**Important Notice** Z-Wave support in this device is **non-certified** and is included **strictly for evaluation and testing purposes**. These are **not certified**, **not for commercial deployment**, and are clearly labeled as **non-Z-Wave certified samples**.
### Key Features - **CC2674P10**: Supports Zigbee 3.0, Thread, and Matter - **EFR32ZG23**: Provides non-Z-Wave certified support 800 series (for testing only) - **ESP32**: Dual-core MCU with integrated Wi-Fi and Bluetooth LE - Compact modular design - Ships with **two antennas**: - **2.4 GHz antenna** for Zigbee/Thread/Matter - **Z-Wave antenna** optimized for **US, EU, and NAZ** frequency bands (please note, **non-Z-Wave certified samples**) ### Important Conditions - Z-Wave functionality is **non-certified** and intended **only for testing** - Devices are **not for resale** and **not suitable for commercial use** - Each sample is clearly labeled as a **non-Z-Wave certified sample** # 🧰 Manual for Testers: Setting Up Z-Wave JS UI in Home Assistant > **Z-Wave JS UI** is a powerful Z-Wave Home Assistant integration with a full web interface for network management. It's ideal for advanced users who want full control. **Purposes of each component:** - Z-Wave JS UI addon - this addon manages Z-Wave network from Home Assisntant. - Z-Wave Integration - Z-Wave device management app. It uses add-on as intermediary part for communication between Home Assistant and Z-Wave devices. --- ### 1️⃣ Install the Z-Wave JS UI Add-on #### 📦 Step 1: Add the Add-on Repository 1. Go to **Settings → Add-ons** in Home Assistant. 2. Click **“Add-on Store”**. 3. Click the **menu (⋮)** in the top right → **Repositories**. 4. Paste the repository URL: `https://github.com/hassio-addons/addon-zwave-js-ui` 5. Click **Add**, then close the dialog. --- #### 🧪 Step 2: Install Z-Wave JS UI 1. Locate **Z-Wave JS UI** in the Add-on Store. 2. Click it → Press **Install**. 3. Wait for installation to complete. [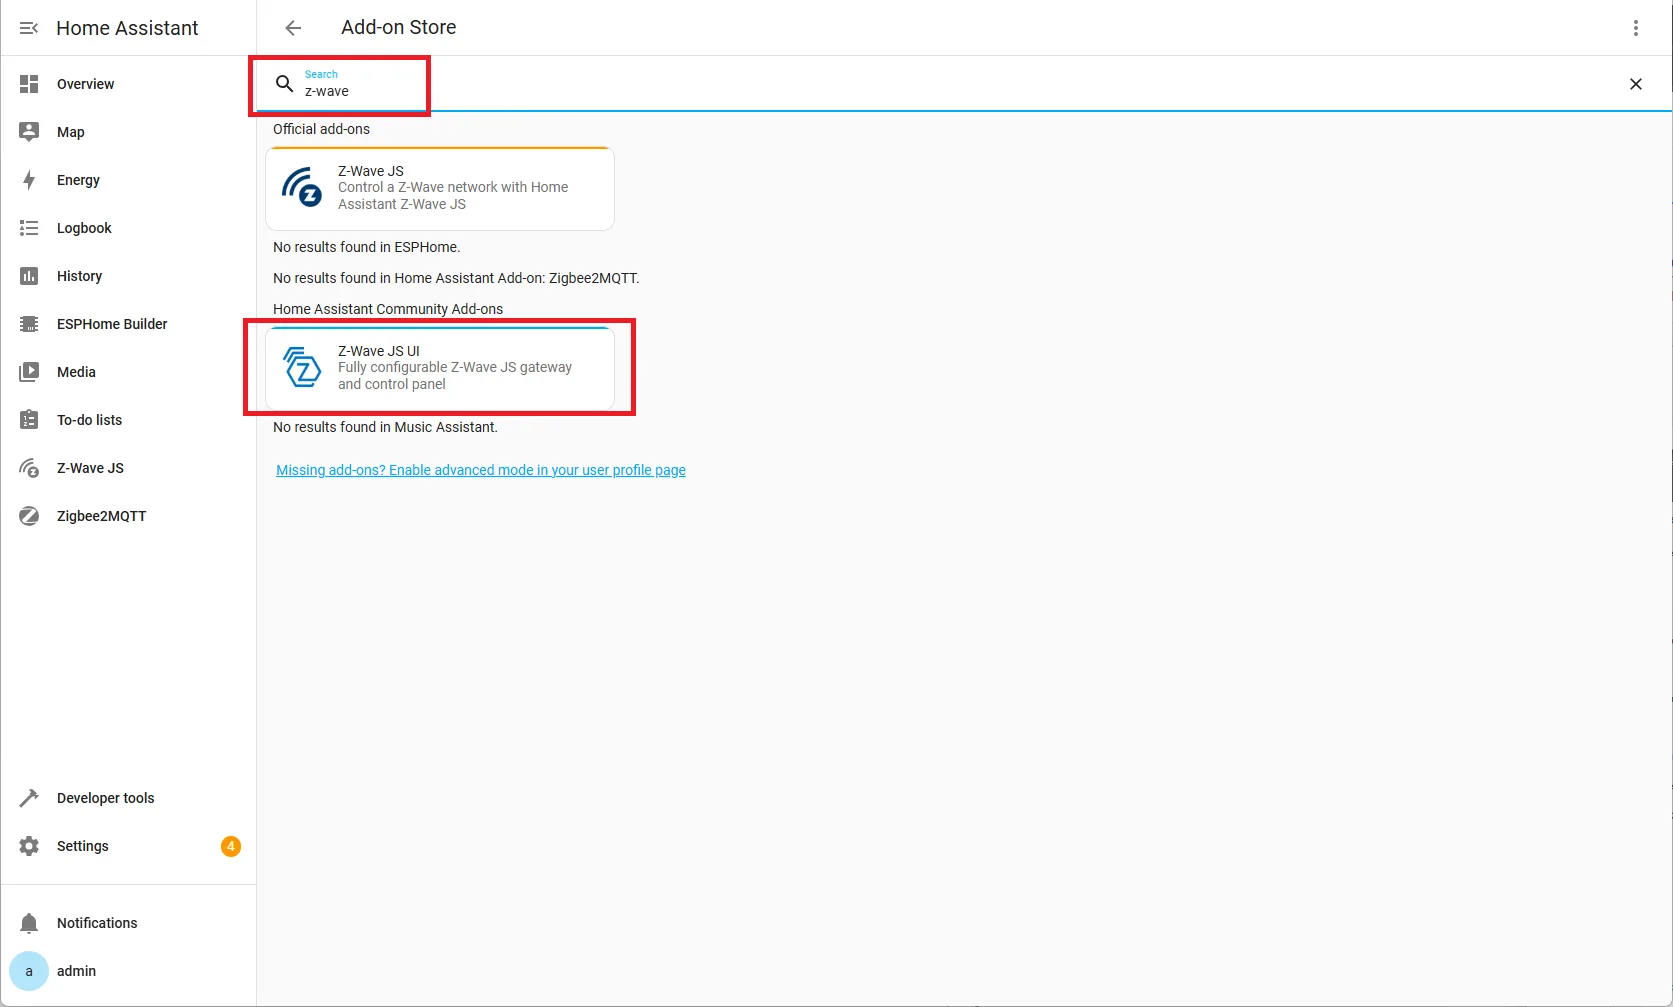](https://smlight.tech/support/manuals/uploads/images/gallery/2026-07/Yqsimage.png) ### 2️⃣ Configure the Add-on #### 🛠️ Step 3: Basic Settings - Enable (optional) **Start on boot** - Enable (optional) **Watchdog** - Enable **Show on sidebar** - Click `Start` - [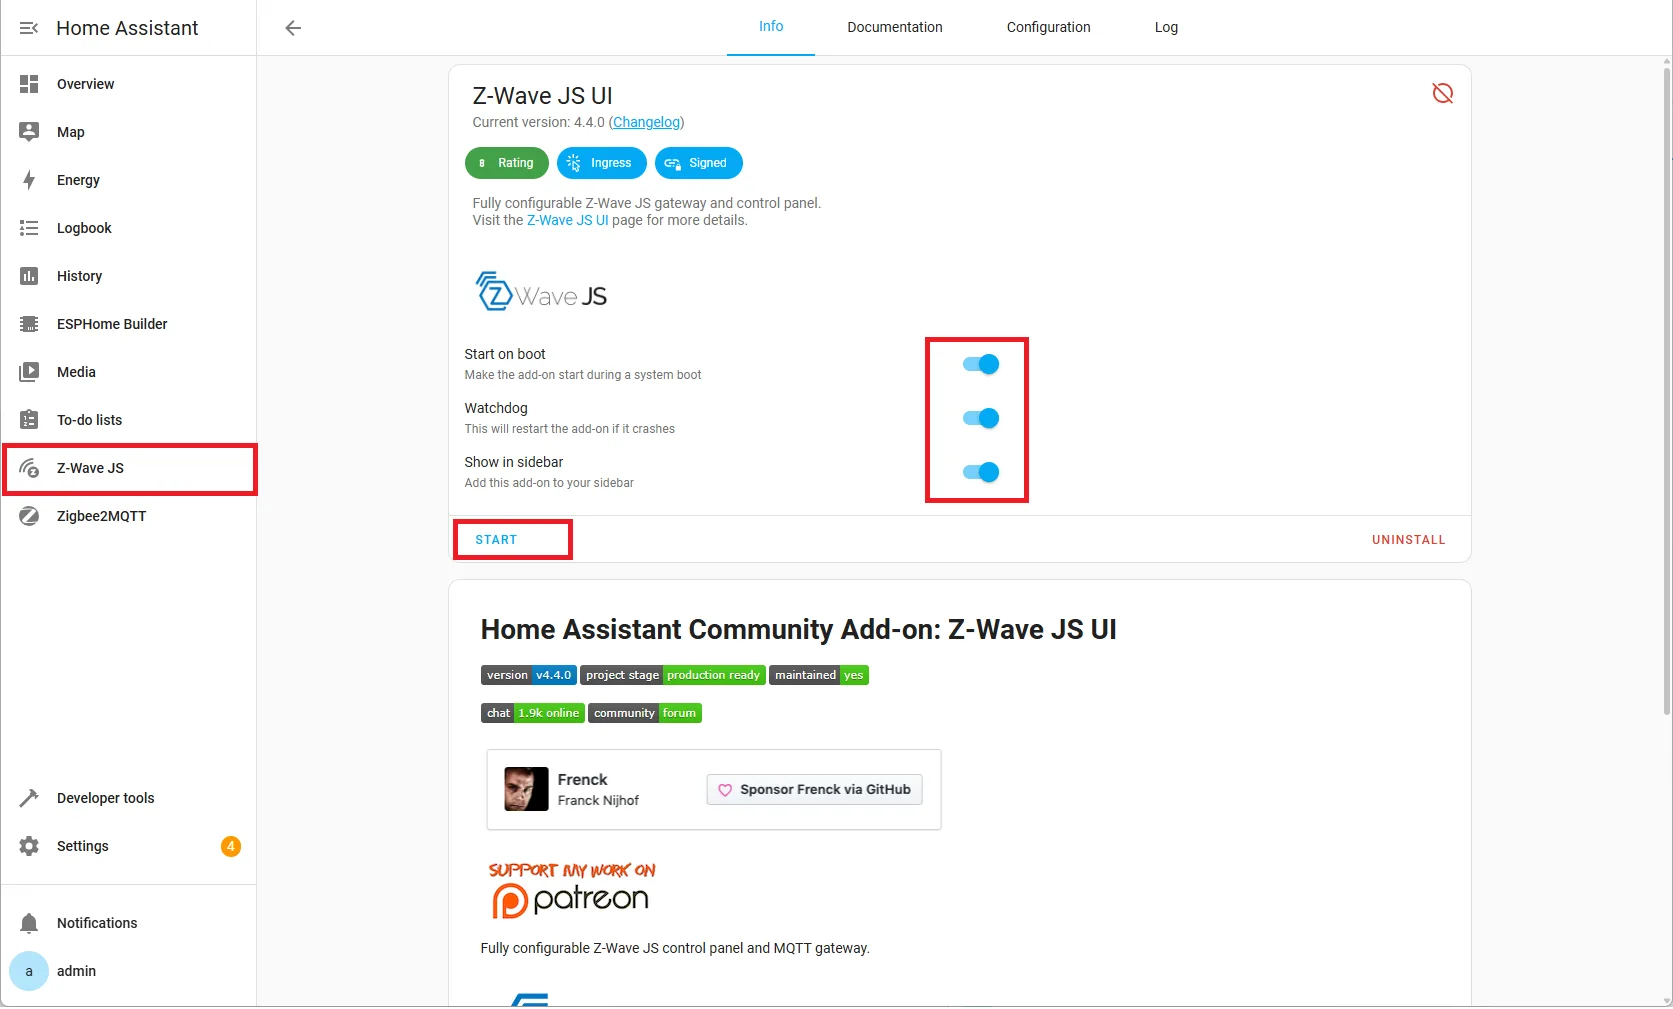](https://smlight.tech/support/manuals/uploads/images/gallery/2026-07/ujXimage.png) #### 🔌 Step 4: Set the Serial Port and Z-Wave settings 1. After Starting, open **Z-Wave JS** tab in the left menu. 2. Click on Setting button. 3. Go to Z-Wave list of setting, Enable, enter Seiral port based on template `tcp://IP-ADDRESS:port`, generate keys and click Save. [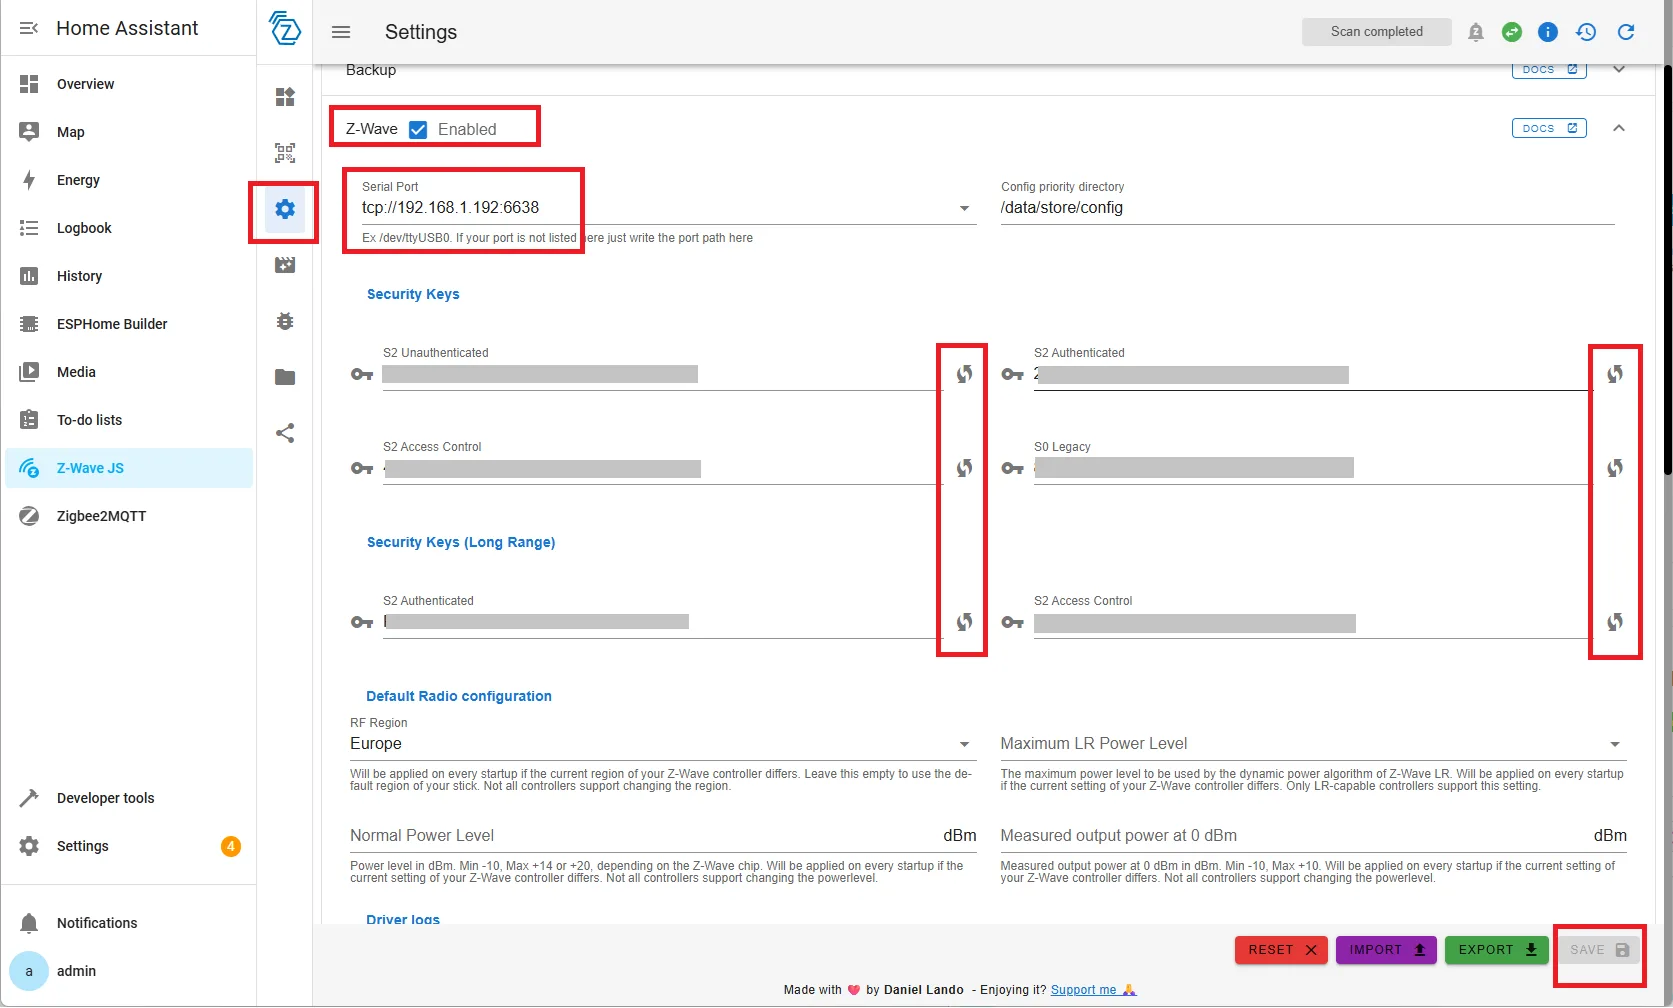](https://smlight.tech/support/manuals/uploads/images/gallery/2026-07/Q3pimage.png) 4. Go to Z-Wave JS UI dashboard and check that Z-Wave controller was activated. [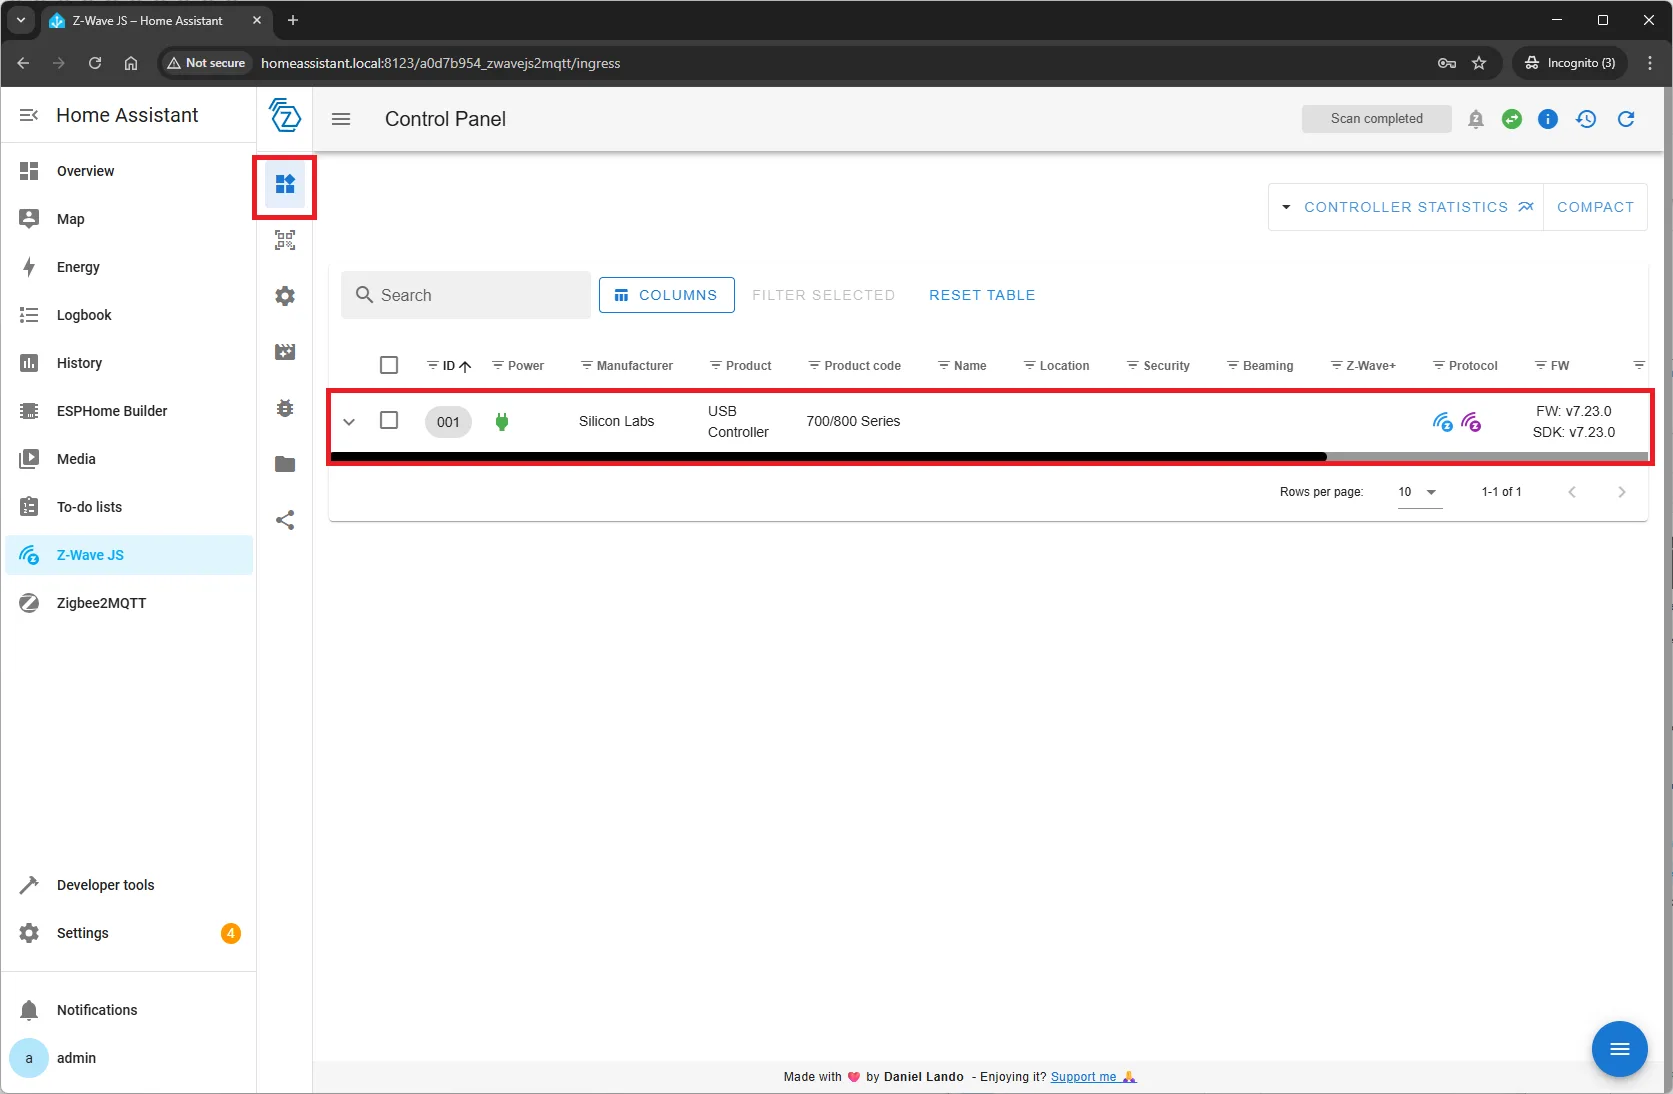](https://smlight.tech/support/manuals/uploads/images/gallery/2026-07/GP6image.png) # 🧰 Manual for Testers: Z-Wave Integration Installation (Home Assistant) 1. Open Integrations Menu Go to **Settings → Devices & Services**, then click **Add Integration** at the bottom right. [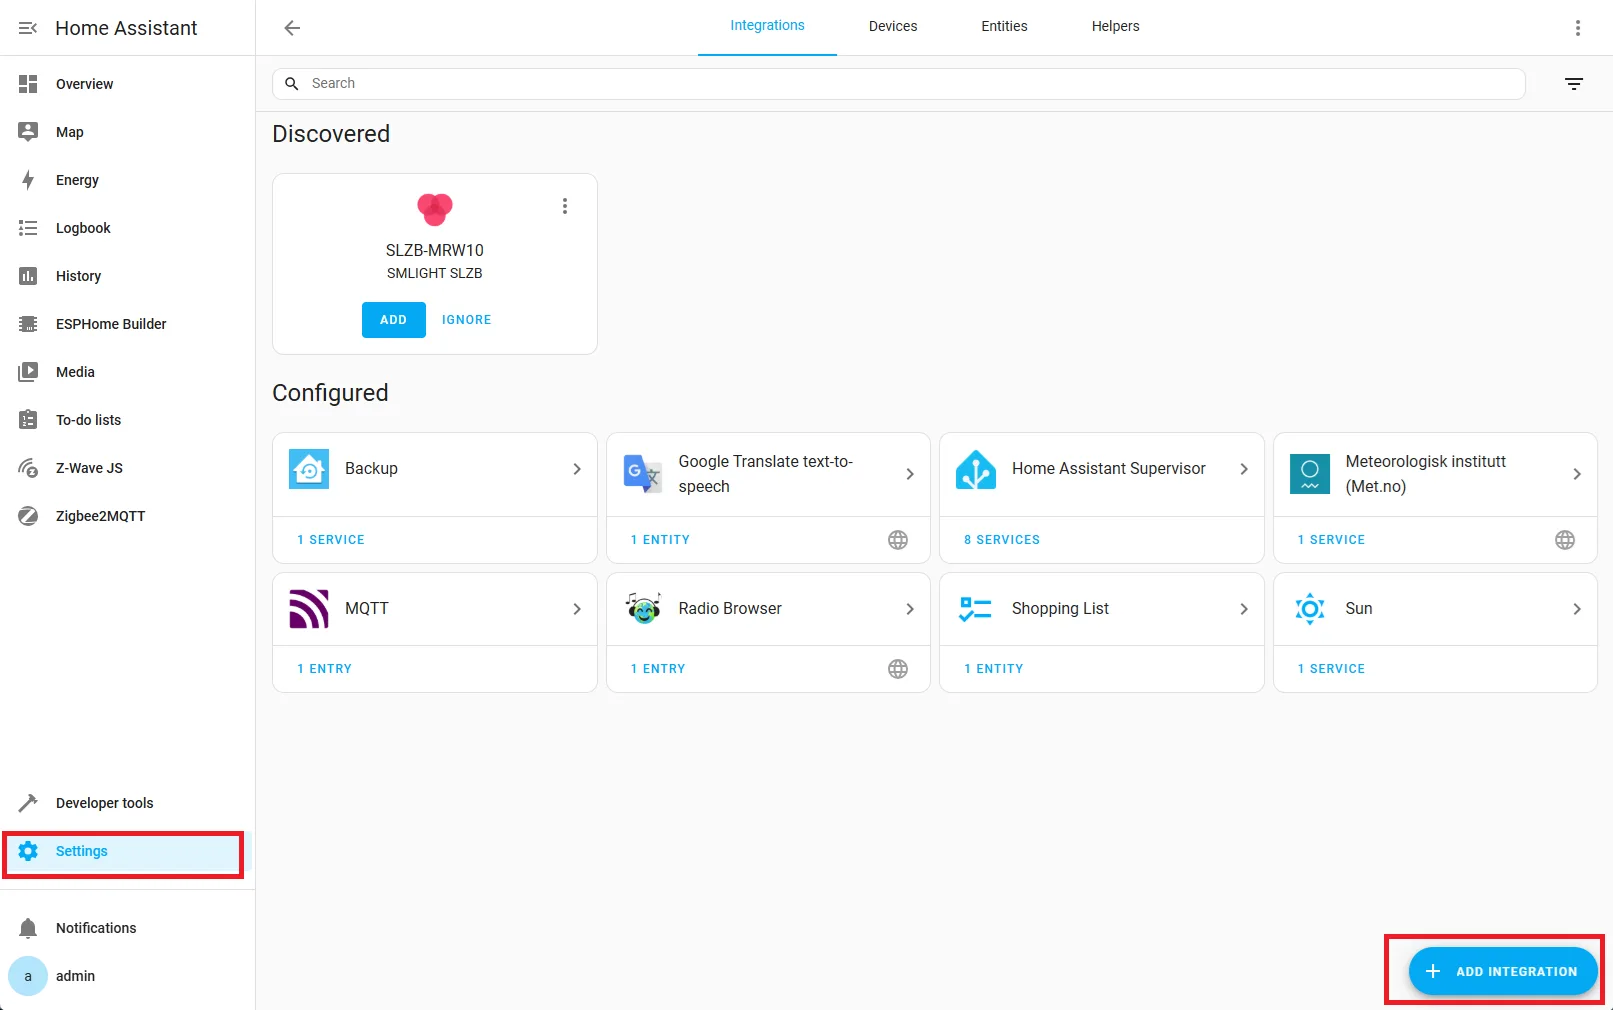](https://smlight.tech/support/manuals/uploads/images/gallery/2026-07/ftEimage.png) ### 2. Search for Z-Wave Integration Type `Z-Wave` into the search bar and click on the integration when it appears. [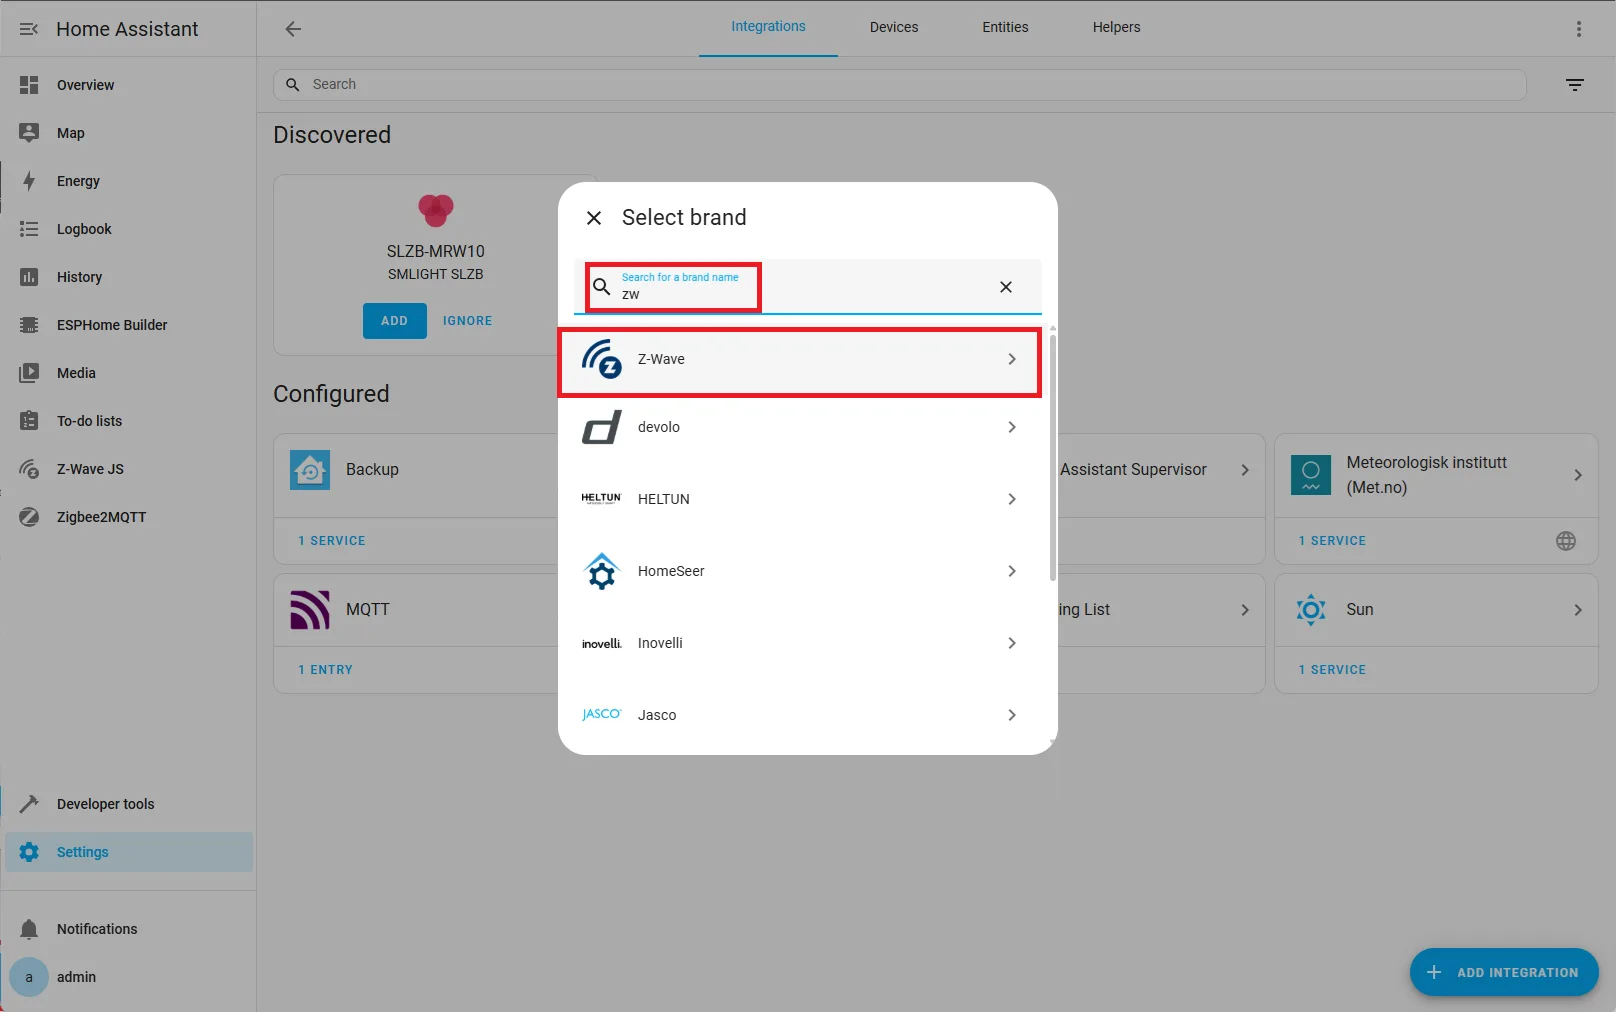](https://smlight.tech/support/manuals/uploads/images/gallery/2026-07/7dXimage.png) ### 3. Select Custom Installation Choose the **Custom Installation** option. [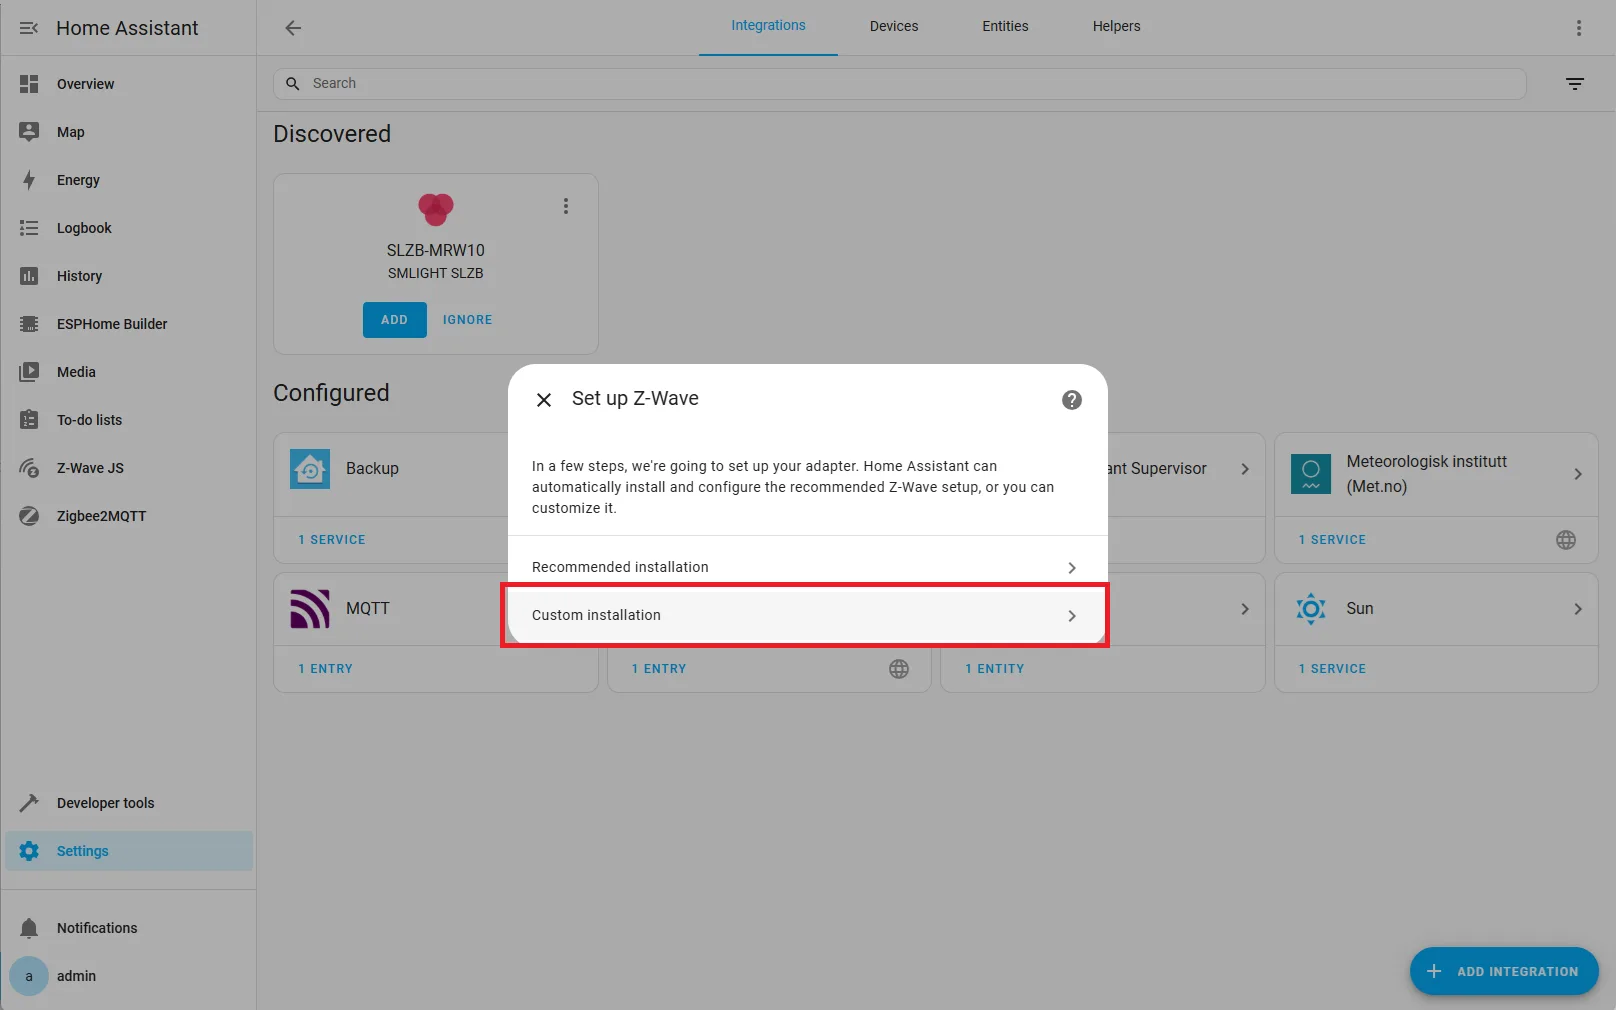](https://smlight.tech/support/manuals/uploads/images/gallery/2026-07/VXiimage.png) ### 4. Disable Supervisor Add-on Uncheck **Use the Z-Wave Supervisor Add-on** and click **Submit**. [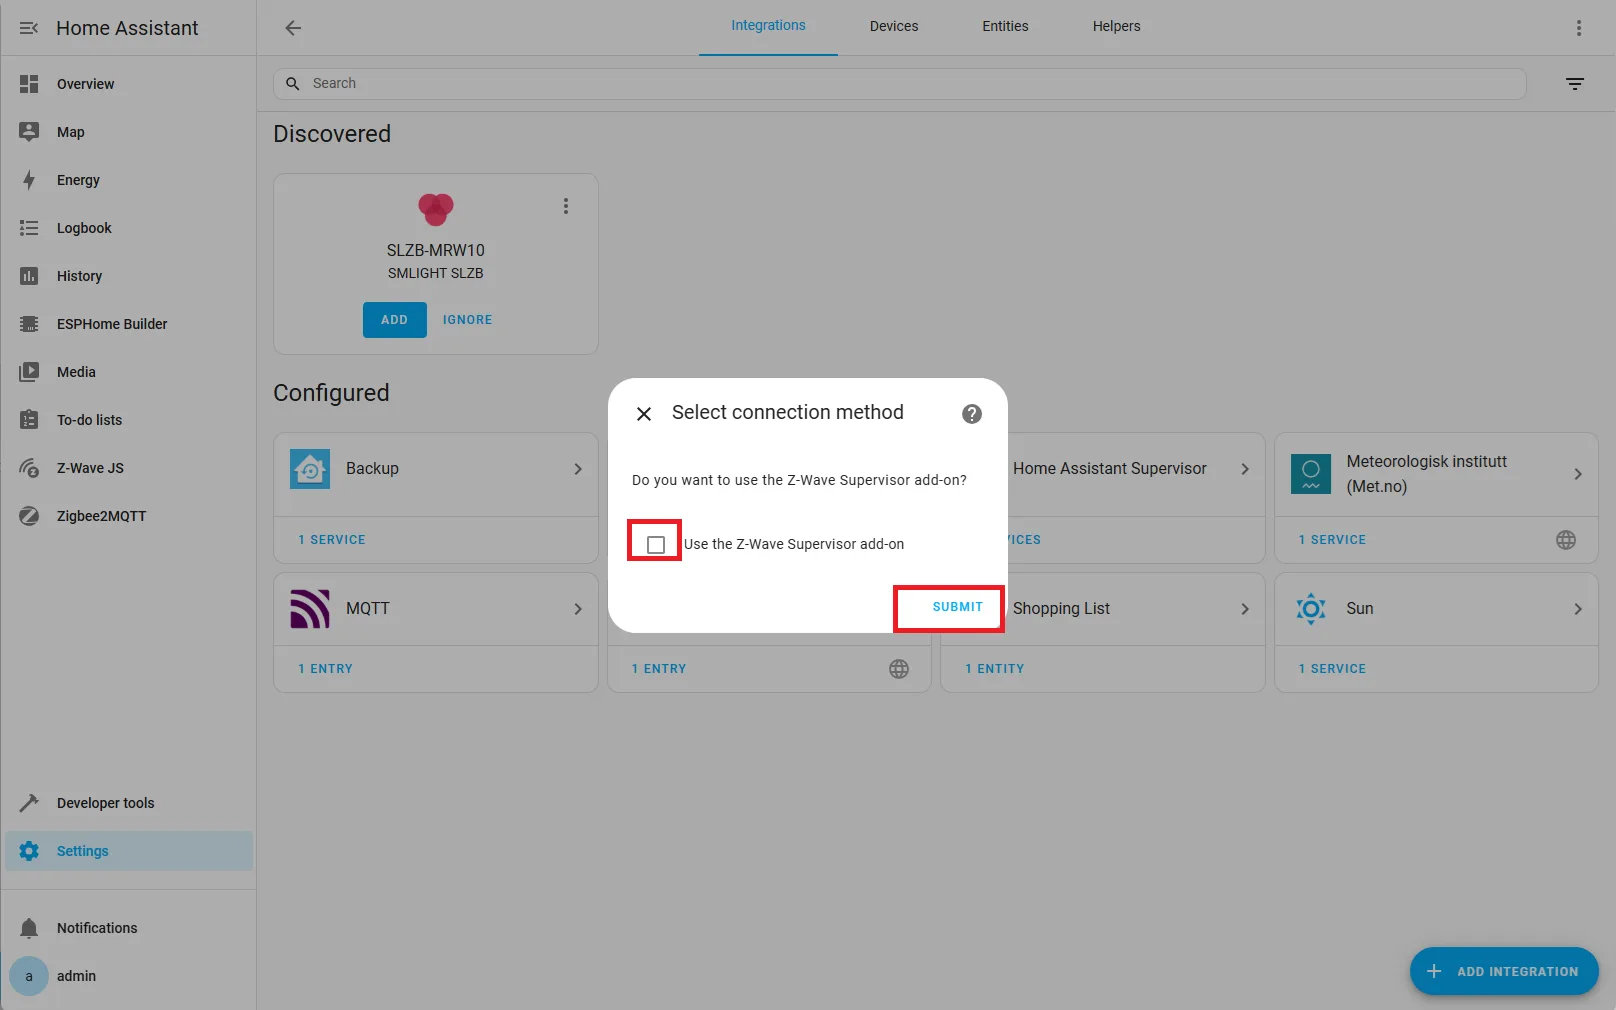](https://smlight.tech/support/manuals/uploads/images/gallery/2026-07/ISjimage.png) ### 5. Get the Add-on Hostname In a new window, go to **Settings → Add-ons → Z-Wave JS UI**, and **copy the hostname** of the add-on. [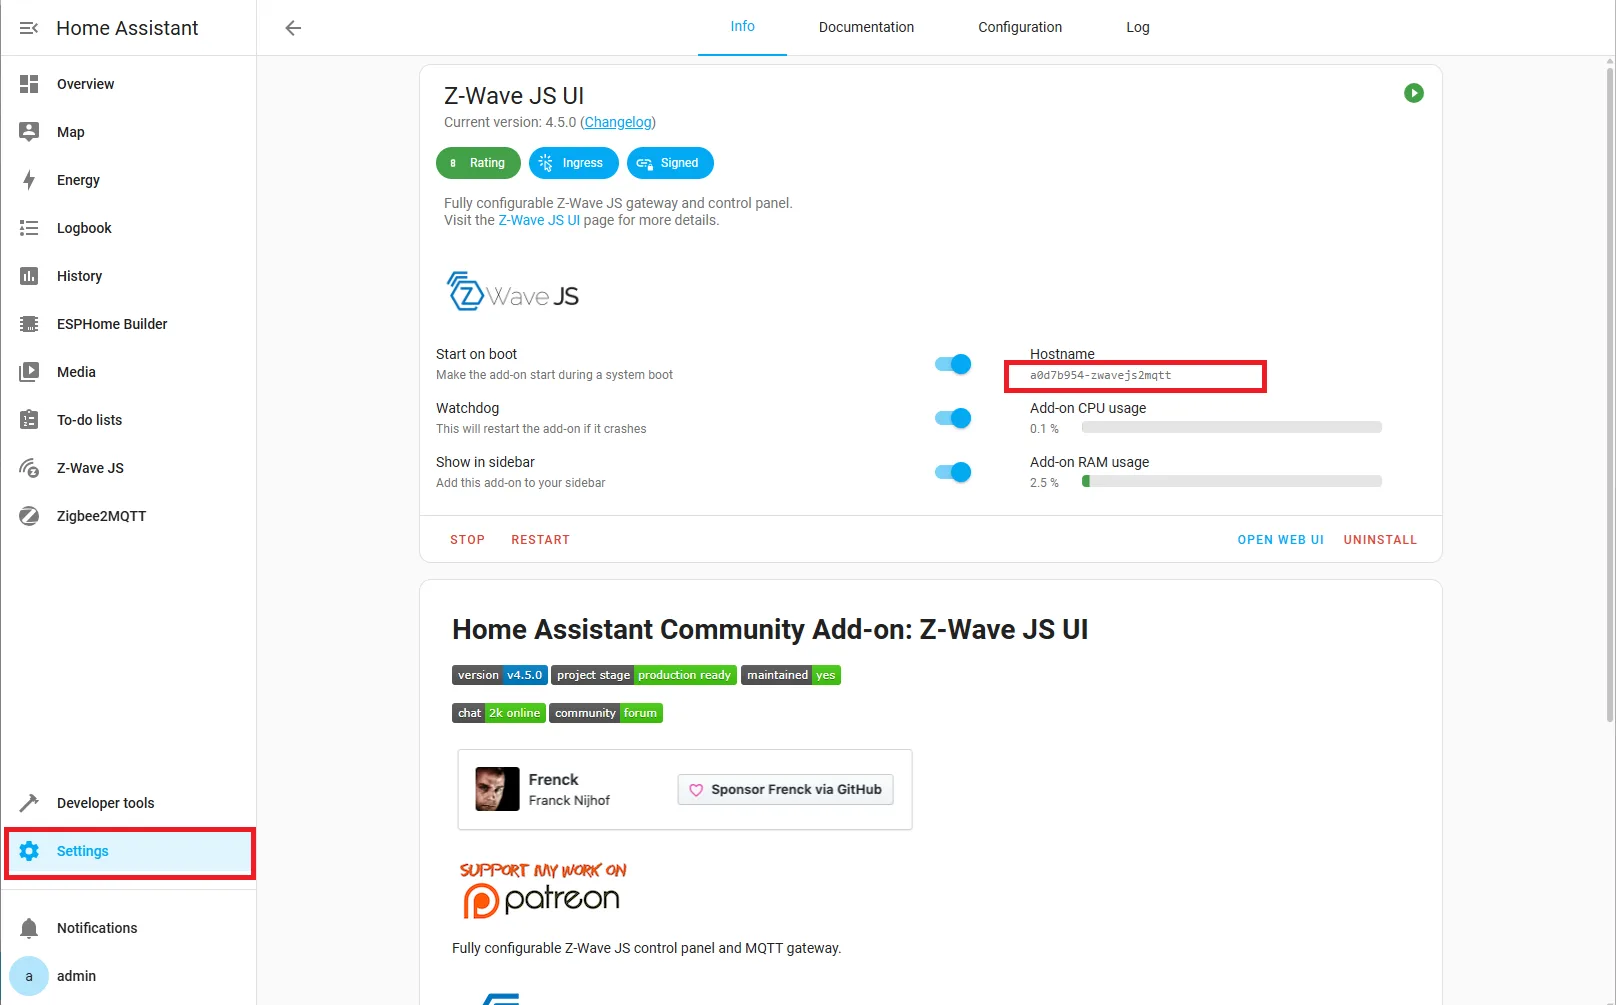](https://smlight.tech/support/manuals/uploads/images/gallery/2026-07/bLKimage.png) ### 6. Enter WebSocket URL Return to the Z-Wave integration setup screen and enter the WebSocket URL in the format: ```text ws://HOSTNAME:3000 ``` Replace `HOSTNAME` with the copied hostname. [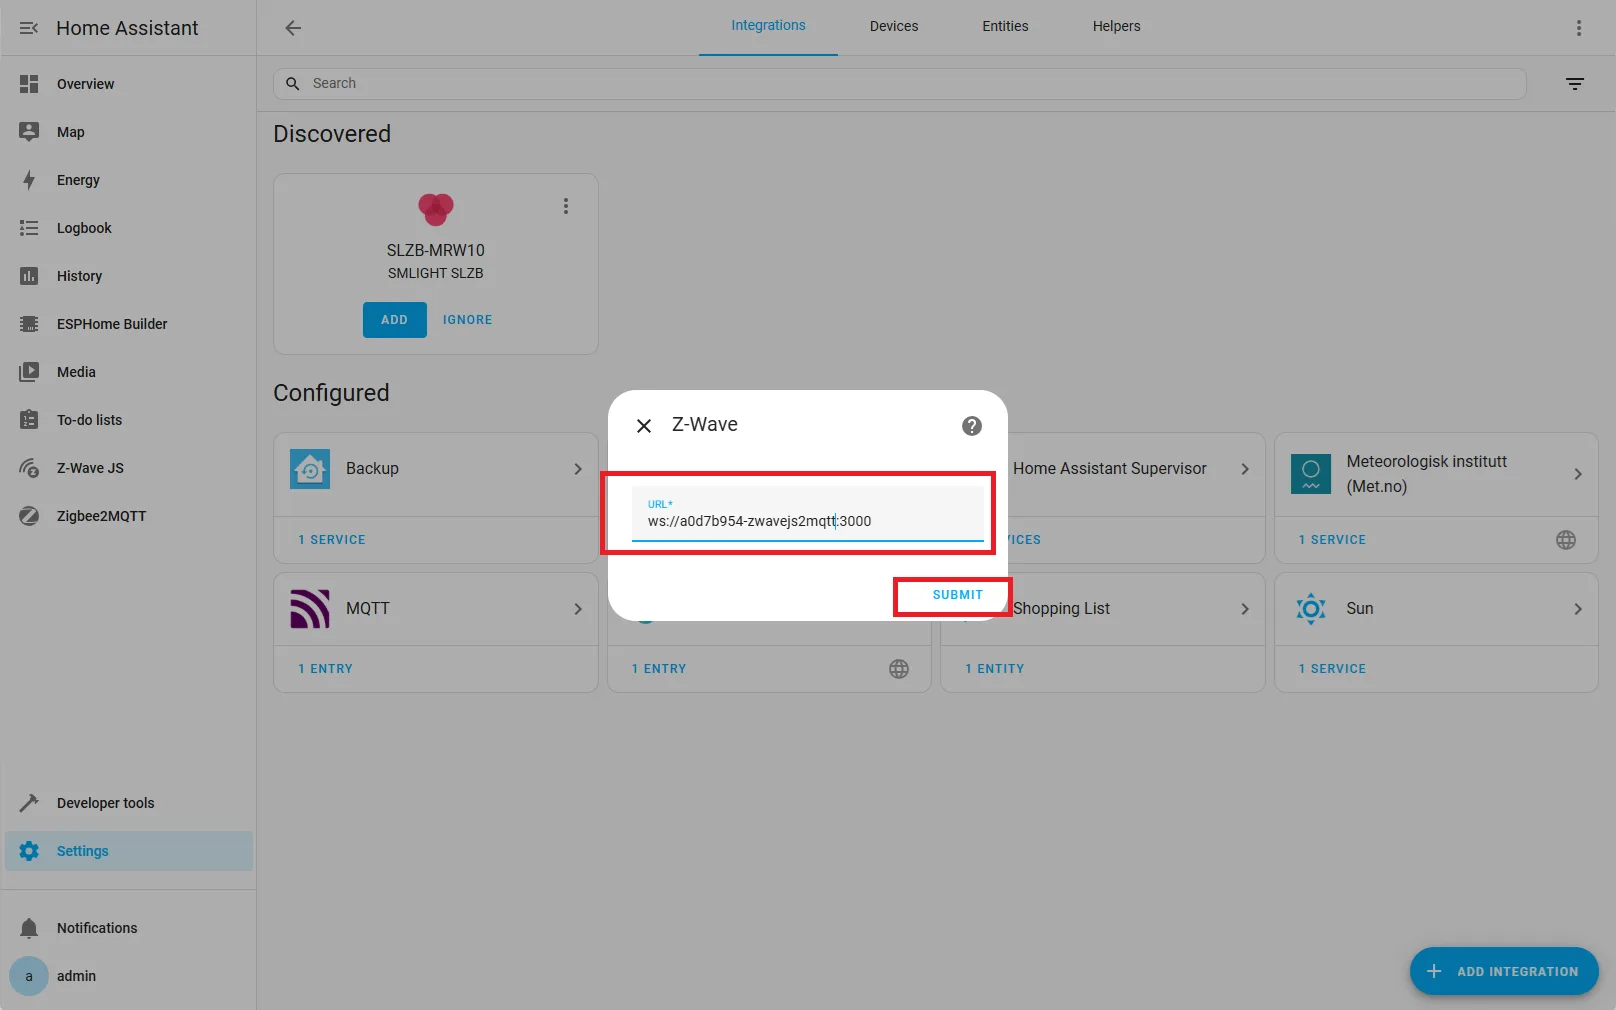](https://smlight.tech/support/manuals/uploads/images/gallery/2026-07/voPimage.png) ### 7. Finalize Integration Optionally set a device name (e.g., **SLZB-MRW10**) and select a location. Click **Finish**. [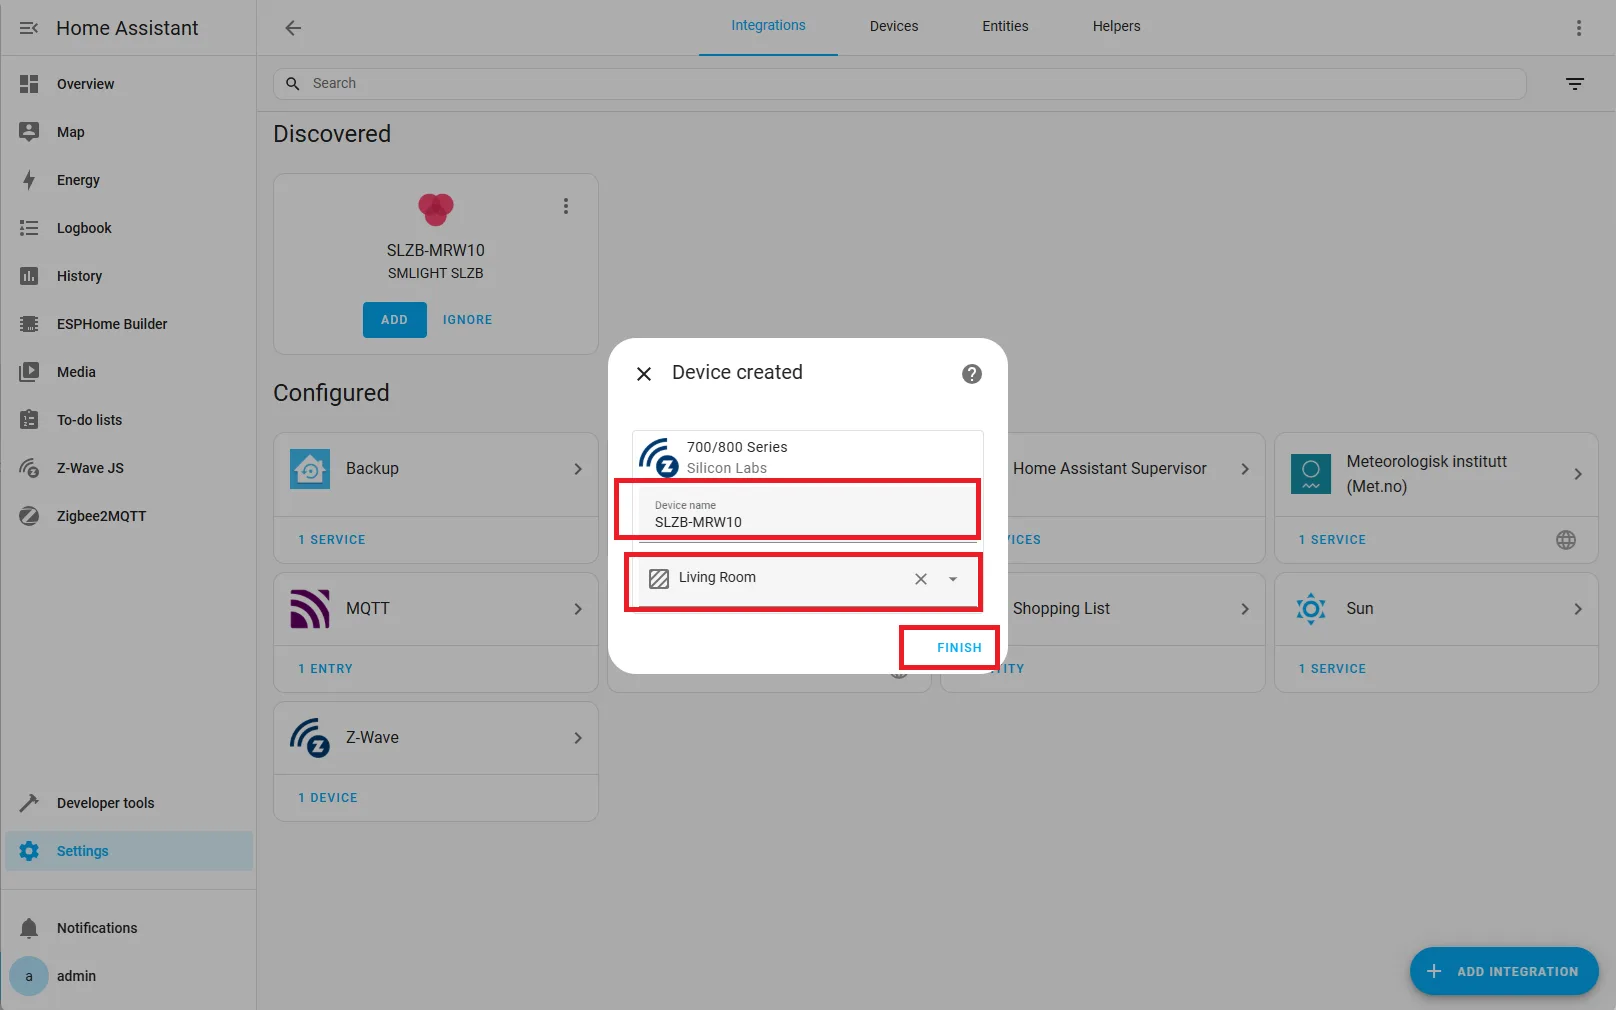](https://smlight.tech/support/manuals/uploads/images/gallery/2026-07/mYfimage.png) # 🧰 Manual for Testers: Pairing a Z-Wave Device ### 1. Open Device Page You should be redirected to the **Z-Wave adapter page**. Click **Add Device**. If not redirected, go to: > **Settings → Devices & Services → Z-Wave → SLZB-MRW10** [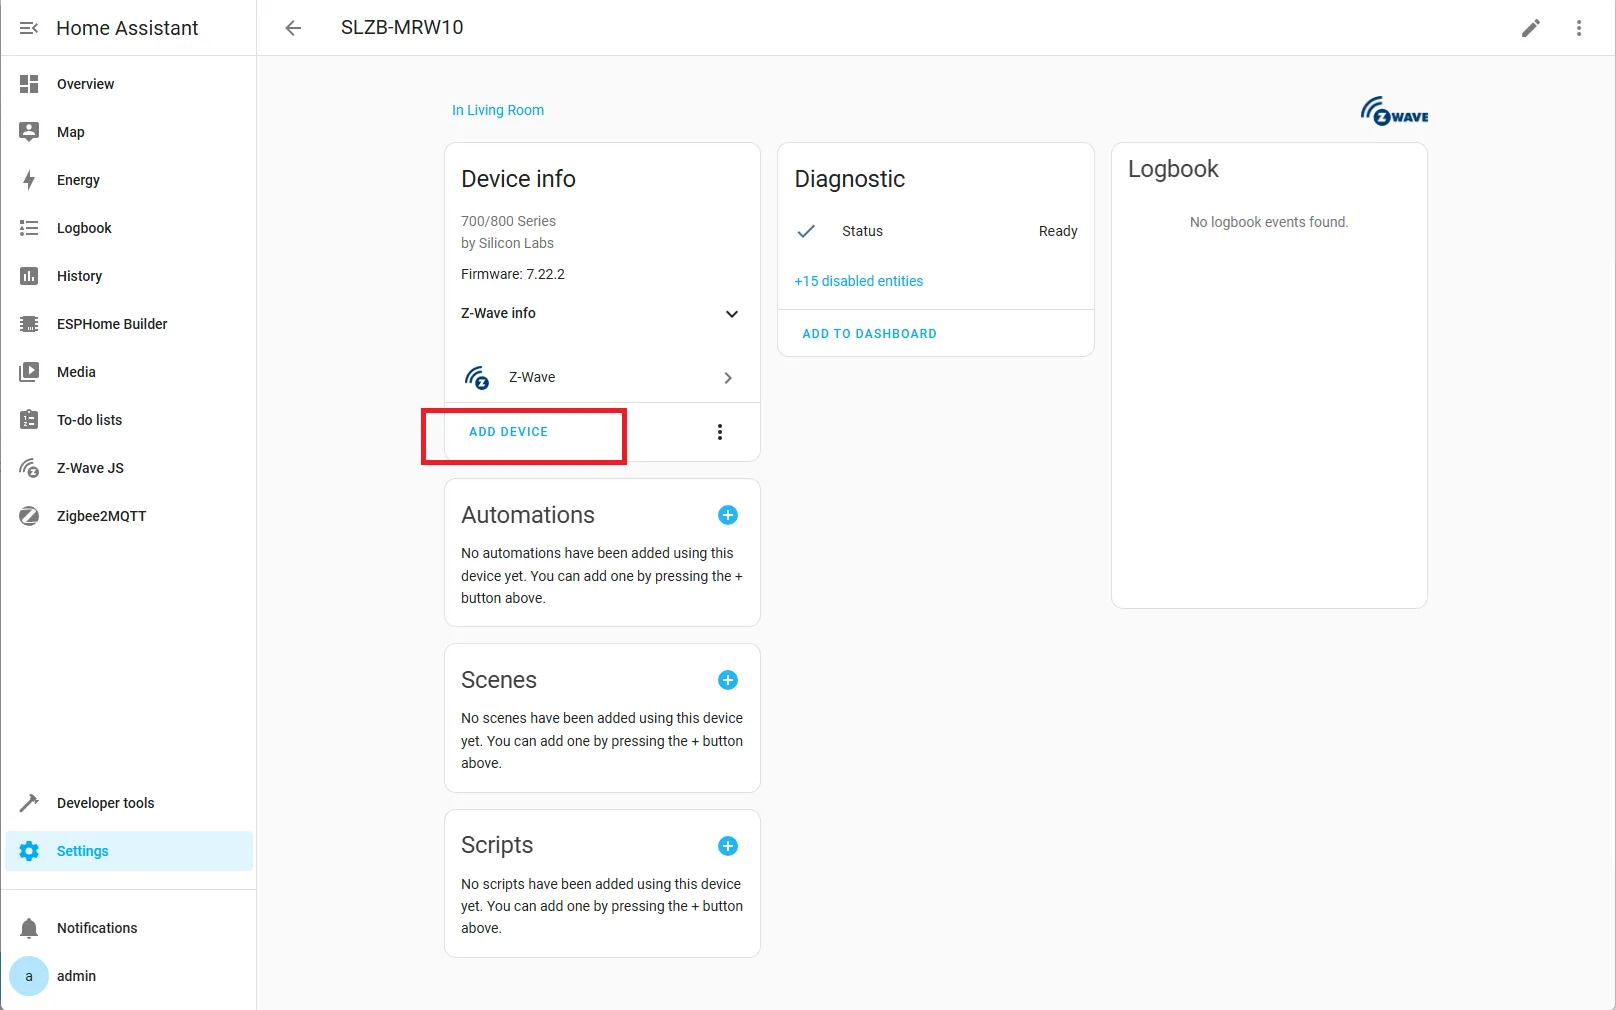](https://smlight.tech/support/manuals/uploads/images/gallery/2026-07/H1Timage.png) ### 2. Choose Pairing Method Choose your preferred pairing method:| Method | Ease | Notes |
|---|---|---|
| **Scan QR‑code using web-cam** | ⭐⭐⭐ | Easiest & secure if the device has a SmartStart label. |
| **Enter QR-code manually** | ⭐⭐ | Secure S2 inclusion when QR‑code isn’t available. |
| **Search for device** | ⭐ | Put device in pairing mode, then let the hub discover it. |