🧰 Manual for Testers: Pairing a Z-Wave Device
1. Open Device Page
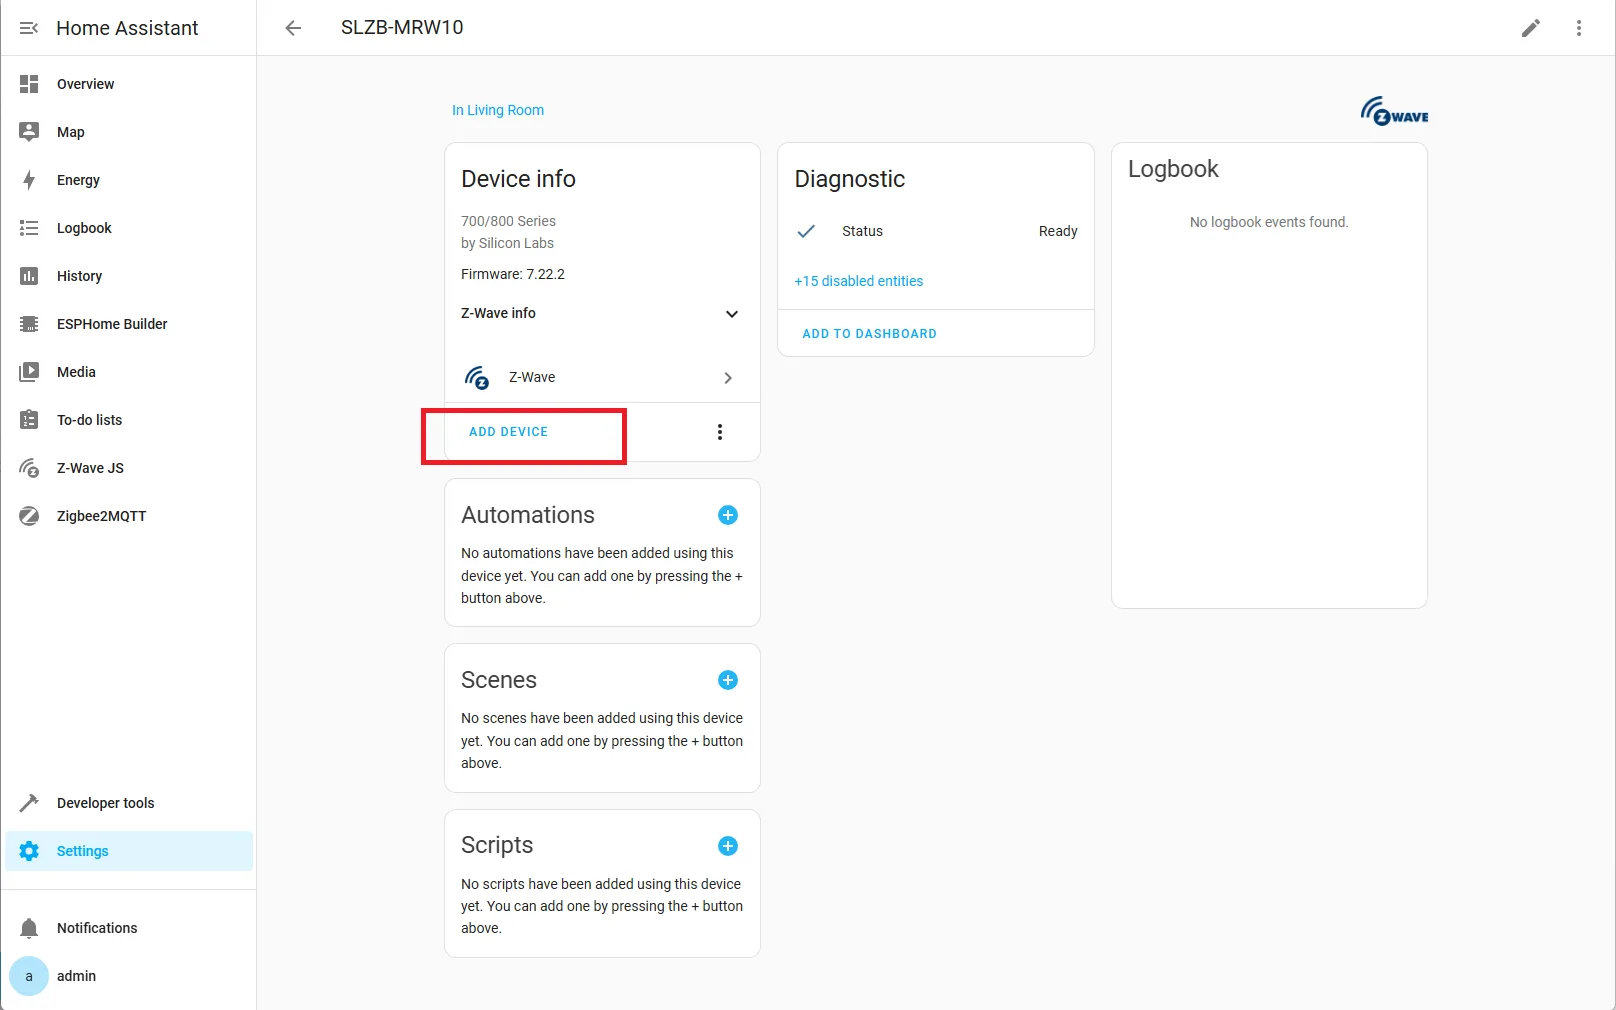
You should be redirected to the Z-Wave adapter page. Click Add Device.
If not redirected, go to:
Settings → Devices & Services → Z-Wave → SLZB-MRW10
2. Choose Pairing Method
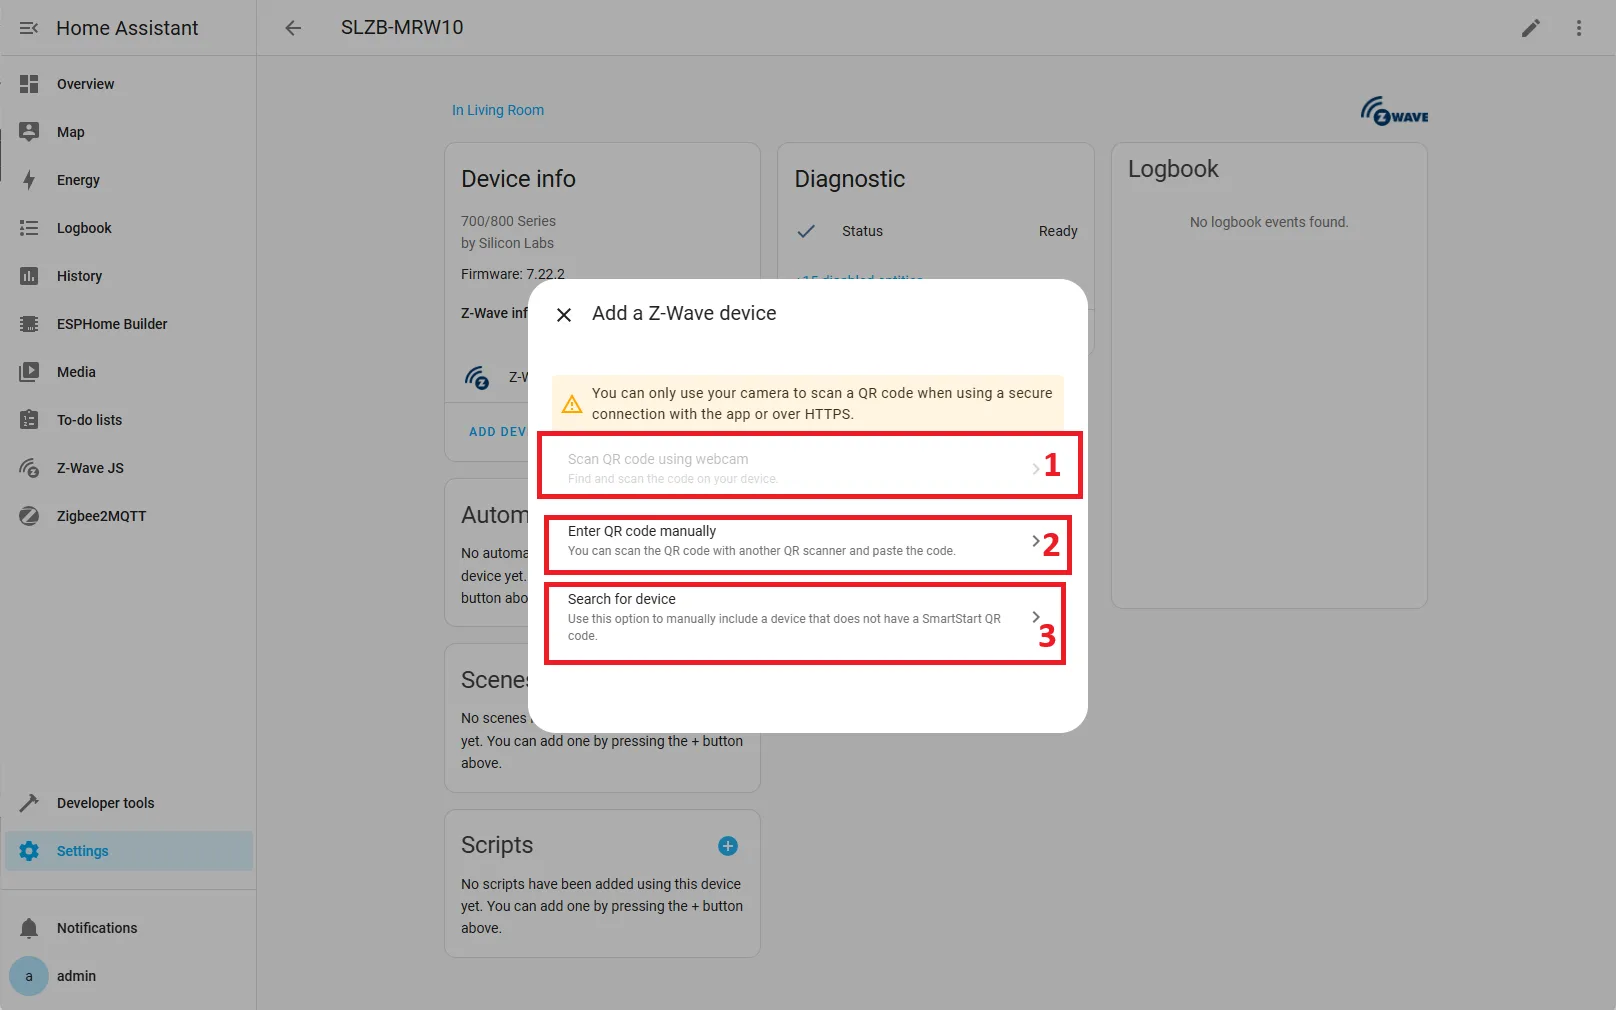
Choose your preferred pairing method:
| Method | Ease | Notes |
|---|---|---|
| Scan QR‑code using web-cam | ⭐⭐⭐ | Easiest & secure if the device has a SmartStart label. |
| Enter QR-code manually | ⭐⭐ | Secure S2 inclusion when QR‑code isn’t available. |
| Search for device | ⭐ | Put device in pairing mode, then let the hub discover it. |
We will use the third method.
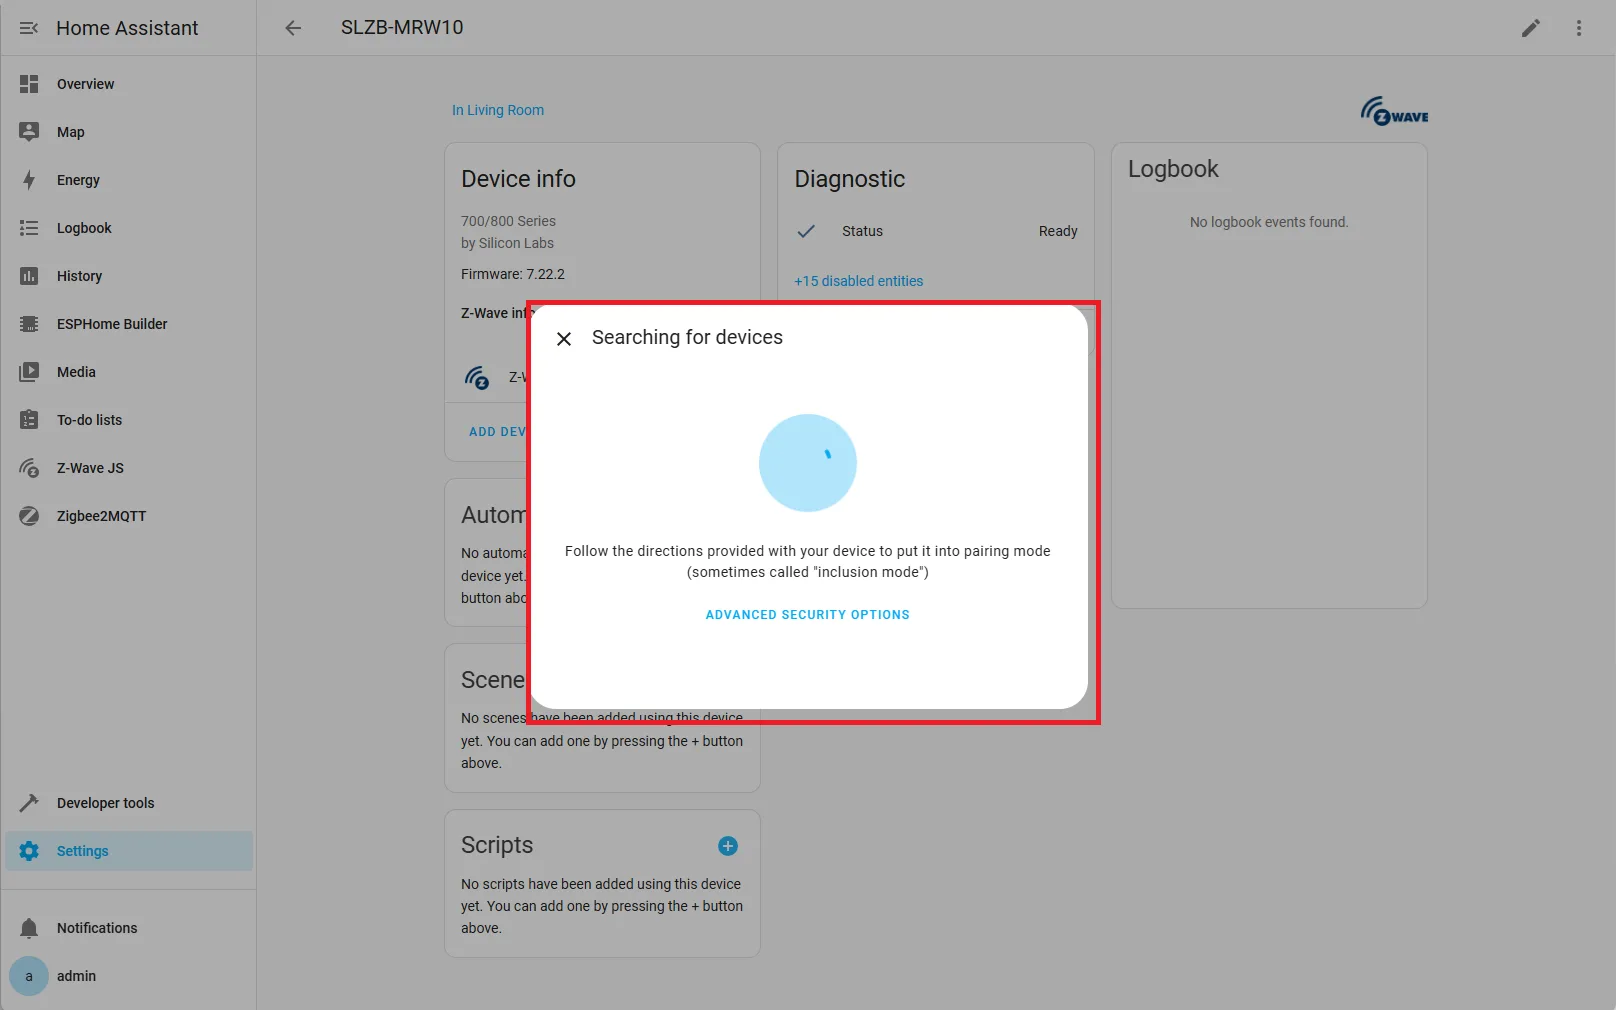
3. Put Device into Pairing Mode
Follow your device’s instructions to enter pairing mode.
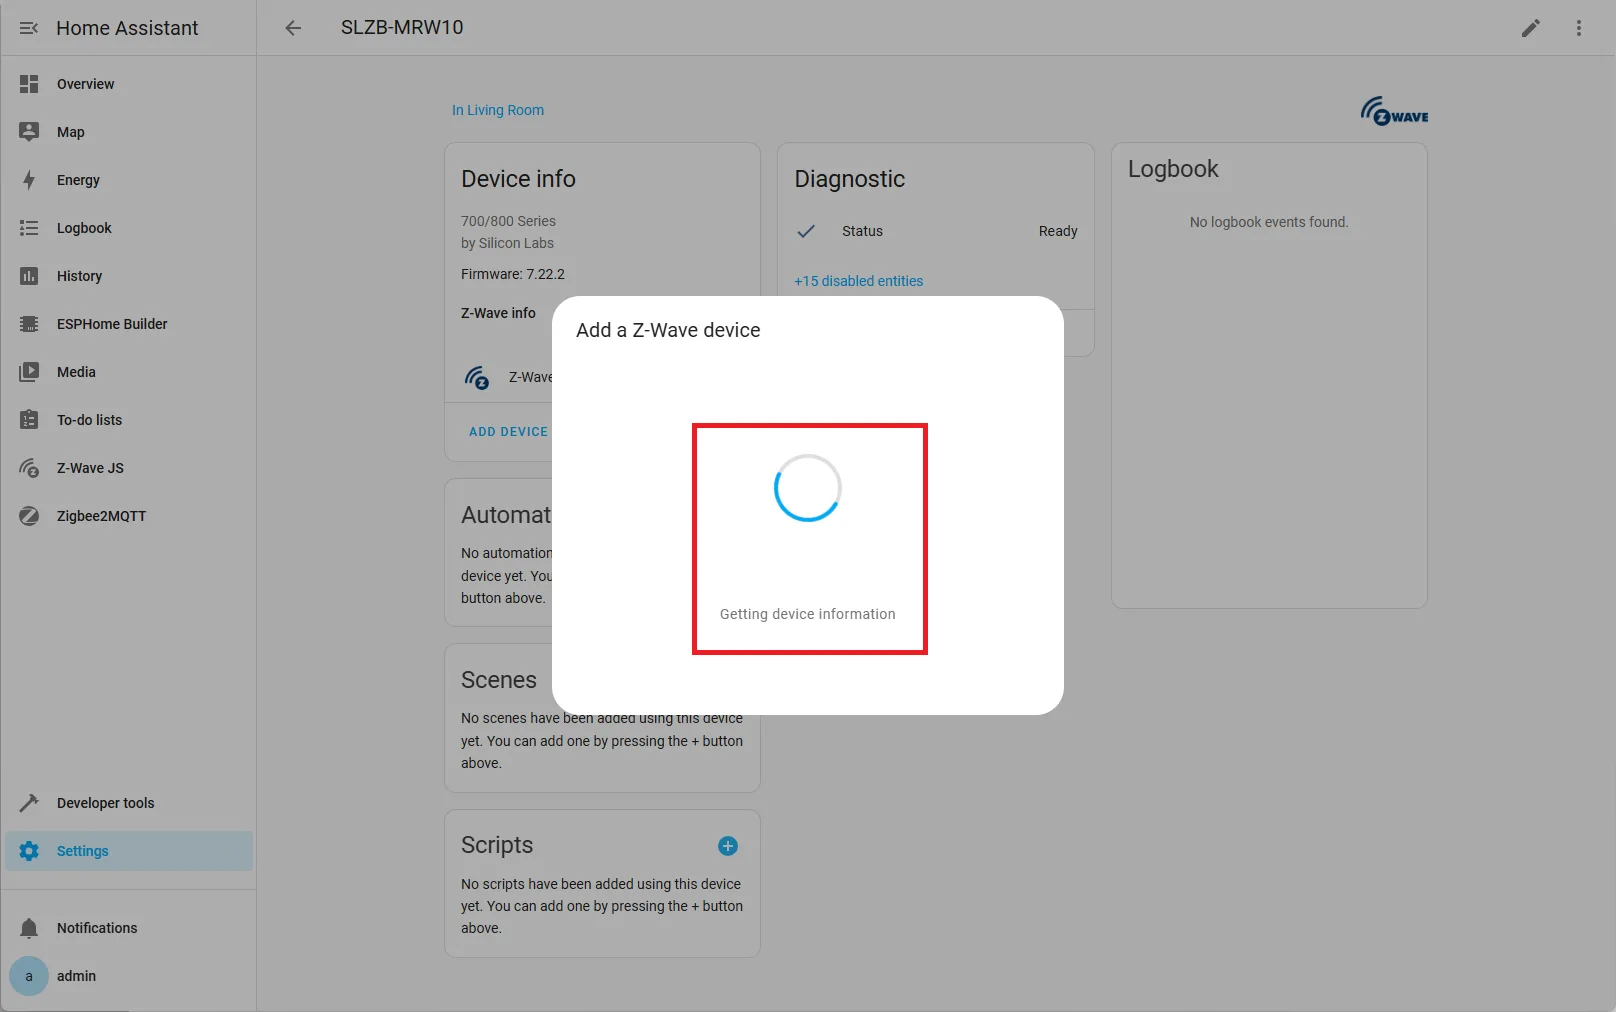
4. Wait for Device Info
Z-Wave will begin requesting information from the device.
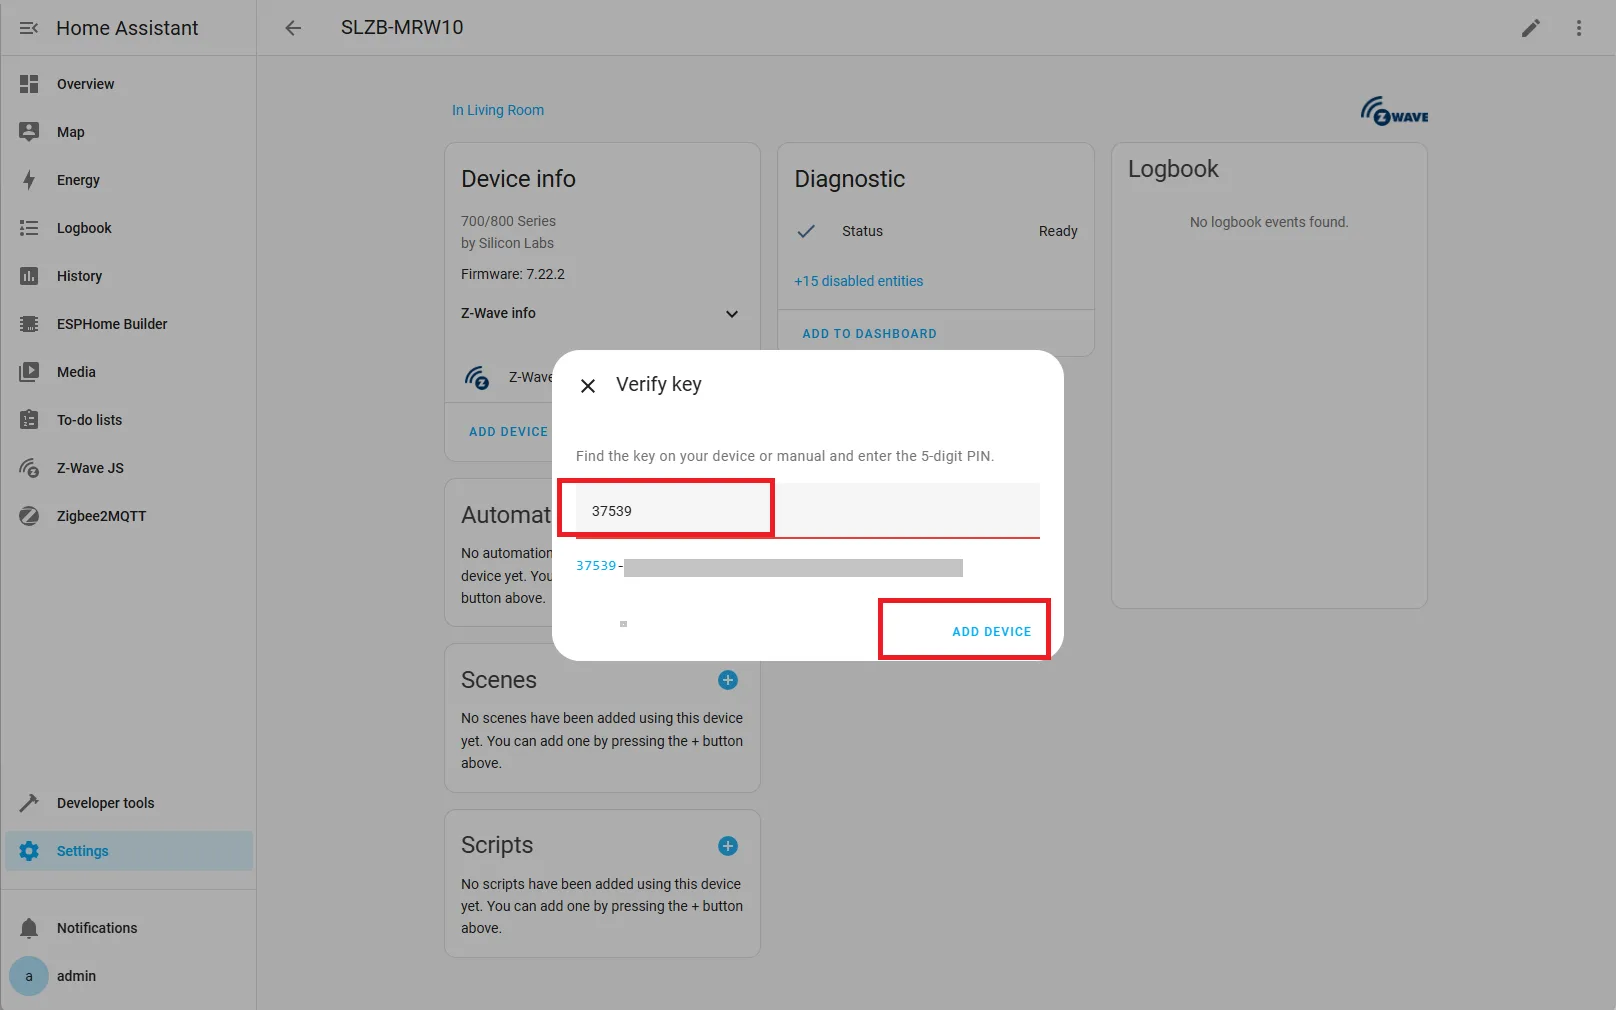
5. Enter Requested Data
If prompted, enter required details (e.g., PIN code found on your device).
6. Device Added!
The device is now ready for use. You’ll be redirected to the device page where you can monitor and control it.
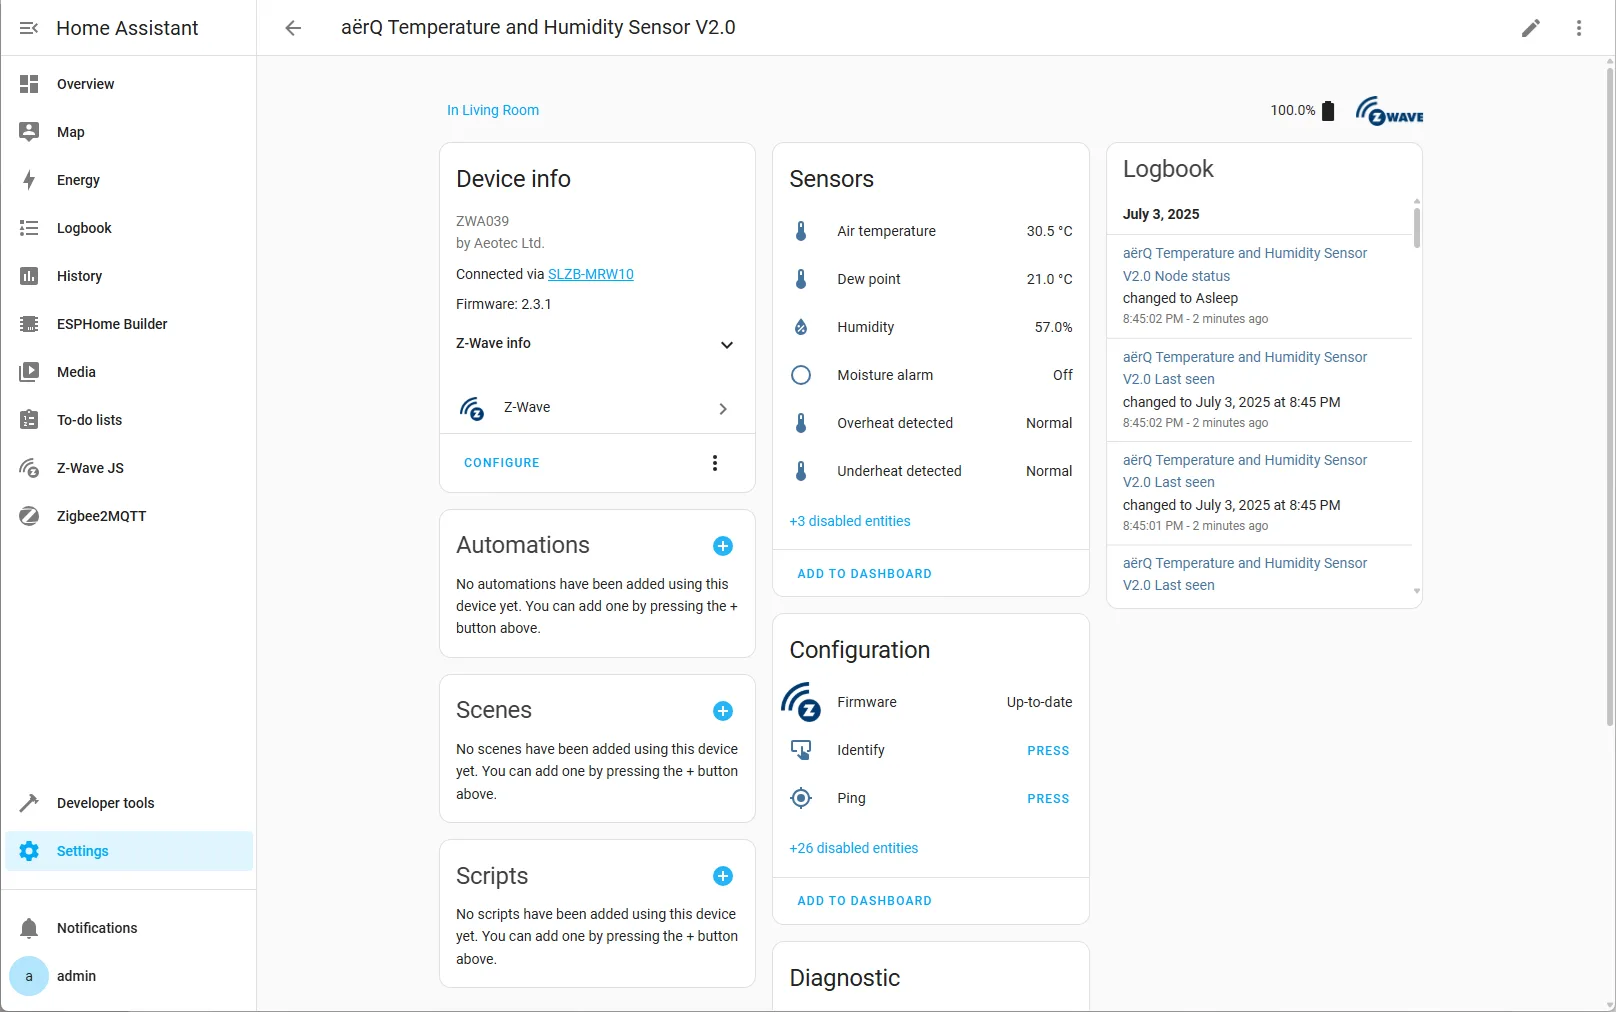
✅ You’re all set! Your Z‑Wave device is now fully integrated and ready for automation with the SLZB‑MRW10 adapter.
📋 Post‑Pairing Tips
- Rename entities to something meaningful (e.g., Kitchen Motion Sensor).
- Assign the device to an Area to keep your dashboard tidy.
- If a secure device fails to interview fully, exclude it first, then re‑include closer to the hub.