Thread setup (network and USB connection)
Thread setup for Home Assistant: two options
SLZB devices support two ways to run a Thread network with Home Assistant:
- Option A - “Thread to remote OTBR”: OTBR runs on Home Assistant (OTBR add-on, or, since Jan-2026, called "App"), SLZB works as a Thread RCP (radio).
- Option B - “Thread + OTBR running on device”: OTBR runs directly on the SLZB device, Home Assistant connects to it via REST API.
Prerequisites
- A server with Home Assistant installed and running (example: Raspberry Pi 4 with HAOS).
- An SLZB device with a Thread-capable radio module.
- The Matter device you want to connect (example: Eve Energy EU).
- An Android or iOS smartphone.
Additional:
- Option A (Thread to remote OTBR): Available on ALL SLZB coordinators. Can run over either USB or network (Serial-over-IP).
- Option B (Thread + OTBR on device): Available on SLZB-06xU, SLZB-MRxU and SLZB-Ultima. OTBR requires IPv6 on your LAN (IPv6 will be force-enabled on the device when this mode is activated).
Step 1 - Choose your setup option
Option A: “Thread to remote OTBR” (OTBR add-on/app runs on Home Assistant)
Choose this if you want OTBR to run on Home Assistant or other smart home systems. SLZB acts as a Thread RCP (radio only). This is the traditional setup, and supports USB or network connection.
Option B: “Thread + OTBR running on device” (OTBR runs on SLZB)
Choose this if you want OTBR to run directly on the SLZB device. Home Assistant connects via network API (http://device-ip:8080), and you don’t need the OTBR add-on in HA.
Note: this is an initial (beta) integration and may have limitations or unexpected behavior.
Step 2 - Set SLZB mode / firmware
Option A (Thread to remote OTBR): Flash / select Thread RCP mode
- Your device must have an internet connection.
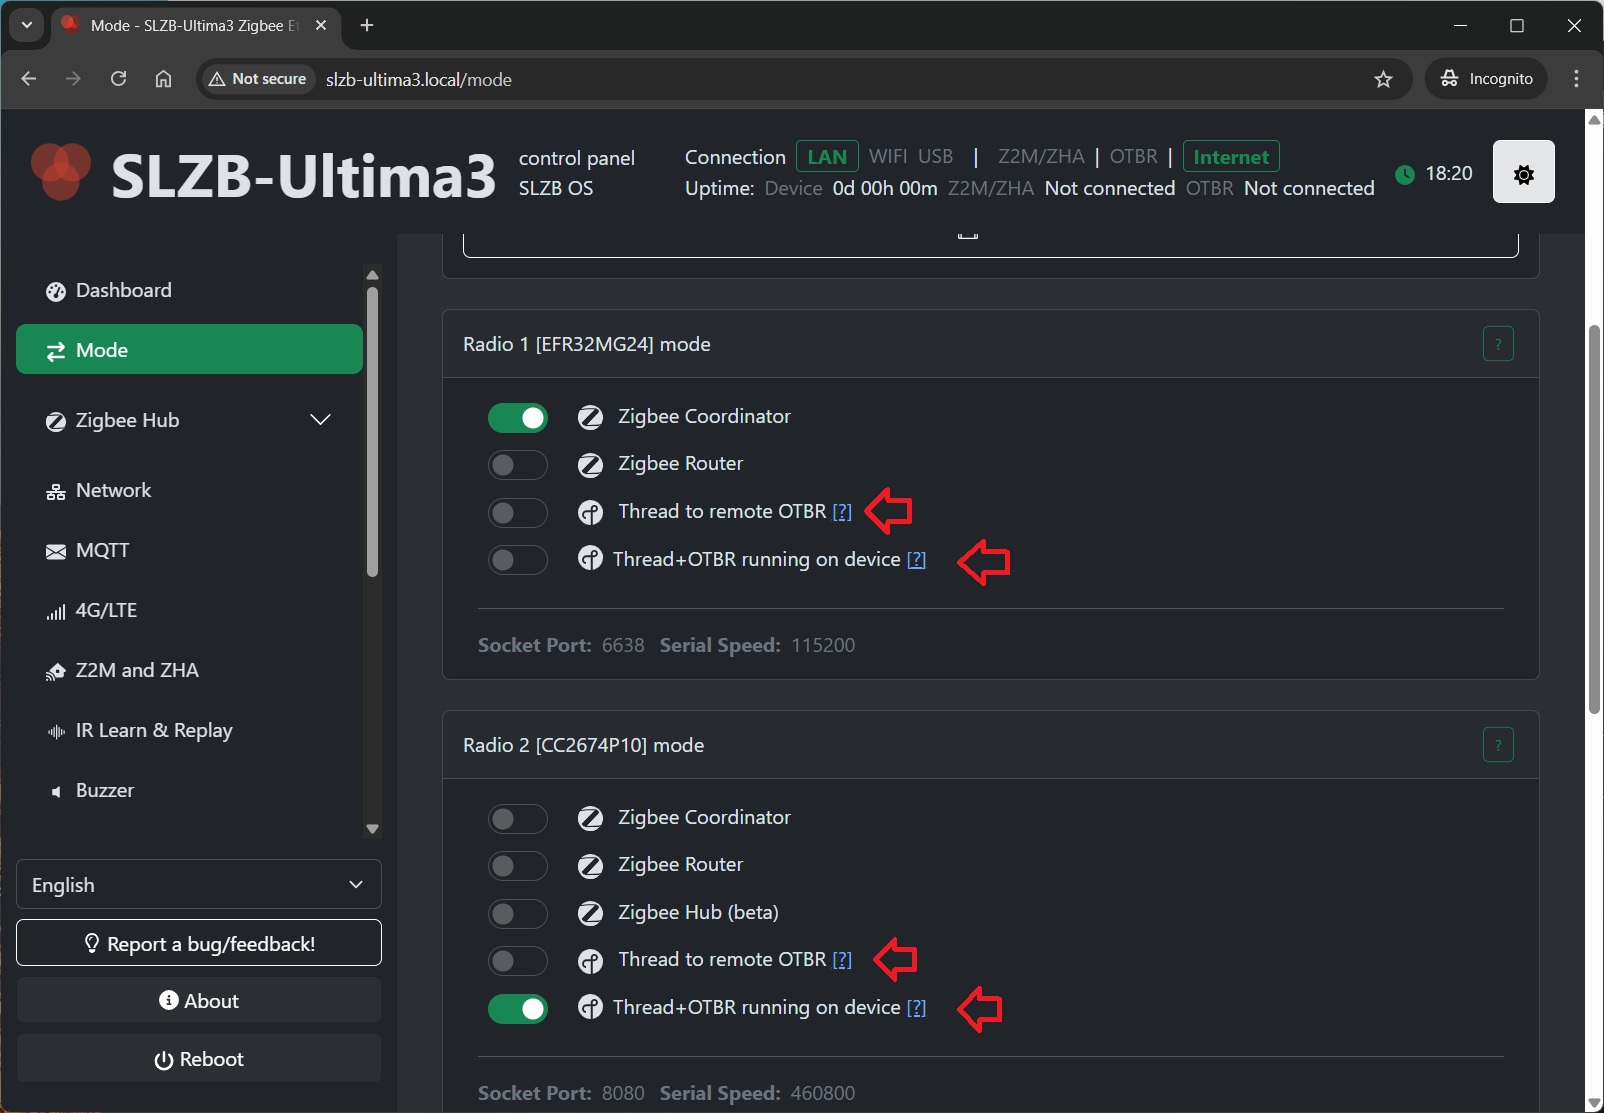
- Go to
Modeand select the "Thread to remote OTBR". The device will be reflashed; wait until the update completes.
Option B (Thread + OTBR on device): Enable OTBR on the device
- Your device must have an internet connection.
- Go to
Modeand select “Thread + OTBR running on device”. The device will apply the required configuration and services and reboots. - OTBR REST API will be available at http://device-ip:8080.
Step 3 - Home Assistant software setup
3.1 Install and start Matter Server (required for both options)
- In Home Assistant go to
Settings→Devices & Services. - Click
Add integrationand search forMatter. - Keep
Use the official Matter Server Supervisor add-onenabled and clickSubmit. - Wait until Matter Integration and Matter Server add-on are installed.
- Go to
Settings→Add-ons→Matter Serverand clickStart. Recommended: enableStart on bootandWatchdog.
Step 4 - Thread / OTBR setup in Home Assistant
Option A: OTBR add-on on Home Assistant
Install the OpenThread Border Router add-on and connect it to the SLZB radio (USB or network).
- Go to
Settings→Add-ons→Add-on Store. - Search for
OpenThread Border Routerand clickInstall. - Open the add-on and go to the
Configuretab.
Option A - OTBR add-on with USB connection
- Switch the coordinator to USB connection mode (if applicable).
- Set OTBR add-on parameters:
Port: select your SLZB USB serial port.Hardware flow control: NoBaud rate: 460800Flash firmware: No (use pre-flashed RCP firmware)- Click
Save
- Go to
Infotab and clickStart. - Recommended: enable
Start on bootandWatchdog.
Option A - OTBR add-on with Network connection (Serial-over-IP)
Configure the OTBR add-on to connect to the SLZB network serial endpoint (example: 192.168.1.10:6638).
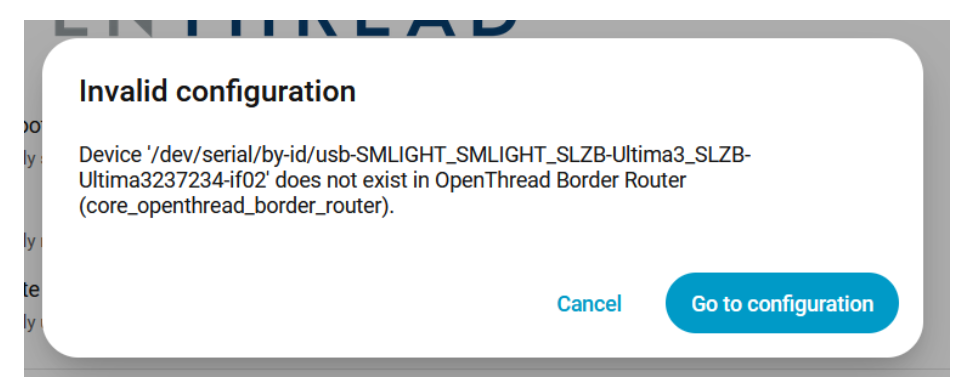
Setting Up the Thread Border Router Add-on (Network connection)
- OTBR config validation issues workarounds.
If you have errors like the ones in the screenshots below:

Workarounds:
- https://github.com/home-assistant/addons/issues/3993#issuecomment-3536041147 and https://github.com/home-assistant/addons/issues/4299#issuecomment-3771514634
- Connect any USB-serial device - Configure the addon according to the example below

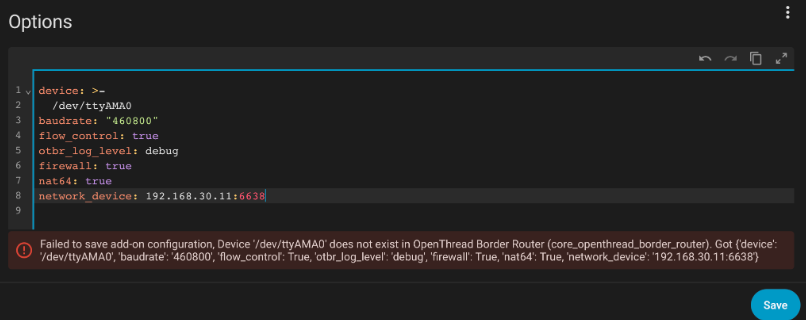
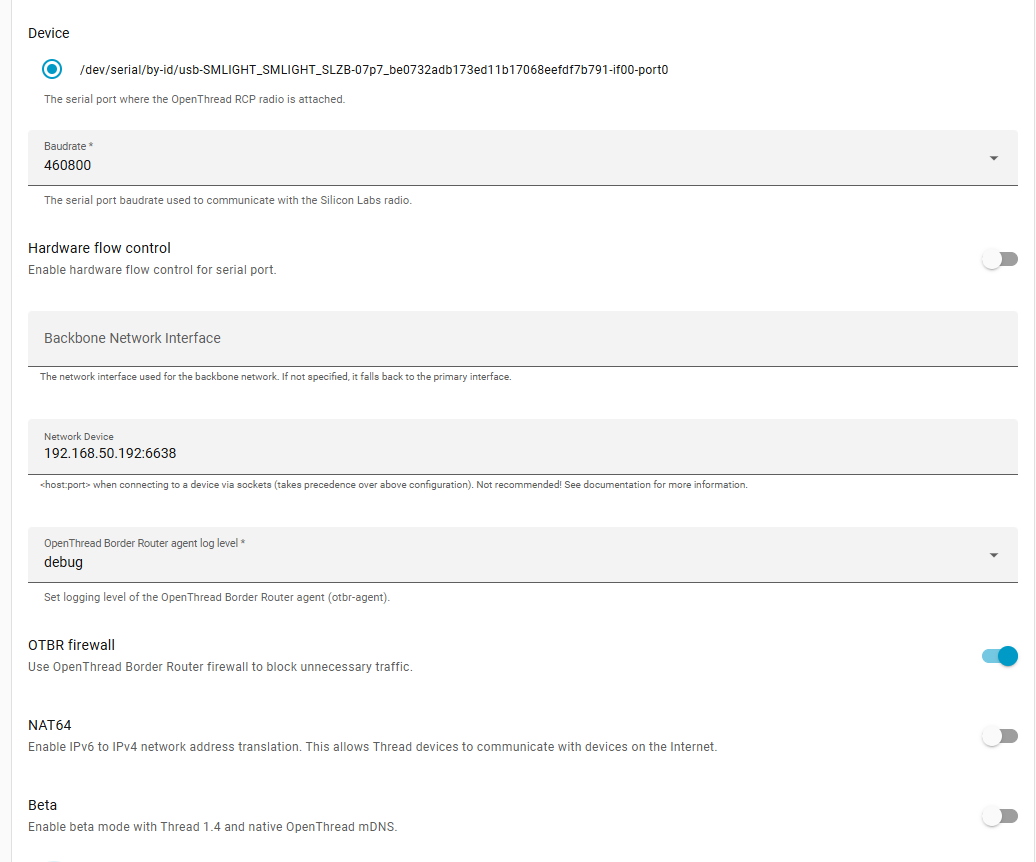
- Select
Show unused optional configuration options Hardware flow control: No.Baud rate: 460800.Flash firmware: No (we use pre-flashed coordinator)Network Device: Enter the IP and port of your coordinator. (for example 192.168.1.10:6638)- Click
Save.
- Go back to the INFO tab and
Startthe OpenThread Border Router add-on. It may take a moment to initialize. We would suggest to activate bothStart on bootandWatchdog. - You can check logs, they should say that addon started, although they can contain some errors as Thread and Matter are still under development in Home Assistant.
Option B: OTBR runs on the SLZB device (no OTBR add-on needed)
In this option, you do not install/use the OTBR add-on in Home Assistant. OTBR is already running on the SLZB device.
- Make sure SLZB mode is set to “Thread + OTBR running on device”.
Step 5 - Configure Home Assistant integrations (both options)
- Go to
Settings→Devices & Services. - Add (or confirm autodiscovery of) these integrations:
- Thread
- OpenThread Border Router
Notes:
- If you use Option A, the “OpenThread Border Router” integration will typically use the OTBR add-on.
- If you use Option B, when asked for the Border Router address, use: <device-ip>:8080.
In the Thread integration:
- Set OpenThread Border Router as the Preferred network.
- If available, enable Use router for Android + iOS credentials.
Step 6 - Reboot Home Assistant
- After installing and configuring Matter + Thread components, reboot your Home Assistant server.
Step 7 - Pre-set up your phone
- Install
Home Assistantapp on your phone. - Install
Google Homeapp (often required for Thread credential handling on Android). - Open Home Assistant app and connect it to your Home Assistant server (same Wi-Fi network).
- In the app go to
Settings→Companion app→Troubleshooting→Sync Thread Credentials. - Repeat until you see:
Home Assistant and this device use the same network. - If it fails repeatedly, try resetting Google Play Services data (Android) and try again.
Step 8 - Add the Matter-over-Thread device
- Ensure Bluetooth is enabled on your phone.
- In Home Assistant app:
Settings→Devices & Services→Devices. - Tap
+ ADD DEVICE→Add Matter device. - Scan the QR code (or enter the pairing code) and follow the on-screen steps.
- If prompted “Which app to open?”, choose
Other→Home Assistant.
The pairing flow usually goes through:
- Connecting to device…
- Generating Matter credentials…
- Connecting device to network…
- Checking network connectivity…
- Connecting device to Home Assistant…
- Device connected!
Tips:
- If the device was powered for a long time, you may need to reset it to enter pairing mode again.
- If you have Google/Nest Thread devices and pairing is unstable, try turning them off temporarily while pairing.
Step 9 - Verify connection and control
- After pairing, the device should appear in Home Assistant under
Devices. - Open it and confirm you can control it (e.g., switch on/off).
Congratulations! You’ve successfully connected a Matter-over-Thread device to Home Assistant.
TIP:
Home Assistant Thread documentation: https://www.home-assistant.io/integrations/thread/