# Access SMHUB via External SSH client

# 🧭 How to Access SMHUB via SSH (Using PuTTY)

> ⚙️ This guide helps you connect to your SMHUB device remotely using **SSH** (Secure Shell) and update it via two simple commands.

---

## 🪄 Step 1: Download PuTTY

1. Open this link in your browser: [https://putty.org/index.html](https://putty.org/index.html)
2. Click the **“Download PuTTY”** link.
3. Choose the correct installer for your computer:
    
    
    - **Windows 64-bit** (most common): `putty-64bit-installer.msi`
    - **Windows 32-bit** (older PCs): `putty-32bit-installer.msi`
4. Download and run the installer.  
    Keep all default settings and finish the installation.

[![image.png](https://smlight.tech/support/manuals/uploads/images/gallery/2025-10/scaled-1680-/EmMimage.png)](https://smlight.tech/support/manuals/uploads/images/gallery/2025-10/EmMimage.png)

---

## 🪪 Step 2: Open PuTTY

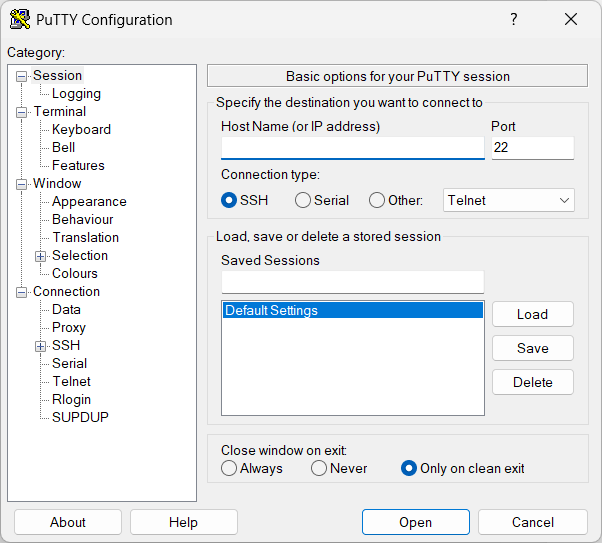
1. After installation, open the **PuTTY** program.  
    You will see the main configuration window.

[![image.png](https://smlight.tech/support/manuals/uploads/images/gallery/2025-10/scaled-1680-/Nl4image.png)](https://smlight.tech/support/manuals/uploads/images/gallery/2025-10/Nl4image.png)

---

## 🌐 Step 3: Enter SMHUB IP Address

1. Start your SMHUB. Wait until Blue LED chase effect stops (for firmwares &gt;0.2.x). This means that SMHUB is ready for SSH connection.
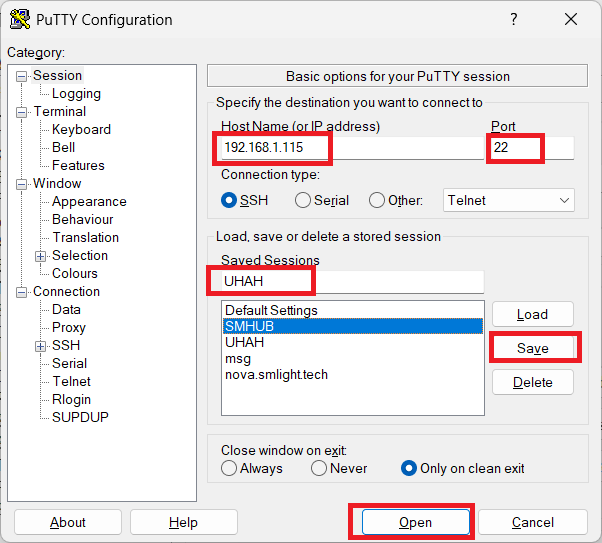
2. In the **“Host Name (or IP address)”** field, type your SMHUB’s IP address.
    
    
    - Example: `192.168.1.115`
3. Make sure **Port** is set to **22**.
4. Ensure **Connection type** is set to **SSH**.
5. Click the **“Open”** button.
6. Optionally, Save your settings for future use.

[![image.png](https://smlight.tech/support/manuals/uploads/images/gallery/2025-10/scaled-1680-/p6Rimage.png)](https://smlight.tech/support/manuals/uploads/images/gallery/2025-10/p6Rimage.png)

> 💡 *If you don’t know your SMHUB IP, you can usually find it in your router’s “Connected Devices” list, under a name like `smhub.local`. Instead of IP address, in PuTTY Host Name, you can enter `smhub.local` . It will work, if your network supports mDNS. If your network does not support mDNS, IP address like `192.168.1.115` should be used.*

---

## 🔐 Step 4: Accept Security Warning

1. The first time you connect, a **security alert** may appear.  
    Click **“Yes”** to trust this device.

---

## 👤 Step 5: Log In

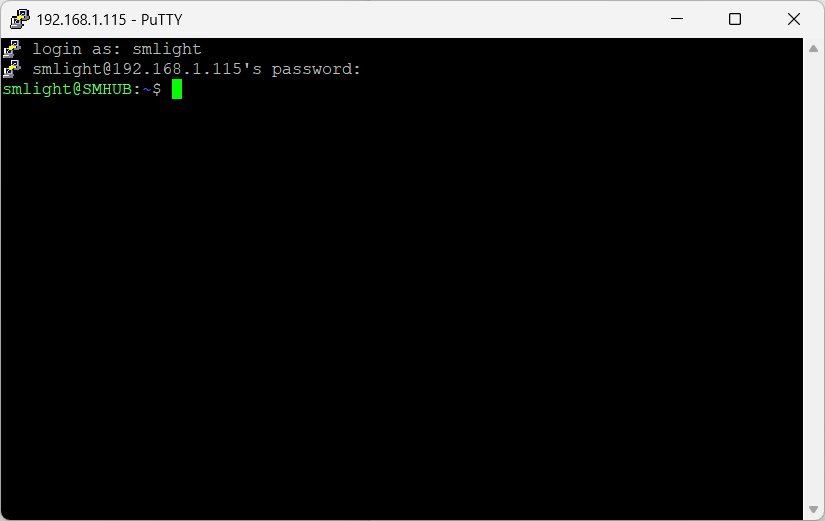
When the black terminal window opens:

1. At the prompt **`login as:`**, type:
    
    <div class="contain-inline-size rounded-2xl relative bg-token-sidebar-surface-primary"><div class="sticky top-9">  
    </div><div class="overflow-y-auto p-4" dir="ltr">`<span class="hljs-attribute">smlight</span>`</div></div>
2. When asked for **password**, type:
    
    <div class="contain-inline-size rounded-2xl relative bg-token-sidebar-surface-primary"><div class="sticky top-9">  
    </div><div class="overflow-y-auto p-4" dir="ltr">`<span class="hljs-attribute">smlight</span>`</div></div>(Note: you will not see any stars or dots while typing - that’s normal.)

[![image.png](https://smlight.tech/support/manuals/uploads/images/gallery/2025-10/scaled-1680-/Jxbimage.png)](https://smlight.tech/support/manuals/uploads/images/gallery/2025-10/Jxbimage.png)

---

## 🧱 Step 6: Update SMHUB Software

Once logged in, run the following two commands one by one:

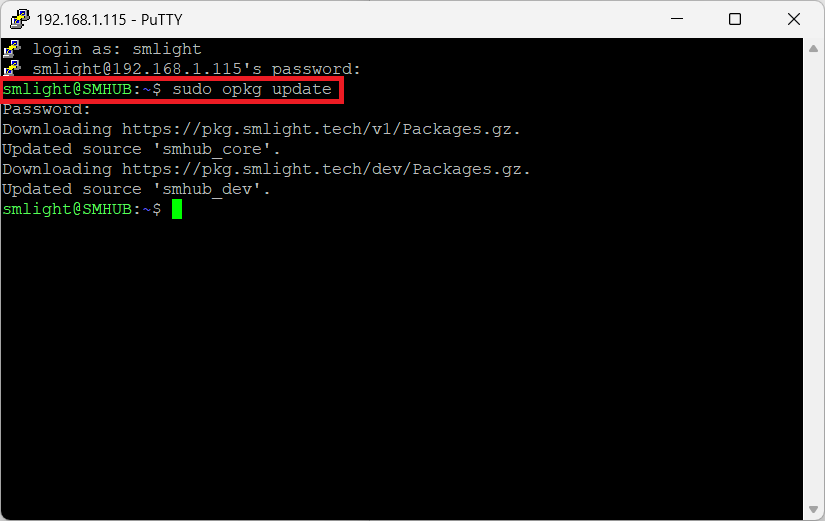
### 1️⃣ Update the package list:

<div class="contain-inline-size rounded-2xl relative bg-token-sidebar-surface-primary" id="bkmrk-sudo-opkg-update"><div class="sticky top-9"><div class="absolute end-0 bottom-0 flex h-9 items-center pe-2"><div class="bg-token-bg-elevated-secondary text-token-text-secondary flex items-center gap-4 rounded-sm px-2 font-sans text-xs">  
</div></div></div><div class="overflow-y-auto p-4" dir="ltr">`sudo opkg <span class="hljs-keyword">update</span>`</div></div>Wait until the command finishes (you will see lines of text ending with “done”). System will ask for password. Please use the same password `<span class="hljs-attribute">smlight</span>`

[![image.png](https://smlight.tech/support/manuals/uploads/images/gallery/2025-10/scaled-1680-/sc5image.png)](https://smlight.tech/support/manuals/uploads/images/gallery/2025-10/sc5image.png)

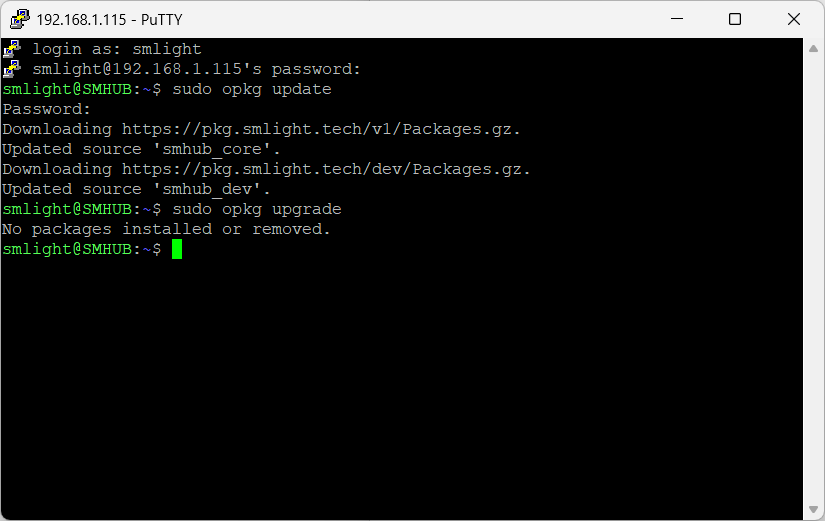
### 2️⃣ Upgrade all installed packages:

<div class="contain-inline-size rounded-2xl relative bg-token-sidebar-surface-primary" id="bkmrk-sudo-opkg-upgrade"><div class="sticky top-9"><div class="absolute end-0 bottom-0 flex h-9 items-center pe-2"><div class="bg-token-bg-elevated-secondary text-token-text-secondary flex items-center gap-4 rounded-sm px-2 font-sans text-xs">  
</div></div></div><div class="overflow-y-auto p-4" dir="ltr">`<span class="hljs-attribute">sudo</span> opkg upgrade`</div></div>This may take a few minutes - don’t close the window during the process.

[![image.png](https://smlight.tech/support/manuals/uploads/images/gallery/2025-10/scaled-1680-/jR7image.png)](https://smlight.tech/support/manuals/uploads/images/gallery/2025-10/jR7image.png)

---

## ✅ Step 7: Done!

Once finished, type: `<span class="hljs-built_in">sudo reboot now</span>`

You can close the window without any commands as well.

Your SMHUB will reboot.  
Your SMHUB is now updated and ready to use 🎉

---

## 💡 Quick Summary

<div class="_tableContainer_1rjym_1" id="bkmrk-action-command-%2F-but"><div class="group _tableWrapper_1rjym_13 flex w-fit flex-col-reverse" tabindex="-1"><table class="w-fit min-w-(--thread-content-width)" data-end="2944" data-start="2713"><thead data-end="2742" data-start="2713"><tr data-end="2742" data-start="2713"><th data-col-size="sm" data-end="2722" data-start="2713">Action</th><th data-col-size="sm" data-end="2742" data-start="2722">Command / Button</th></tr></thead><tbody data-end="2944" data-start="2773"><tr data-end="2803" data-start="2773"><td data-col-size="sm" data-end="2790" data-start="2773">Login username</td><td data-col-size="sm" data-end="2803" data-start="2790">`smlight`</td></tr><tr data-end="2834" data-start="2804"><td data-col-size="sm" data-end="2821" data-start="2804">Login password</td><td data-col-size="sm" data-end="2834" data-start="2821">`smlight`</td></tr><tr data-end="2875" data-start="2835"><td data-col-size="sm" data-end="2853" data-start="2835">Update packages</td><td data-col-size="sm" data-end="2875" data-start="2853">`sudo opkg update`</td></tr><tr data-end="2918" data-start="2876"><td data-col-size="sm" data-end="2895" data-start="2876">Upgrade packages</td><td data-col-size="sm" data-end="2918" data-start="2895">`sudo opkg upgrade`</td></tr><tr data-end="2944" data-start="2919"><td data-col-size="sm" data-end="2934" data-start="2919">Exit session</td><td data-col-size="sm" data-end="2944" data-start="2934">`exit`</td></tr></tbody></table>

</div></div>---