
SMHUB Early Adopter – Quick Start Guide
The SMHUB Early Adopter Version is the first public release of our multi-radio smart hub. It’s designed for early buyers who want to explore the platform before the full release.
What’s Already Installed (Ready to Use)
-
Zigbee2MQTT (for CC26XX or EFR32XX radios)
-
Mosquitto MQTT broker
-
Matterbridge
-
Node-RED
Hardware – Working Now
-
CC26XX radio
-
EFR32MGXX radio
-
100 Mb Ethernet port
-
12× WS2812B RGB LEDs (Ambilight effects)
-
eMMC storage
-
PoE module support (optional)
-
Z-Wave module support (optional)
Hardware – Present but Still in Development
-
Wi-Fi 6 (2.4 / 5 GHz) and Bluetooth (currently CLI only, UI support coming)
-
IR receiver and transmitter
-
USB ports: 2× USB-C (1 for power/upstream, 1 downstream), 1× USB-A
-
SD card slot
-
3.5 mm audio jack
-
4× Service LEDs
-
3× Hardware buttons
-
Expansion connectors: UART, I²C, SPI, DIY pinouts
Updates & Roadmap
-
More hardware functions will be enabled gradually via SMHUB-OS updates.
-
New features will roll out continuously (but availability is not guaranteed).
-
Early adopters receive updates and improvements first.
Updating SMHUB Firmware
📅 As of 25 September 2025
Currently, Over-the-Air updates are not yet available. (Expected in the coming weeks.) For now, updates must be done with a USB Type-C cable.
👉 Updating is required to ensure proper operation.
Steps:
-
Download the firmware package from the provided link (223Mb): https://updates.smlight.tech/firmware/smhub/os/smhub_os_v0.1.2.zip
-
Install drivers from the
driversfolder in the package (works with Windows). -
Connect SMHUB to your PC using a Type-C to Type-C cable. Use the upstream Type-C port (near the RJ45/Ethernet port).
-
Run
flash.batfrom the firmware folder. -
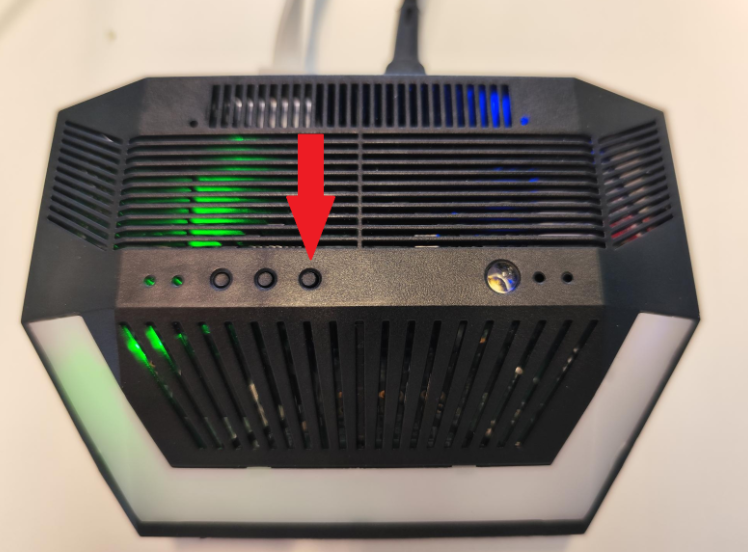
Press the Reset button (top of the device, 3rd button from the right).

-
Wait ~2 minutes while flashing completes.
-
The device will reboot automatically.
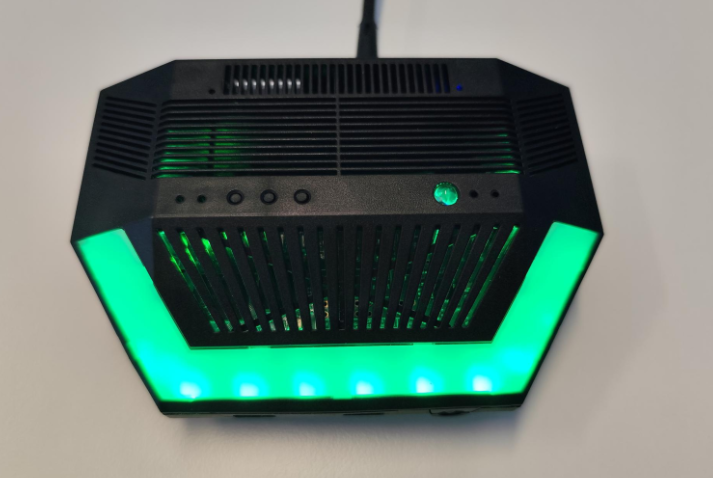
🔔 On every boot, the green Ambilight LEDs will glow for 1 minute to confirm a successful boot (so the web interface is accessible). It can take up to 1-3 minutes, depending on how many apps are starting at boot. First time it usually takes more for the first configuration.
Accessing the Web Interface
-
Open: http://smhub.local
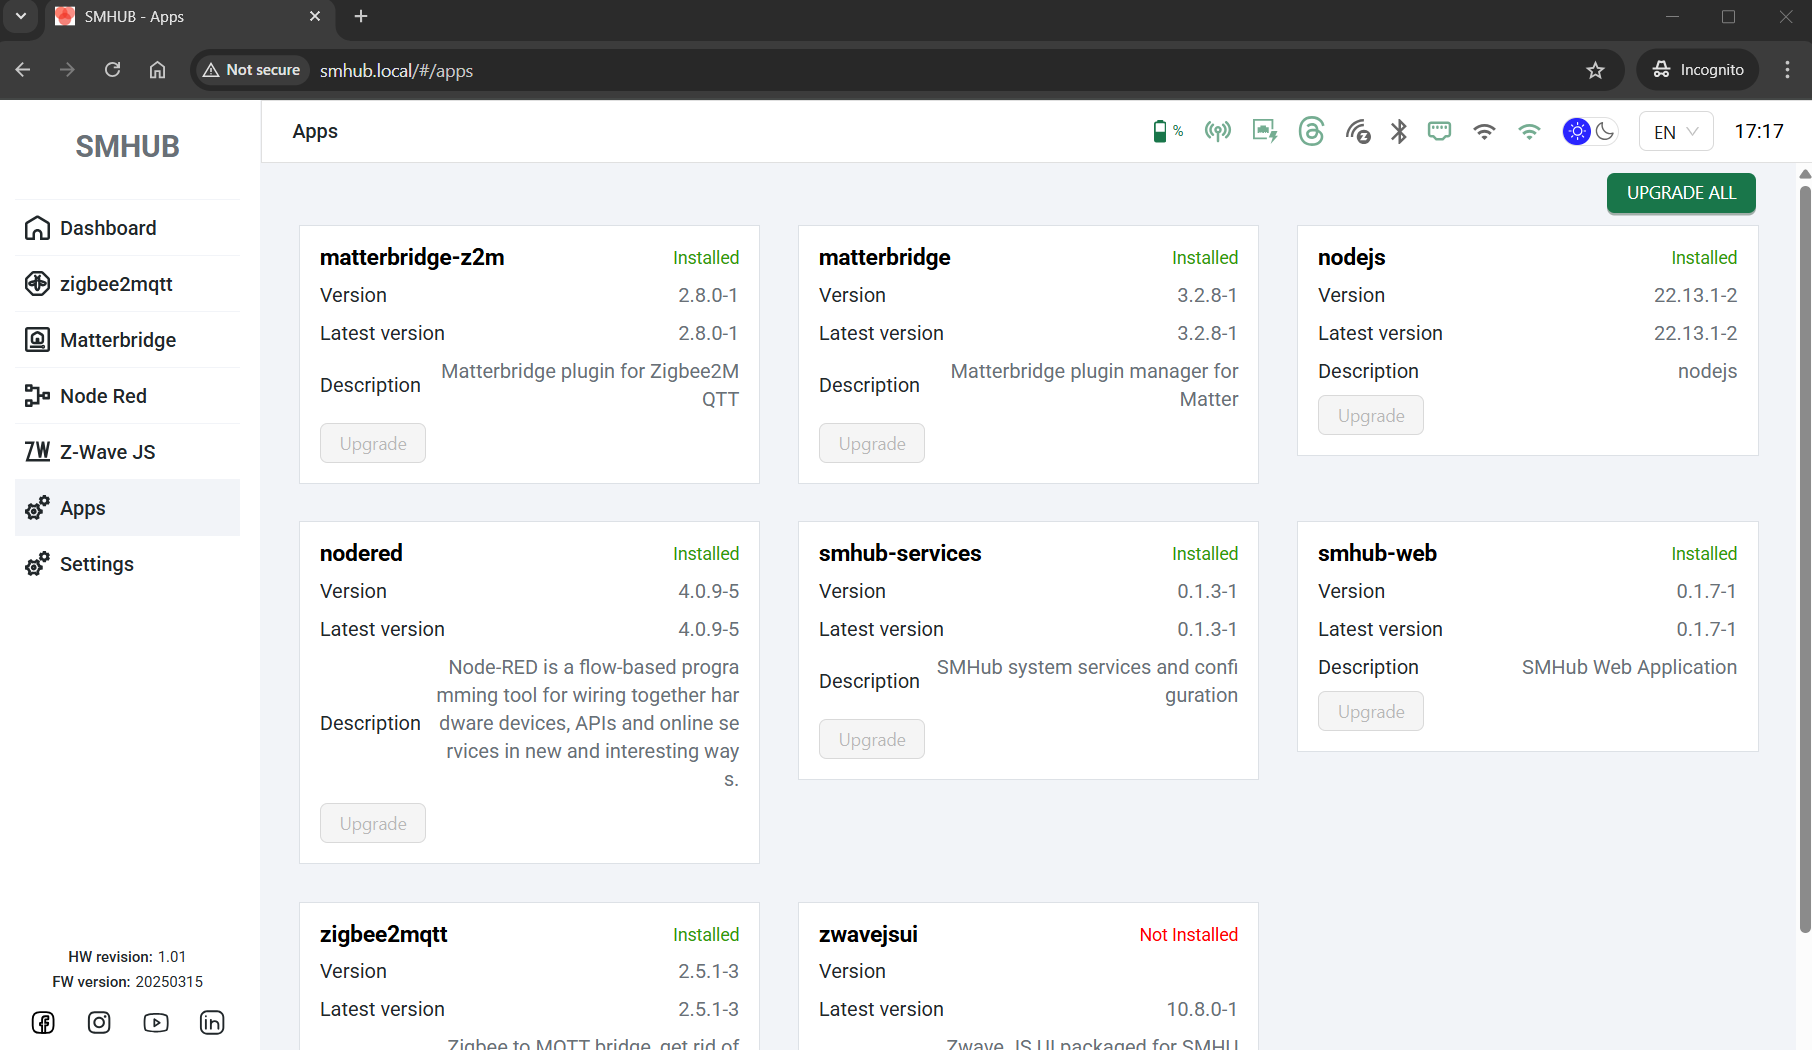
On first boot, no apps are running. You must enable them.
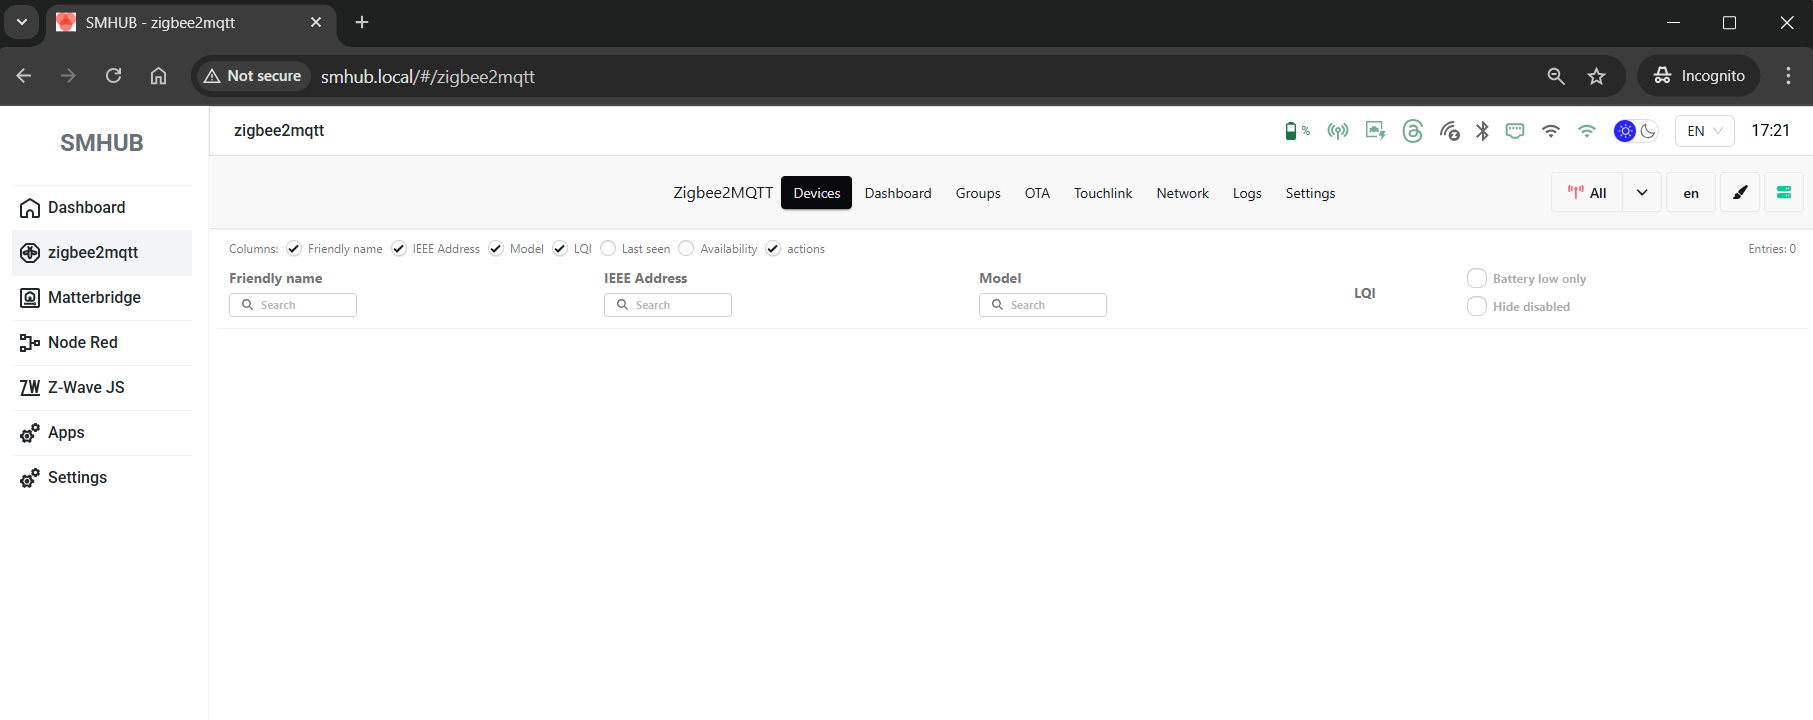
Running Apps (Example: Zigbee2MQTT)
-
Open the Apps tab.
-
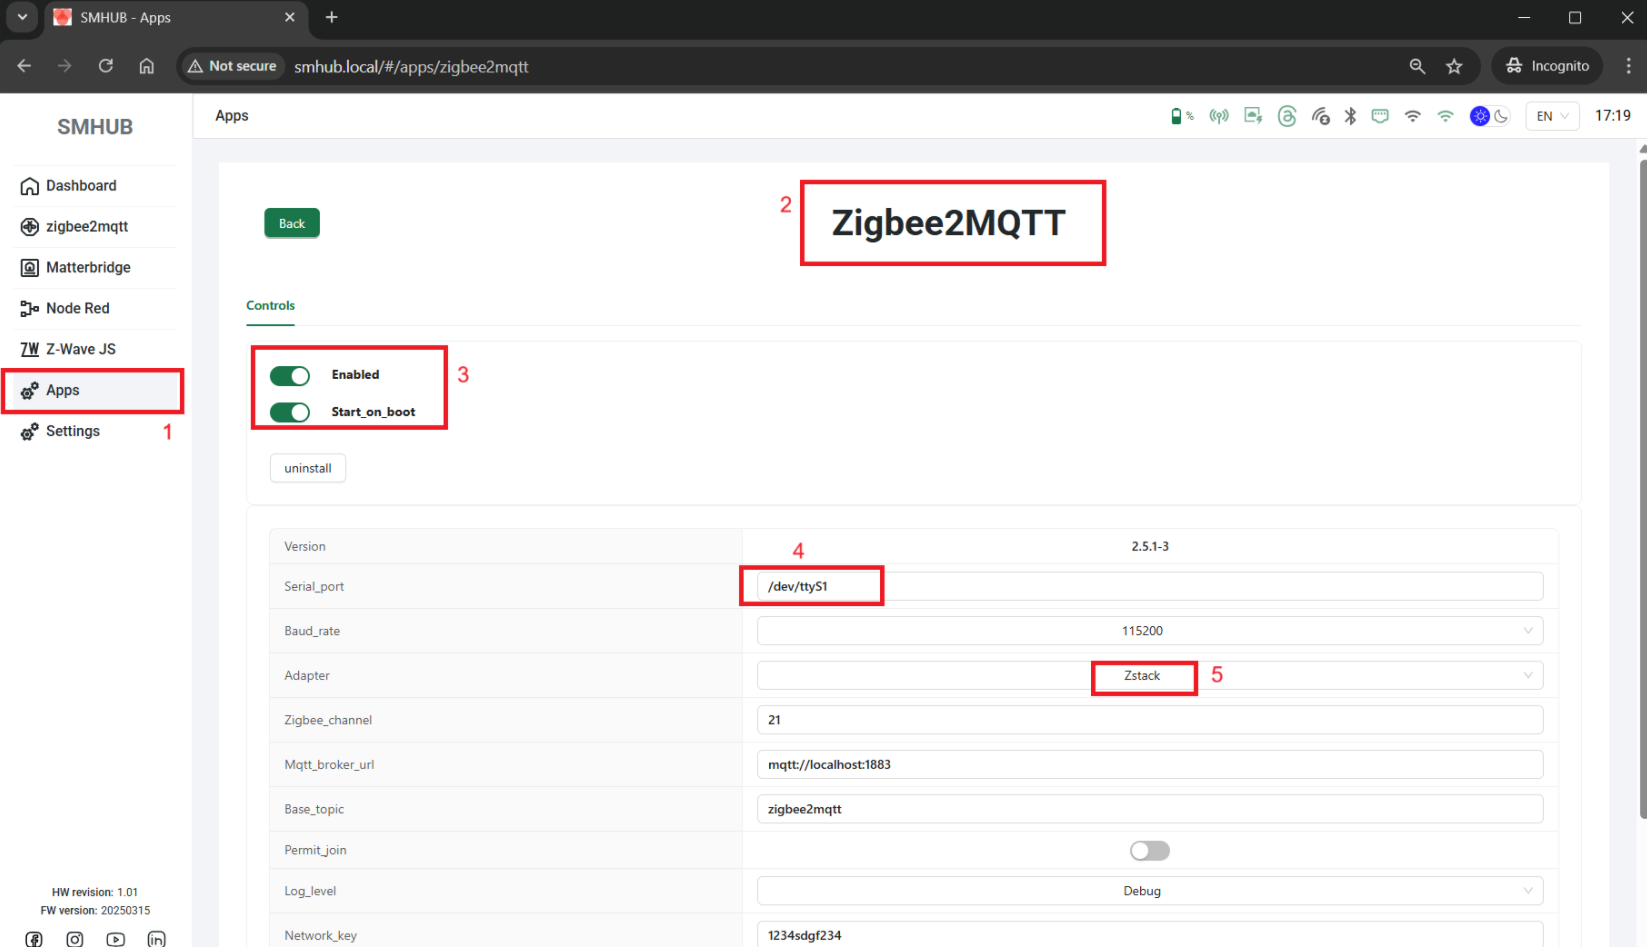
In Z2M app settings:
-
Choose your Zigbee chip:
-
ttyS1→ CC26XX SoC -
ttyS2→ EFR32XX SoC
-
-
Configure MQTT broker if needed.
-
-
Toggle:
-
Enabled → allows the app to run.
-
Start on boot → app starts automatically after reboot.

-
-
Reboot SMHUB (press Reset or power cycle).
-
Once booted, open the Zigbee2MQTT tab – you’ll see the configuration page.
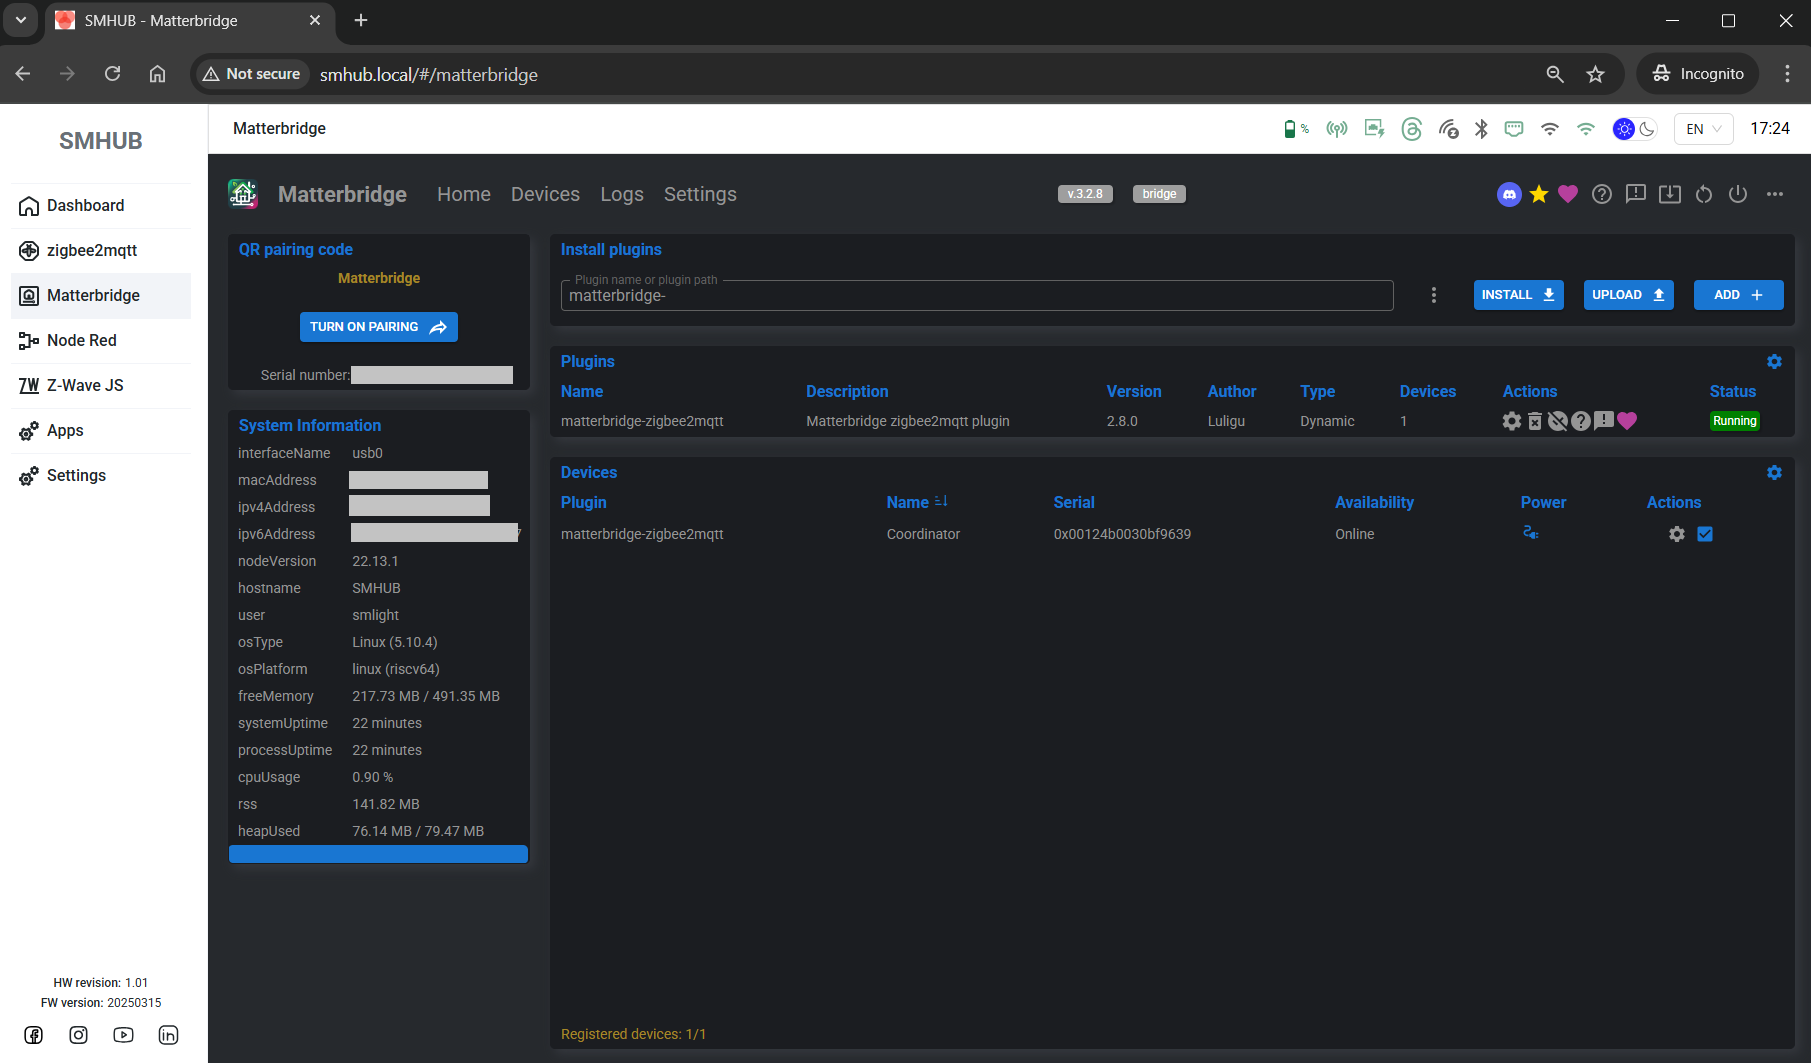
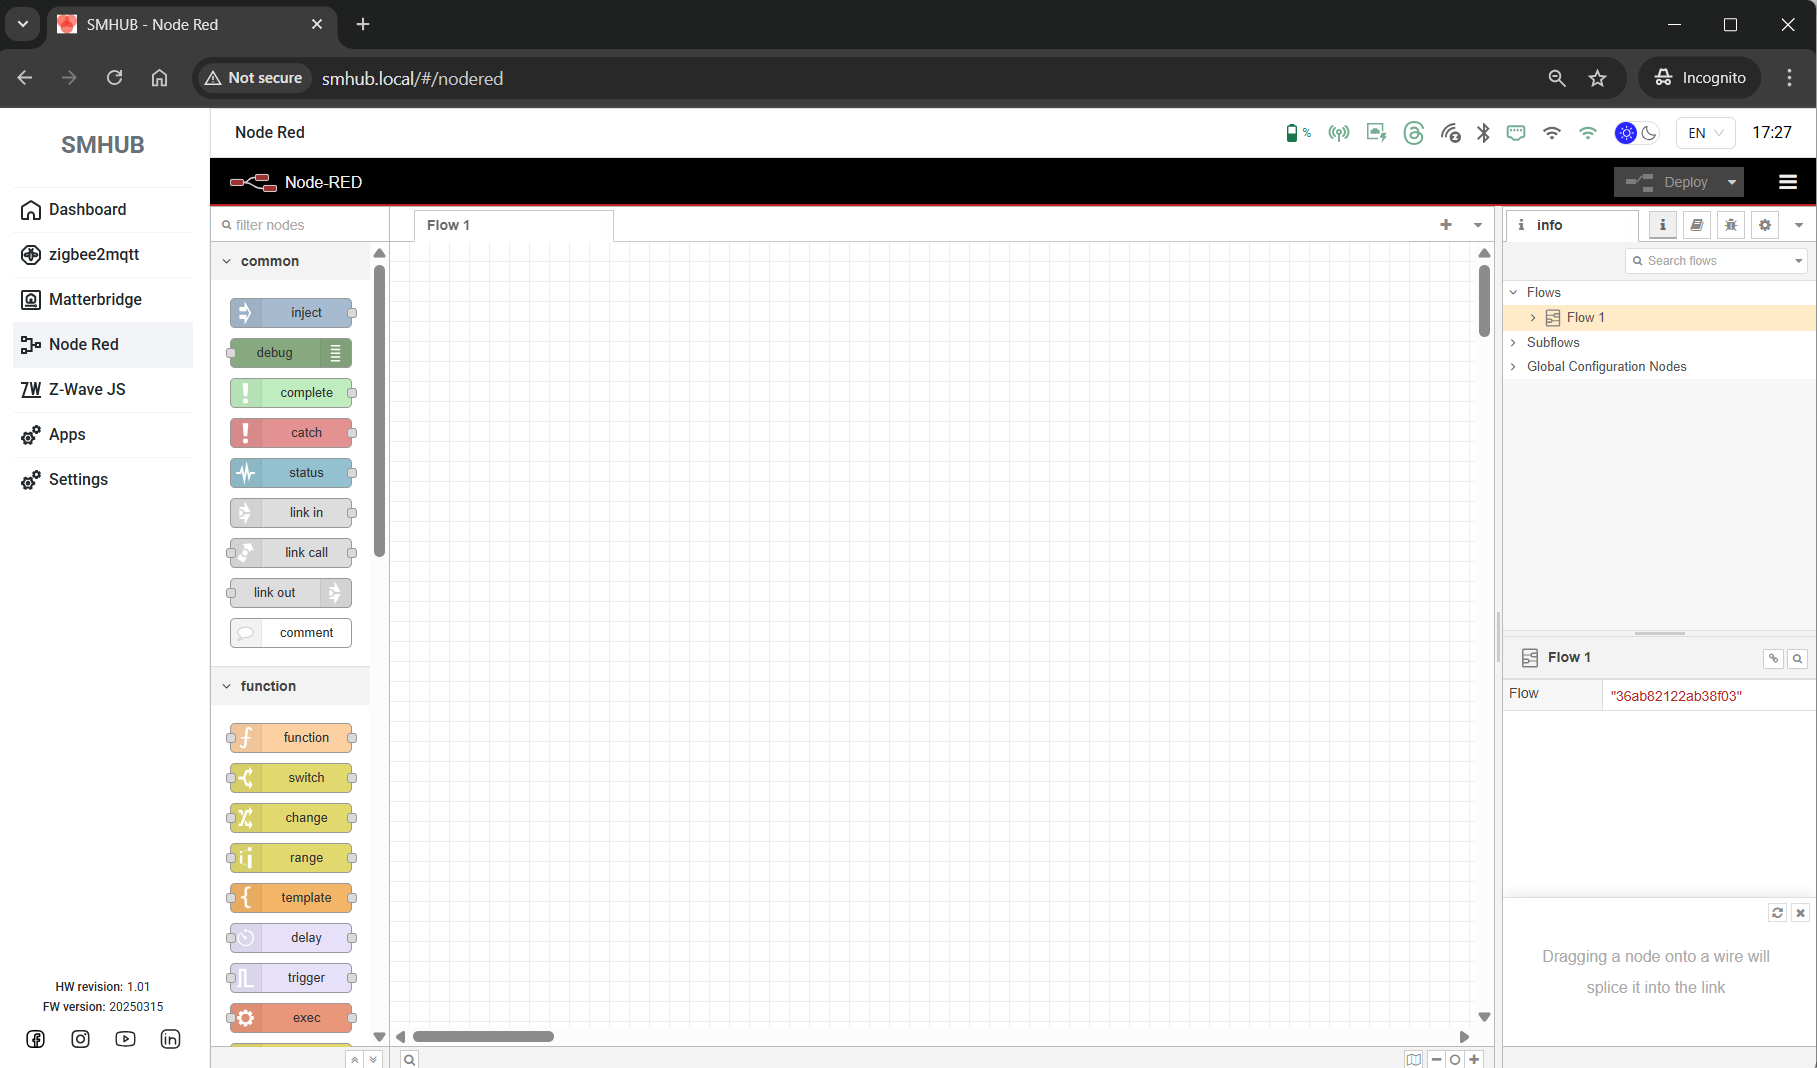
You can repeat the same steps for:
-
Matterbridge
-
Node-RED


Notes
-
The Settings tab is under development – more options will appear in future updates.
-
Once per day, the device automatically runs
opkg updateto check for available updates. -
If you do not see package updates in the web interface, you can force an update manually:
-
Connect to the device using an SSH terminal (e.g., PuTTY).
-
Log in with credentials:
-
User:
smlight -
Password:
smlight
-
-
Run the command:
-
Return to the web interface and refresh the Apps page.
-