Troubleshooting
This section lists common issues that may occur during the installation or operation of SMHUB and their solutions.
Power & Boot
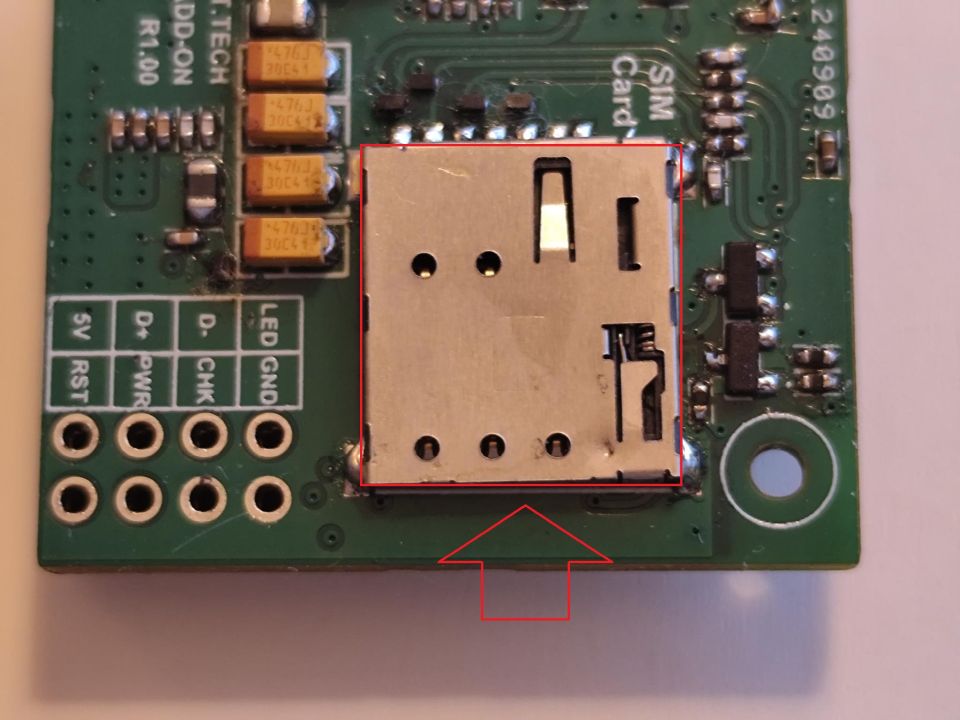
The first batch of SMHUBs with 4G add-ons did not include the screw with a ring, which was meant to be placed between the add-on and the main PCB.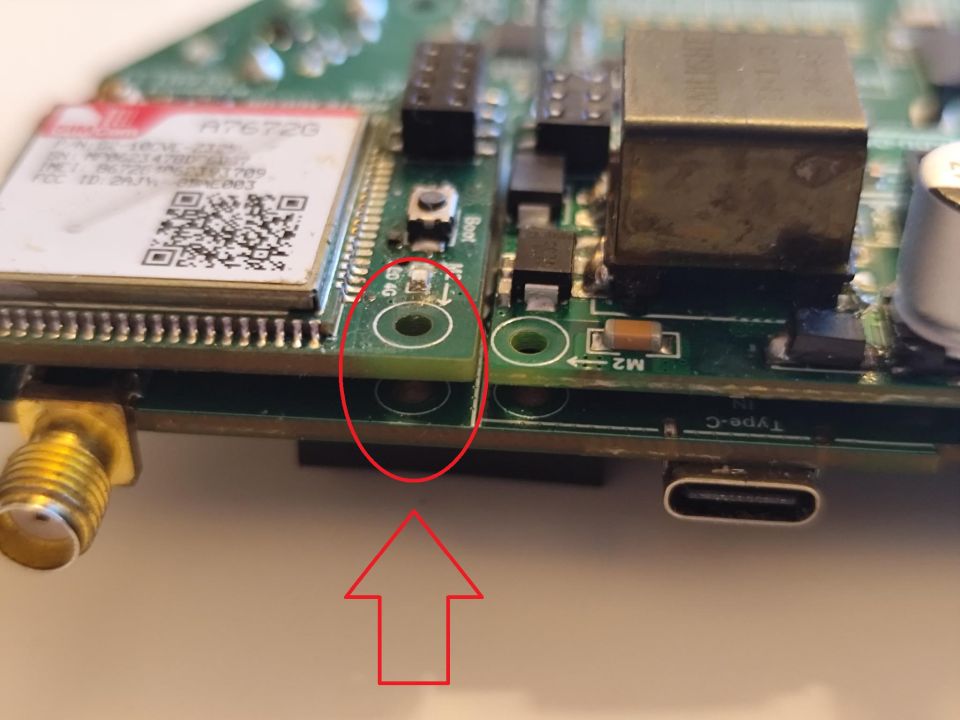
For some users, this caused a short circuit that prevented the hub from turning on.
To fix this, follow the steps below:
- Remove the 4G add-on
- Stick insulating tape to the SIM card slot or place a layer of paper between the PCB and the 4G add-on

- Install the 4G add-on
This section lists common issues that may occur during the installation or operation of SMHUB and their solutions.
Feedbacks from users
- Issue: ... nothing on the webUI is loading. the Settings page stays completely blank, doesn't matter which setting I choose.
Resolution: And I have to admit, the problem was not the hub, it was me - Firefox & AdBlock will break the UI, at least in my case.
Device bricked with SMHUB-OS v2.x
Some users experienced a "soft bricked" device after updating over any method (Type-C / SD-Card or through the web UI). This issue appeared because of U-Boot changes introduced in version 0.2.0, when the Robust Auto-Update Controller ("RAUC") was introduced.
Users who experienced that were able to recover their "bricked" device by flashing back 0.1.2 via Type-C (because it did not contain the new RAUC changes [by the way, it is here smhub-os-v0.1.2]) and then updating directly to a 0.3.x version via Type-C.
Below is a simple explanation of what happened and how it was fixed.
When the device turns on, the very first piece of software that runs is called U-Boot. You can think of it like the “starter” or boot manager of the device. Before anything else loads, U-Boot reads some settings (called “environment variables”) from the internal storage (the MMC). These settings tell it how to start the system.
At some point, RAUC (stands for "Robust Auto-Update Controller" - the Linux update system on SMHUB) accidentally damaged/corrupted those settings. When U-Boot tried to read them, it got confused and didn't know how to continue booting properly, and the device failed to boot - which looked like it was “bricked.” (for regular start, or for Type-C/SD-Card updates).
What Was Changed:
To prevent this from ever happening again, we made two fixes:
1. Automatically reset U-Boot's settings whenever they are detected as corrupted. In simple terms: If U-Boot sees that its configuration is broken, instead of crashing or getting stuck, it will throw away the bad settings and restore working default settings - before any damage happens.
2. We also corrected how RAUC marks a software update as “successful.” It will now only do that after an update actually happens, instead of doing it on every boot. The old behavior is likely what caused the corruption.
Simple Analogy:
- Imagine a PC that reads its BIOS settings when it powers on.
- If the BIOS settings get corrupted, the PC might not start.
- The fix is to detect the bad BIOS settings and automatically reset to “factory defaults” so the computer can continue to boot normally.
This is exactly what we are doing here, but for an embedded device.
The good news: starting from SMHUB-OS v0.3.2, the fix is now built-in. You can simply update and recover your device via Type-C / SD-Card.
(See details below https://smlight.tech/support/manuals/books/smhub/page/smhub-os-release-notes#bkmrk-smhub-services-v0.1.-1)
Your device is now:
- More robust
- Self-recovering
- Protected from this type of failure in the future
Zigbee2MQTT
z2m: Error: [BACKUP] Current backup file is not for EmberZNet stack.
This means that you have previously run Z2M for Radio1 (CC26XX).
Unfortunately Z2M does not support restoring backups between CC and EFR Zigbee chips, so to run Z2M for EFR radio you will have to delete the backup, which means you will have to re-pair all Zigbee devices.
Following the steps below means you will have to re-pair your Zigbee devices.
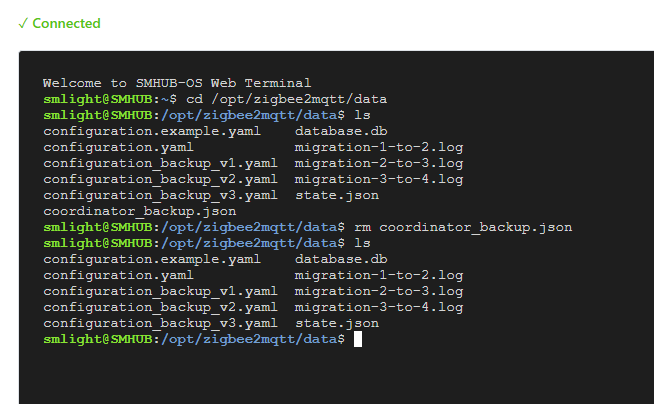
Hint: You can press the [TAB] key to autocomplete paths/file names.
- Open console

- Type:
cd /opt/zigbee2mqtt/data - (optional) Type:
lsto show filelist - Type
rm coordinator_backup.json - (optional) Type:
lsto show updated filelist - Go to "Apps" -> "Zigbee2MQTT" and press "Run" button
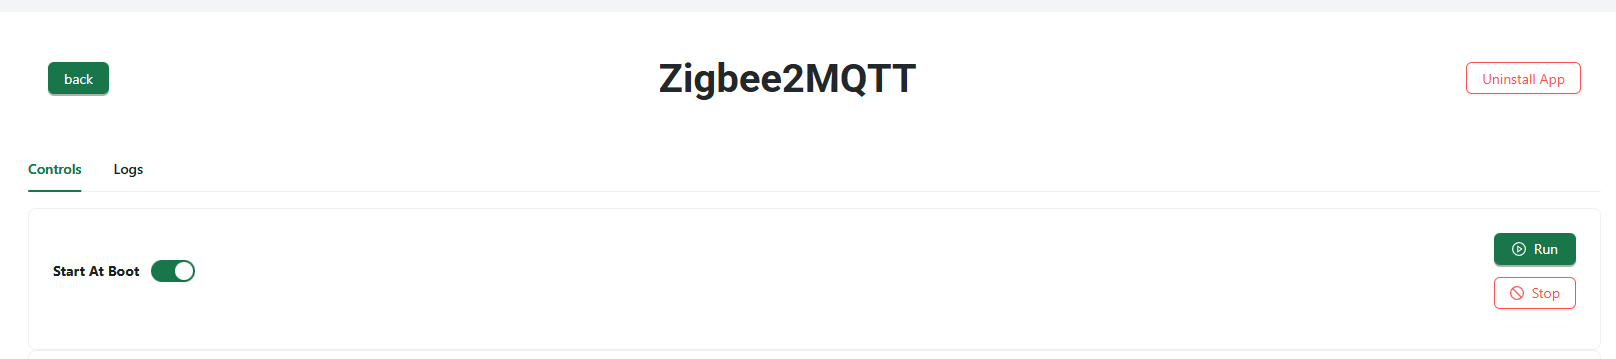
- Now you can go to the Z2M interface, it will launch soon


Screenshot with a list of commands: