
I LOVE smart home devices. Pretty much the exact moment I moved out of my parents' house to attend university, I equipped my place with a bunch of smart devices to hook into my existing Home Assistant instance. My bedroom alone has multiple smart Zigbee devices: LED bulbs and remotes, an air quality monitor, a presence/light sensor, two power switches+monitors and some other stuff I'm probably forgetting. Something about having a fully local dashboard and smart home platform around a bunch of sensors really triggers the nerd inside of me.
Now, my networking situation is a bit… interesting. Home Assistant is running on the homelab at my parents' place, but I live a little too far away for the Zigbee signal to reach all the way over here. I used to run a Raspberry Pi 4 with an SLZB-07 dongle, Zigbee2MQTT and an MQTT broker at my own place and bridged it with the broker at my homelab over a VPN. That worked incredibly well, and in fact served my needs perfectly for several years. However, the Raspberry Pi 3 in my 3D printer finally gave in recently, so I've had to salvage my only Pi 4 to fix it. That unfortunately left me with a dysfunctional Zigbee network, meaning I had to manually turn my lights on and off again (yes, by pressing buttons! Ew!) Now imagine my excitement when the kind folks over at SMLIGHT were willing to send over one of their SMHUB devices, and all it cost was for me to write a single review about their device. Deal!
That's right! I tricked you into reading a product review! Don't worry though, all the words in this post were formed from my own opinion alone, and we will still be exploring the cool software stuff behind the scenes. It's just that while working towards our remote Zigbee goal, we will also be talking about the device itself a bit, as well as what I think of it. Sounds good?
The Device
Let's first talk a bit about what this SMHUB device actually is, and how it will help us achieve our goal. In their own words:
SMHUB Nano is a professional-grade control hub running a Linux-based system that can host apps locally — Zigbee2MQTT, MQTT broker, WireGuard, Tailscale, Matterbridge, and more.
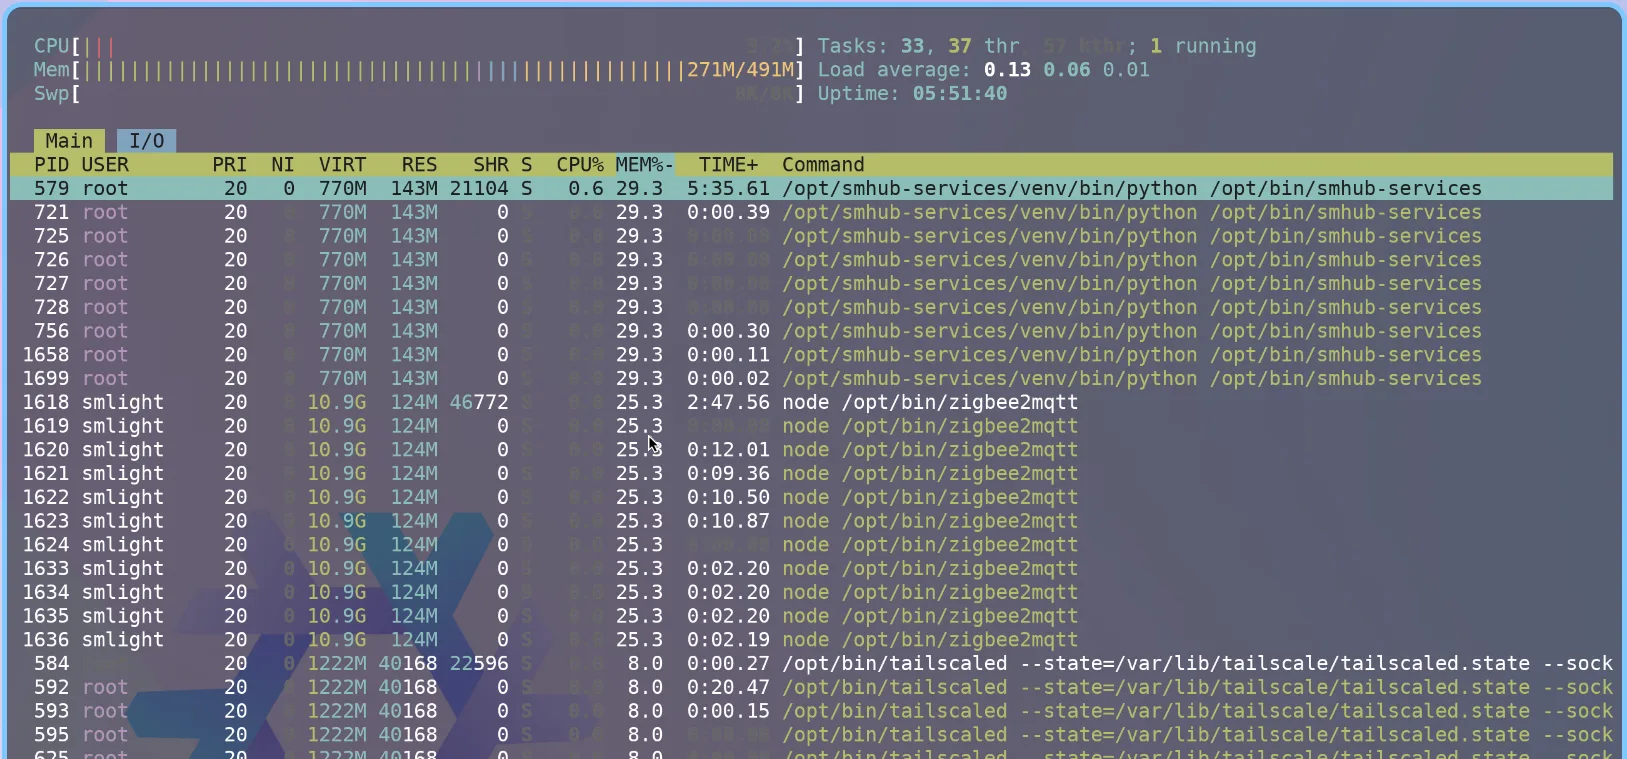
Fancy! Under the hood, the SMHUB is simply an embedded Linux device with a built-in Zigbee/Matter/Thread adapter. It doesn't have a whole lot of juice: it appears to be running on a single-core riscv CPU (bonus nerd points for ISA!) and around half a gigabyte of RAM. Despite this, it appears to be running fairly comfortably: my hub is idling at around 3% CPU usage and 300MB 'used' memory. And this is with Mosquitto, Zigbee2MQTT, Tailscale and their Python-based backend running, along with some other necessary services. You can definitely feel it drag its heels when installing apps, booting up or restarting services, but once it's up and running it's impressively smooth.
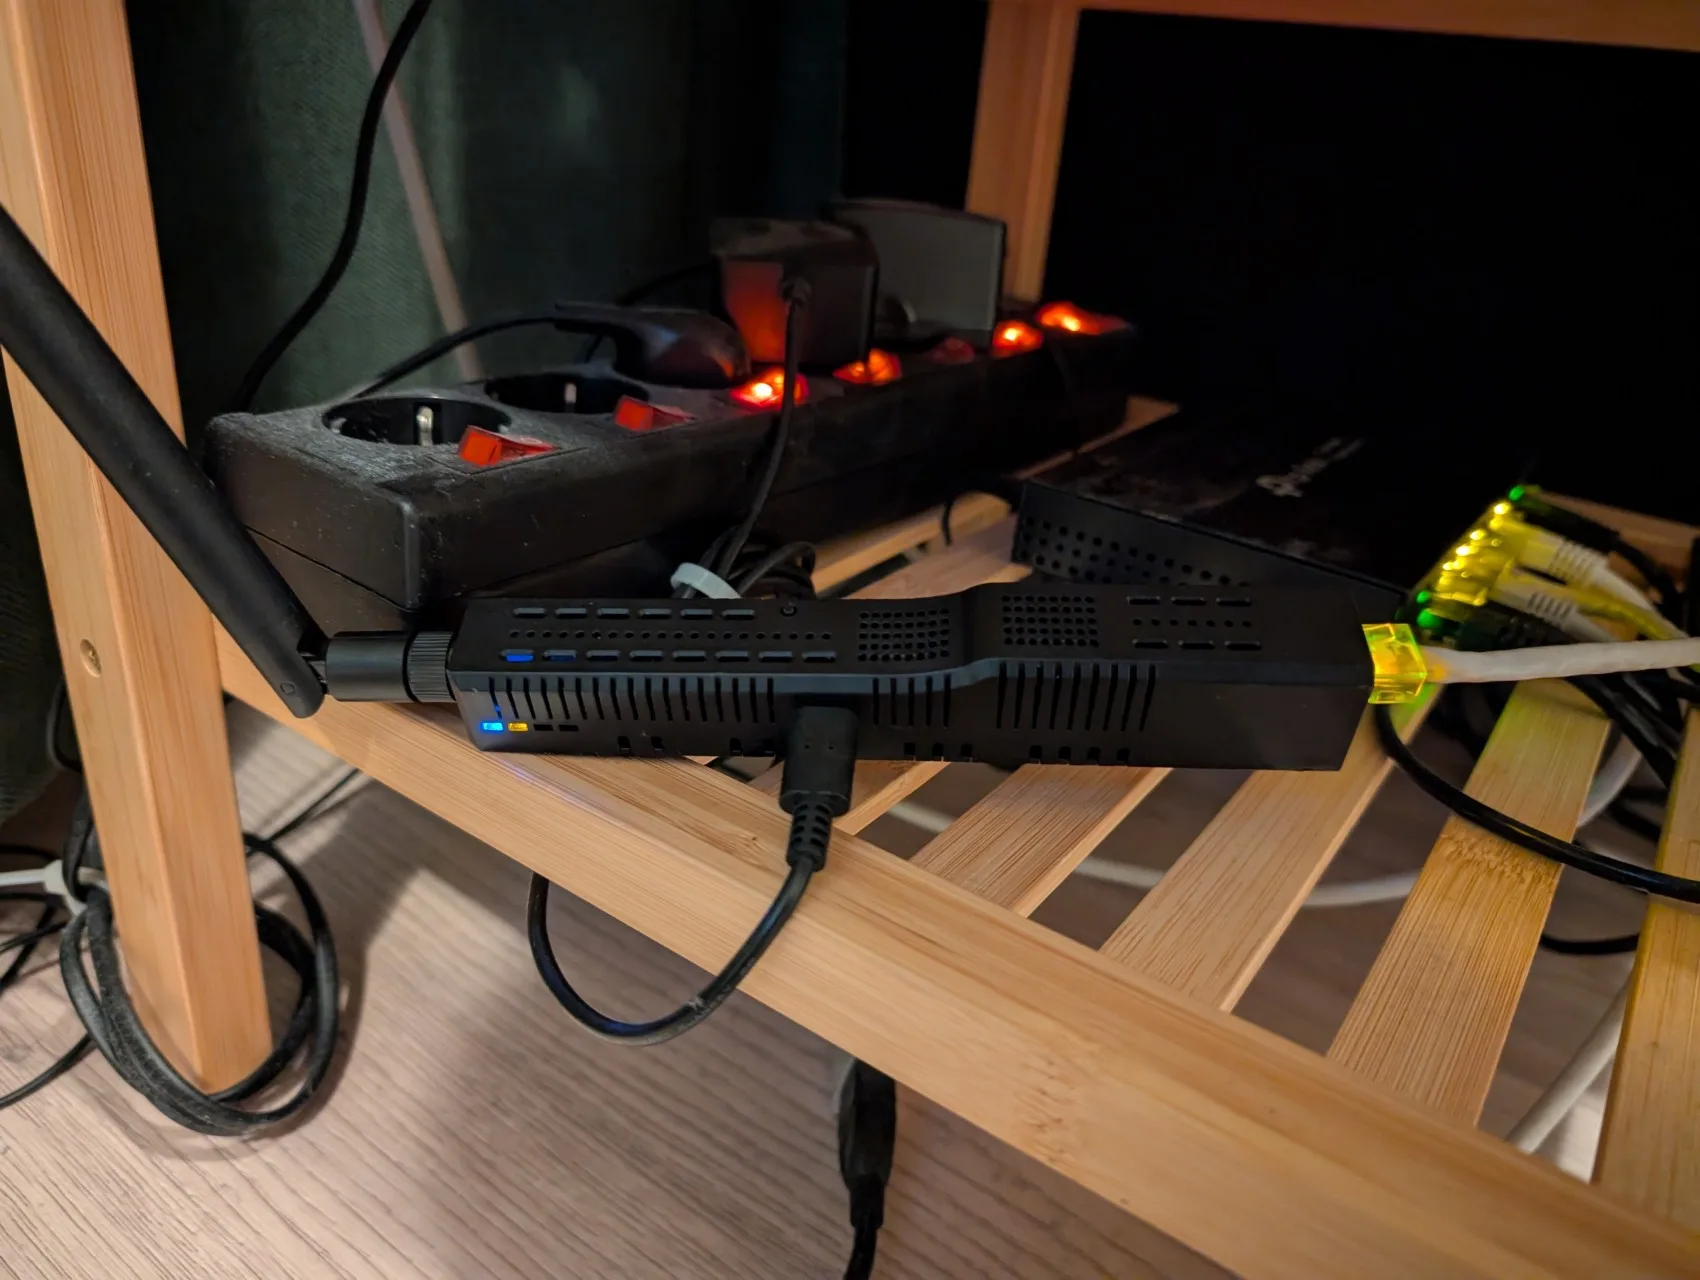
Physically, SMLIGHT appears to use the same black casing as is also used for their other Ethernet-enabled adapters. It can be powered using either a USB-C cable or PoE. PoE does indeed work quite well, and it would be great to deploy it that way; however, I only own a single PoE injector, and it's currently being used for my access point/router. So USB-C it is. Grrr.
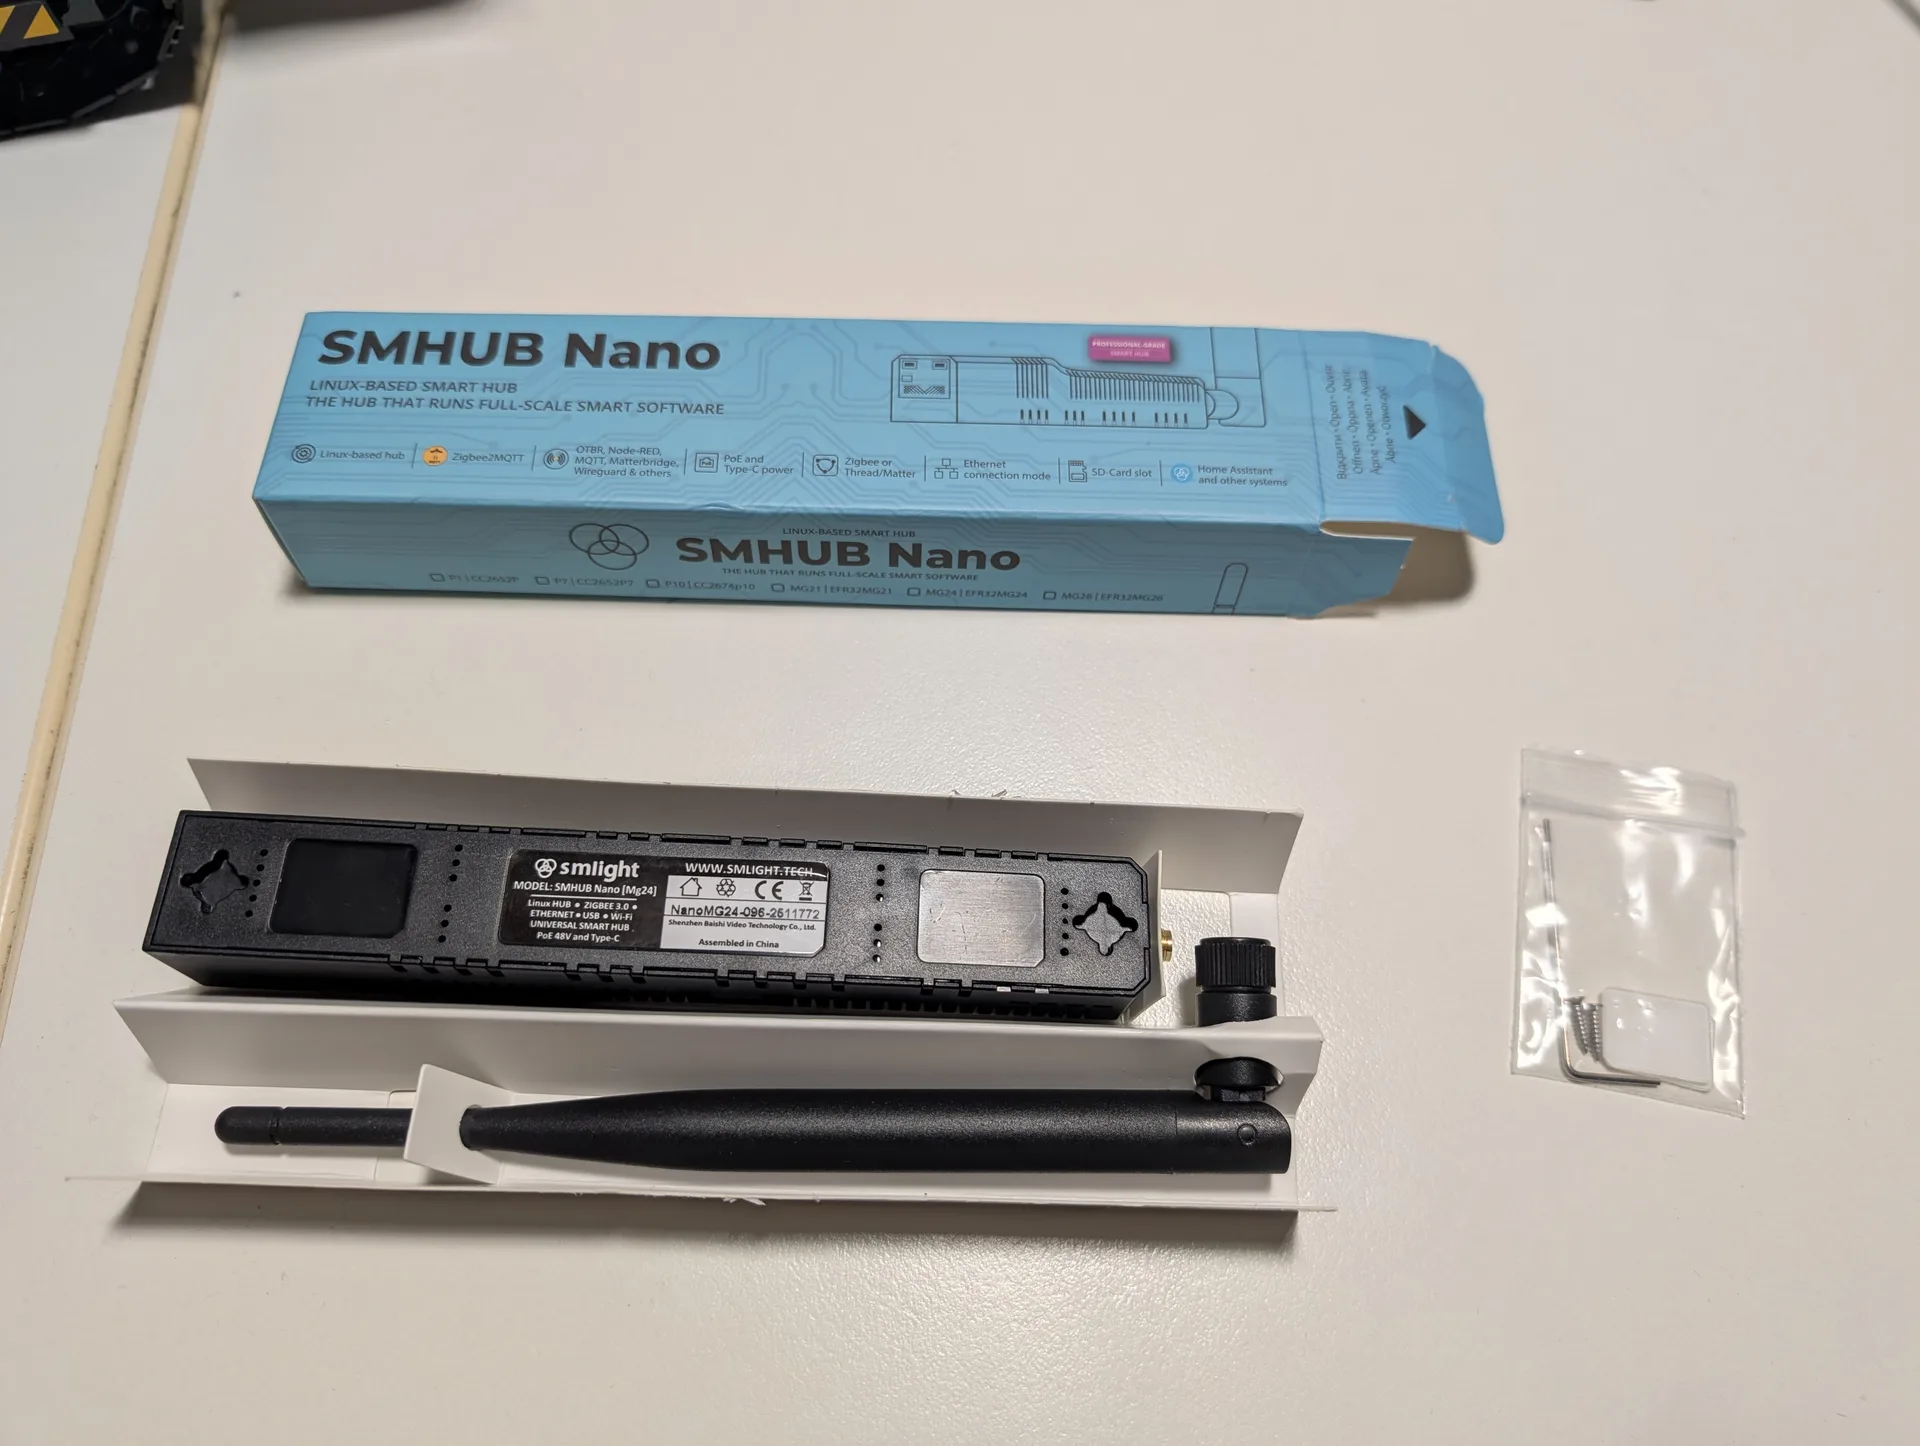
Note that no USB-C cable or power brick were provided in the box, however I think most people will likely have some of those lying around anyway. The device takes regular 5V power, so any regular old phone charger seems to work just fine. They do provide double-sided sticky pads to stick the device to a surface, as well as two mini screws + a hex key if you prefer to go that route. Or, if you're like me, just put it on your bedside table 👍 (the lights really add to the ambience at night)
The Plan
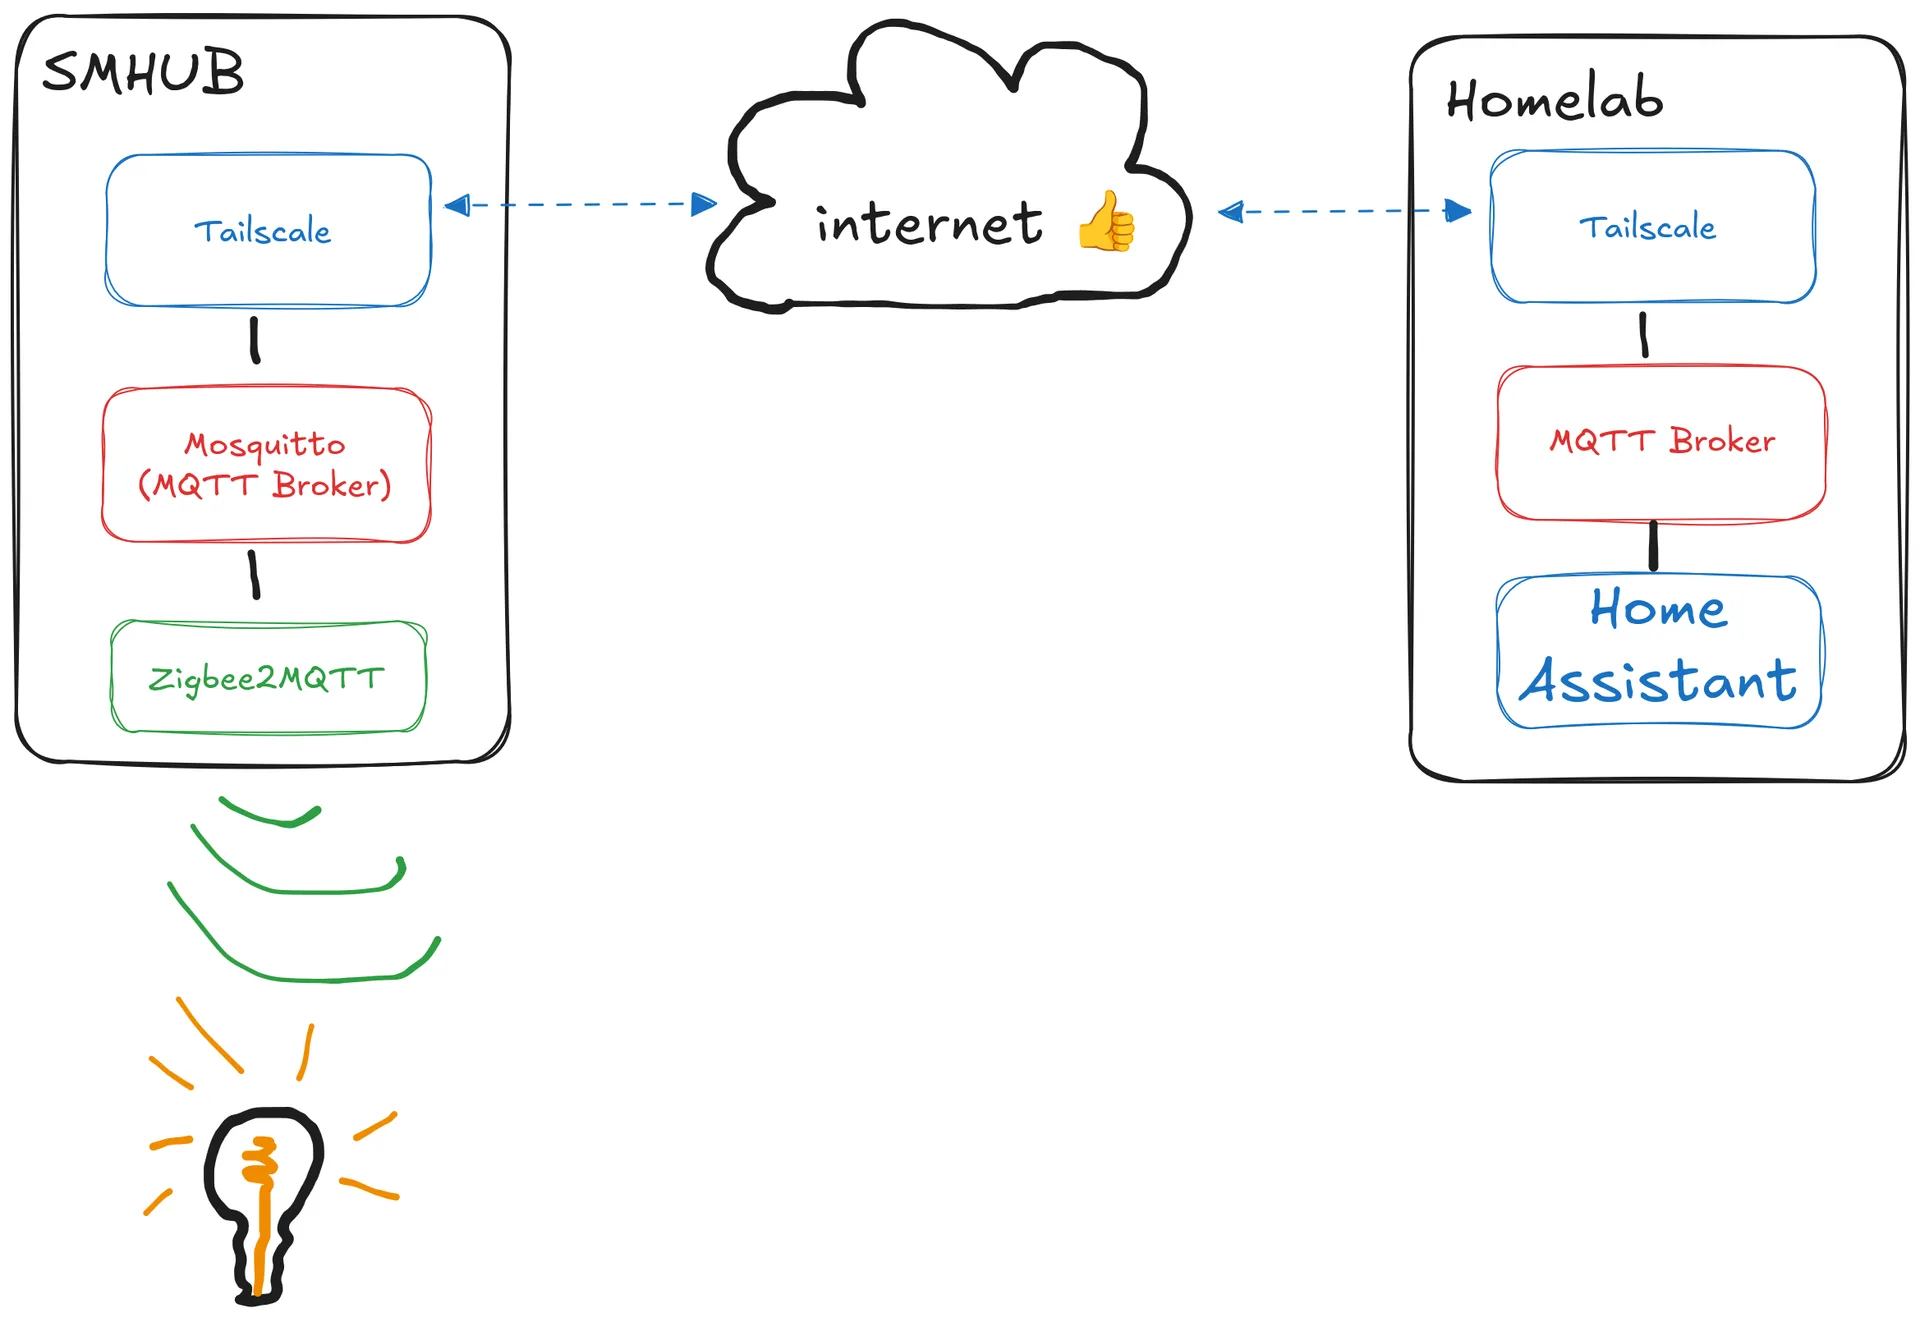
My desired end result is a device that I can simply plug into any ethernet port and which will automatically connect back to my homelab where Home Assistant runs.
I already run an MQTT broker and Tailscale on my homelab, so we will be installing Tailscale on the SMHUB to add the device directly to my Tailnet, which allows it to directly communicate with my Home Assistant host. Then, we configure the MQTT broker on the SMHUB to bridge to my main 'upstream' MQTT broker. This will re-emit any messages posted on one of the two brokers on the other broker, and essentially provides a transparent bridge for MQTT messages between the two devices. Finally, we configure Zigbee2MQTT on SMHUB to connect to our local broker. Home Assistant will then be able to see all devices controlled by Zigbee2MQTT and be able to control them.
We can split this plan up into the following parts:
- Setting up SMHUB for first use
- Configuring our Home Assistant host
- Installing and configuring Tailscale on SMHUB
- Configuring Mosquitto and Zigbee2MQTT
- Adding devices to see if it works!
The Execution
Getting started
Setting up the SMHUB was quite simple. Simply plug it into power, attach an ethernet cable and you're done! The device exposes a web UI which you can reach via smhub.local. If that doesn't work, check your router for the IP address that was assigned to the device, and use that to connect to it instead.
If all went well, you should be greeted with a dashboard that looks something like this:
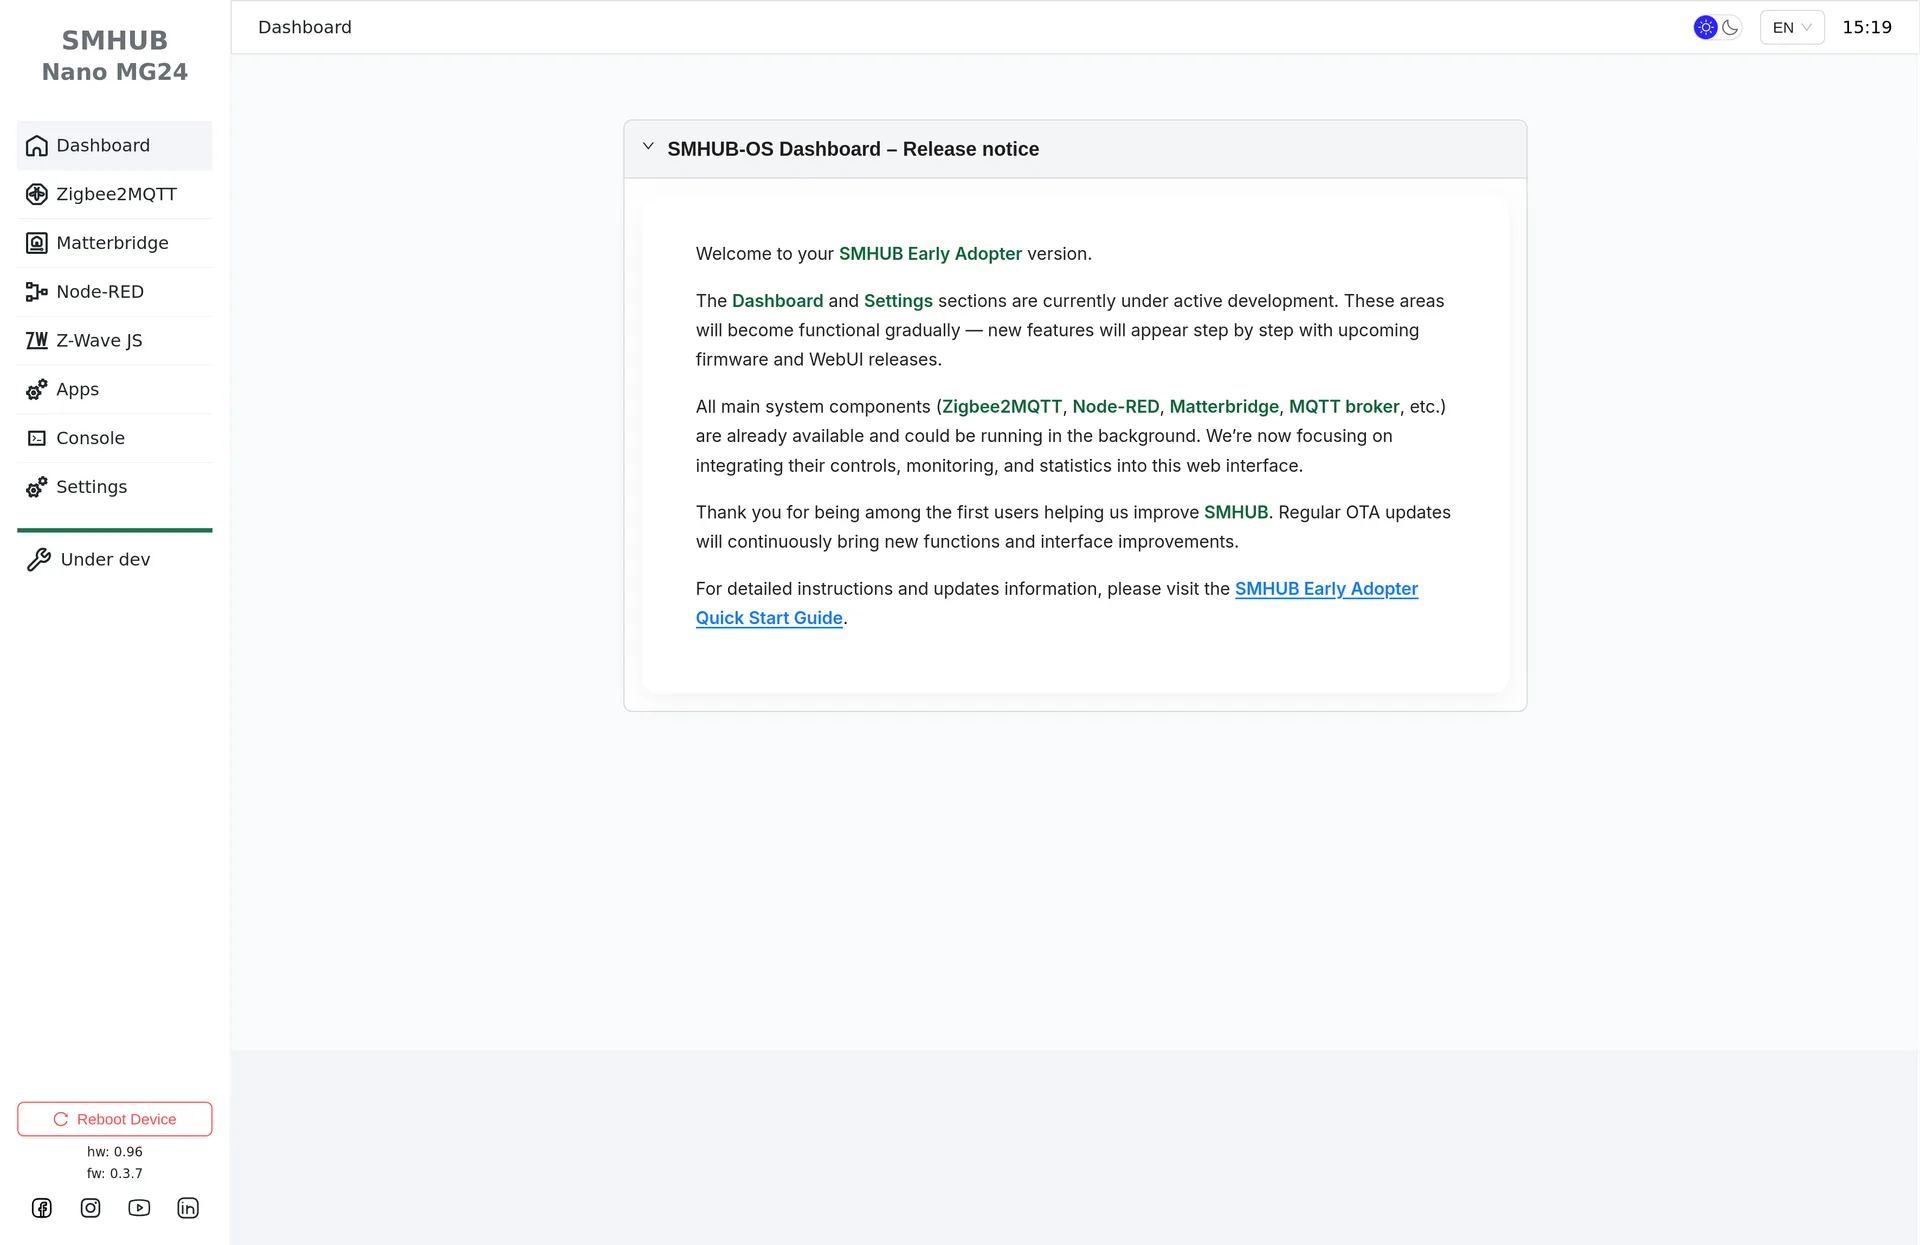
Before configuring any settings, I would highly recommend to first update the system, apps and firmware on your device. I was running into quite a few (minor) hurdles along the way, but SMLIGHT has assured me (and I was able to verify) that the latest software versions have fixed those issues.
We need to upgrade 3 different system components using the following methods:
-
Firmware: to upgrade the device's firmware, navigate to Settings → Updates and Restore and make sure that the latest OTA update is installed. If not, click the update button and restart the device.
-
Apps: apps such as Zigbee2MQTT, the web interface and the backend code are updated independently from the OS. These can be updated by navigating to Apps and selecting Refresh button, before clicking on the Upgrade All button. Alternatively, you can open a terminal session from the Console menu and enter the following command:
sudo opkg update && sudo opkg upgrade. I prefer the latter method because you get a better sense of the upgrade progress (which can take some time), but either should work. -
Adapter Firmware: my device came with an adapter firmware version that had issues with Zigbee2MQTT under heavy network load. Even if it works fine for you, it's a good idea to update to the latest version. Navigate to Settings → Radios, select a radio mode (you likely want Zigbee Coordinator), then select the newest firmware and click Update.
Configuring Home Assistant
There are many ways to install and use Home Assistant, and configuration will depend on how you have your smart home set up. I don't personally use Home Assistant OS, but I know many people do. If you are one of them, here's some pointers to guide you in the right direction:
- Mosquitto: https://github.com/home-assistant/addons/blob/master/mosquitto/DOCS.md
- Tailscale: https://github.com/hassio-addons/addon-tailscale/blob/main/tailscale/DOCS.md
You may also have to install the MQTT integration into Home Assistant (if it doesn't do that automatically).
What matters is that you have an MQTT broker running with Home Assistant connected to it, and that the broker is reachable through Tailscale.
Running Tailscale on SMHUB
Tip! At the time of writing, SMHUB does not officially support Tailscale (yet). We will therefore be installing it manually for now. SMLIGHT has indicated that they intend on providing Tailscale support soon, so this manual installation method might not be necessary for you. You can use the command
sudo opkg listto see whether Tailscale was added to the repository. If it is, usesudo opkg install <package name>to install it.
Currently, Tailscale is not (yet) officially supported on the SMHUB. However, the binaries published by Tailscale appear to work quite well and can be installed relatively easily. Run the following commands from the Console tab to download, extract and install Tailscale 1.92.1 to /opt/bin/:
wget https://pkgs.tailscale.com/stable/tailscale_1.92.1_riscv64.tgz
tar -xvf tailscale_1.92.1_riscv64.tgz
sudo mv tailscale_1.92.1_riscv64/tailscale tailscale_1.92.1_riscv64/tailscaled /opt/bin/
rm -rf tailscale_1.92.1_riscv64*
This works, but requires us to manually start the Tailscale daemon every time. Let's create an init.d script to automatically run it at boot:
sudo nano /etc/init.d/S98tailscale
And paste the following contents:
#!/bin/sh

DAEMON="tailscaled"
PIDFILE="/var/run/$DAEMON.pid"
LOGFILE="/var/log/$DAEMON.log"

export PATH=/opt/bin:$PATH

cleanup_and_exit() {
    local exit_code=$1
    rm -f "$PIDFILE"
    return "$exit_code"
}

start() {
    printf "Starting tailscale: "

    mkdir -p /run/tailscale /var/lib/tailscale

    start-stop-daemon --start --background --make-pidfile \
        --pidfile "$PIDFILE" \
        -o -O "$LOGFILE" \
        --exec /opt/bin/tailscaled -- \
            --state=/var/lib/tailscale/tailscaled.state \
            --socket=/run/tailscale/tailscaled.sock

    status=$?
    [ "$status" -eq 0 ] && echo "OK" || echo "FAIL"
    return "$status"
}

stop() {
    printf "Stopping tailscale: "

    start-stop-daemon --stop --pidfile "$PIDFILE" --exec /opt/bin/tailscaled
    status=$?

    if [ "$status" -eq 0 ]; then
        echo "OK"
    else
        echo "FAIL"
    fi

    # Wait until fully stopped
    while start-stop-daemon --stop --test --quiet \
        --pidfile "$PIDFILE" --exec /opt/bin/tailscaled; do
        sleep 0.1
    done

    # Required post-stop cleanup
    /opt/bin/tailscaled --cleanup >/dev/null 2>&1

    cleanup_and_exit "$status"
}

restart() {
    stop
    start
}

case "$1" in
    start|stop|restart)
        "$1"
        ;;
    reload)
        restart
        ;;
    *)
        echo "Usage: $0 {start|stop|restart}"
        exit 1
esac
Exit nano using Ctrl+X.
Let's start the daemon and sign in! Run the following command and follow the instructions:
sudo chmod 755 /etc/init.d/S98tailscale
sudo /etc/init.d/S98tailscale start
sudo /opt/bin/tailscale up
If all went well, your SMHUB should now be added to your Tailnet! I recommend rebooting once to make sure Tailscale is in fact started automatically.
Configuring Mosquitto & Zigbee2MQTT
Warning: we will not be configuring a username/password for our MQTT broker. If you intend on deploying SMHUB in an untrusted environment, make sure to set one up. In this case, do not forget to set a password for the web UI (in Settings → Authorization) and properly secure the built-in SSH server. Configuring all this is out of scope for this tutorial.
Both Mosquitto and Zigbee2MQTT can be configured from the web UI alone. We will first configure Mosquitto. Navigate to Apps → MQTT and modify the settings as follows:
- Allow Anonymous: only enable if you don't have a username / password configured
- Enable bridge mode: enabled
- Remote connection:
- Remote Address: address to the MQTT broker that's connected to Home Assistant. Since we're using Tailscale, we can use device names here. Example:
hass:1883to connect to devicehasson port1883(default MQTT port). If you don't know the name of your device, check your Tailscale dashboard. - Remote User / Password: credentials for your existing MQTT broker (if required). If you're using the Home Assistant add-on, this will likely be the credentials to your Home Assistant account.
- Bridge Topic: enter
# both 0to bridge messages in both directions. If your internet is very unreliable you could set the last digit to1or2, but in practice I found this to be unnecessary. The digits correspond to MQTT QoS levels.
By this point, the page should look similar to this:
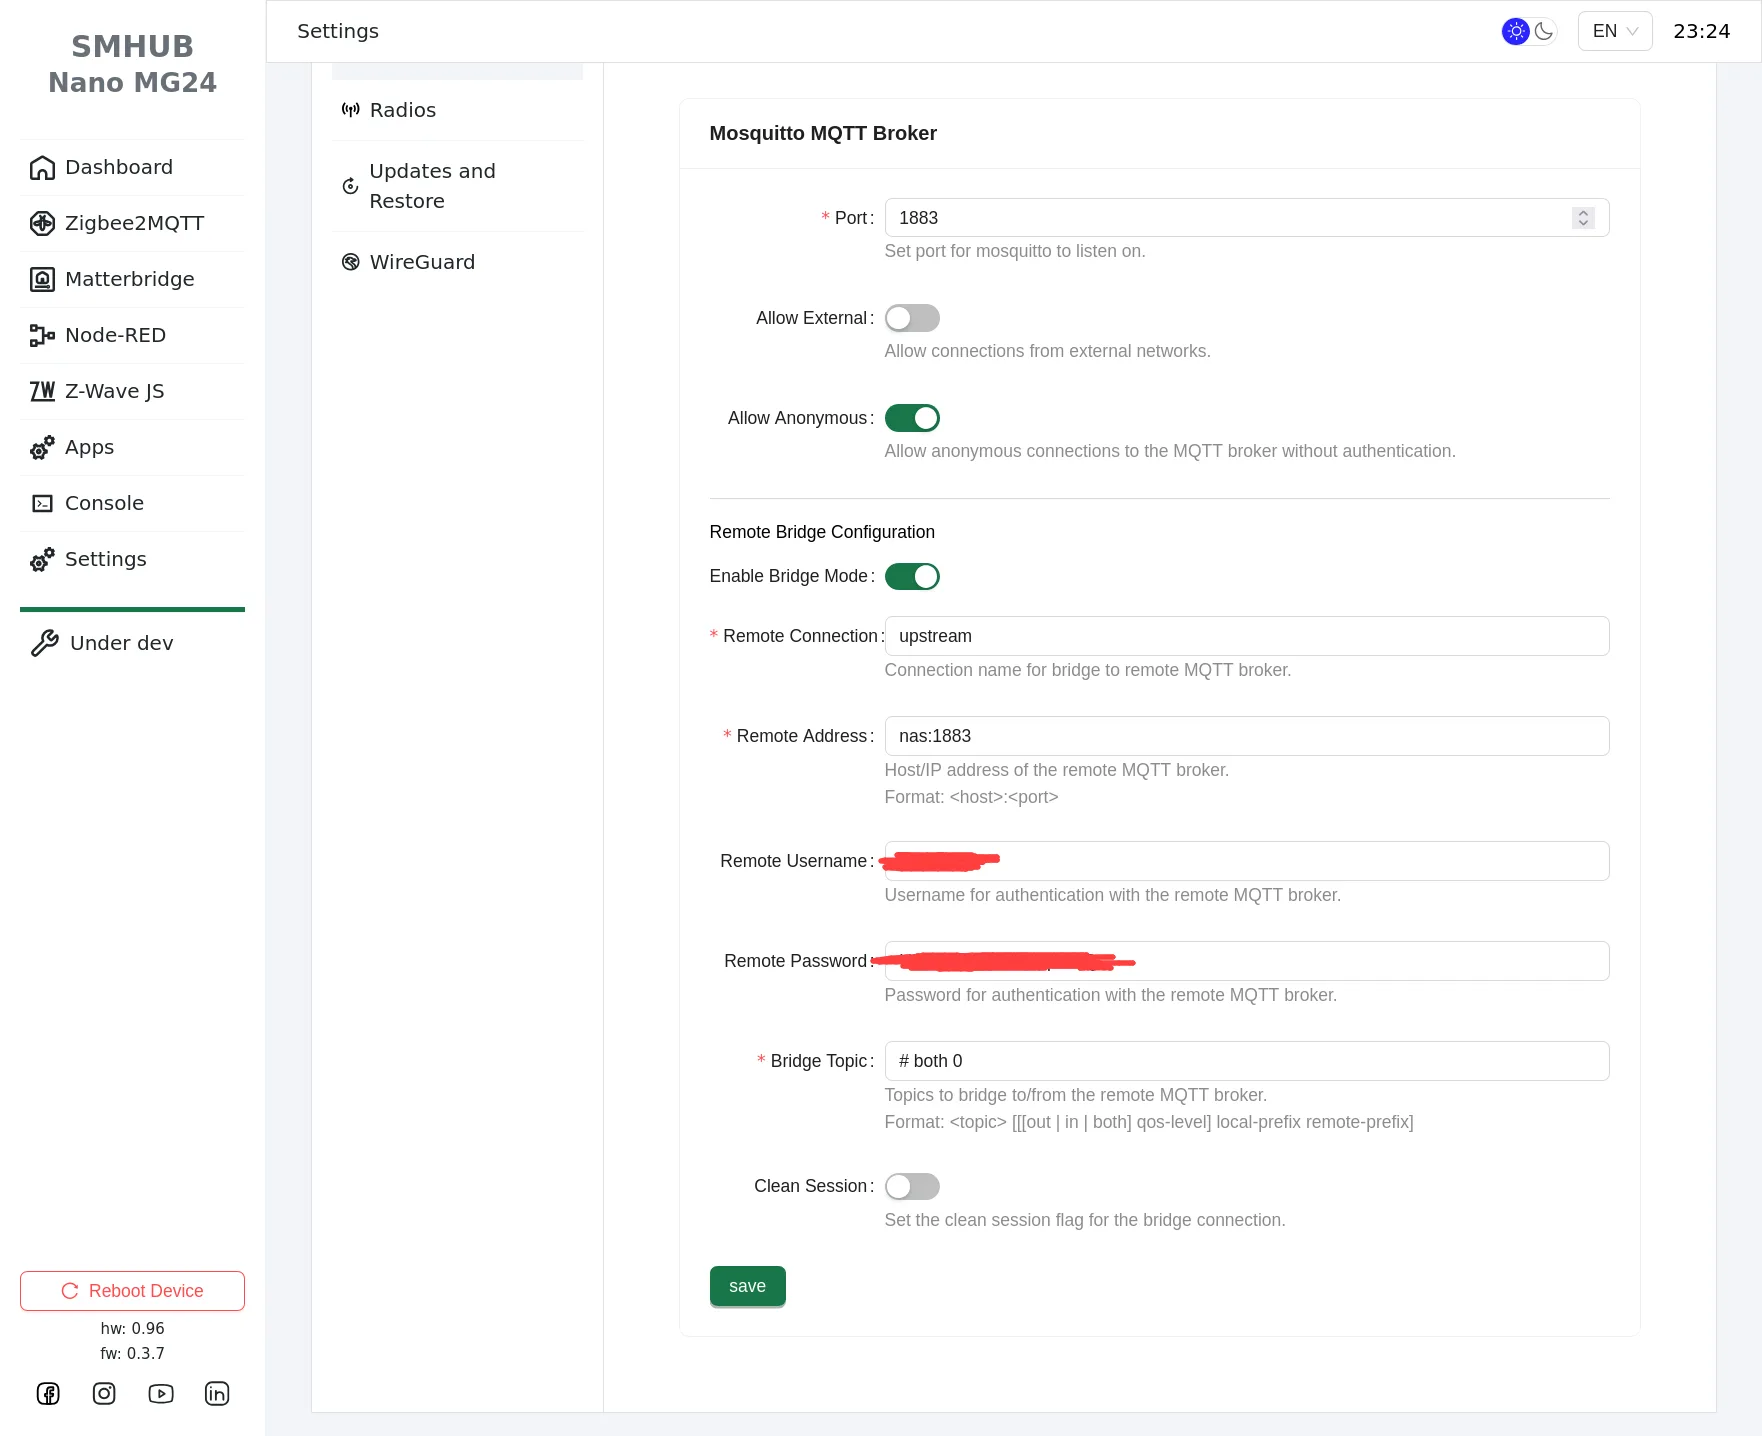
Make sure to save your settings. The MQTT server should be reloaded automatically.
To configure Zigbee2MQTT, navigate to Apps → zigbee2mqtt and set the options as follows:
- Start at Boot: enabled
- Serial Port:
/dev/ttyS1 - Baud Rate:
115200 - Adapter:
Ember - Zigbee Channel: leave default unless you're having interference issues. Read this page for more info.
- MQTT Broker URL: leave default (
mqtt://localhost:1883) - MQTT User / Password: leave empty
- Home Assistant: enabled
Your configuration page should look something like this:
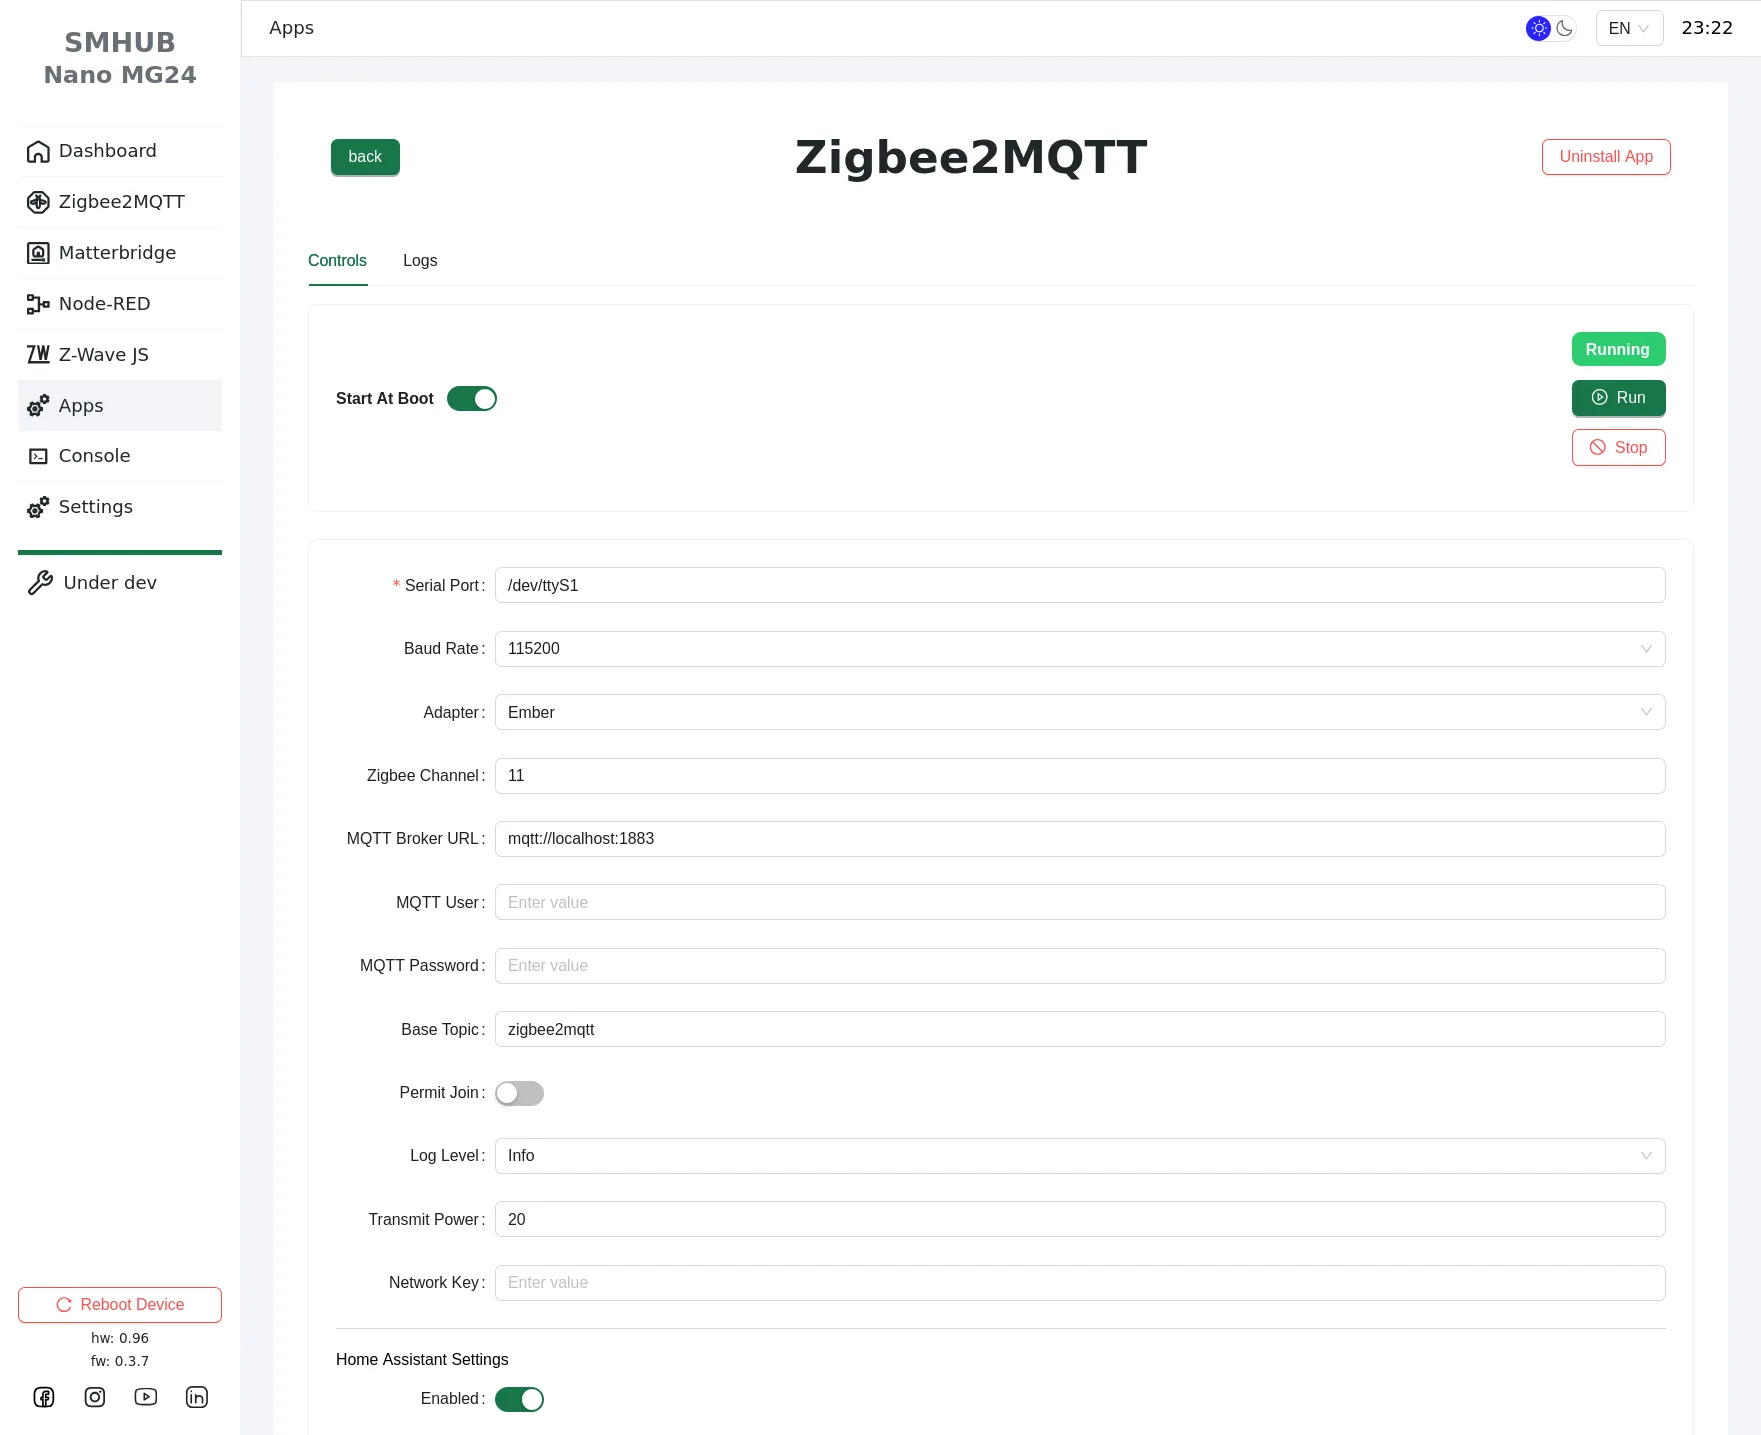
Finally, click the Stop and then Run button at the top of the page to restart Zigbee2MQTT. This can take a minute.
Adding Devices
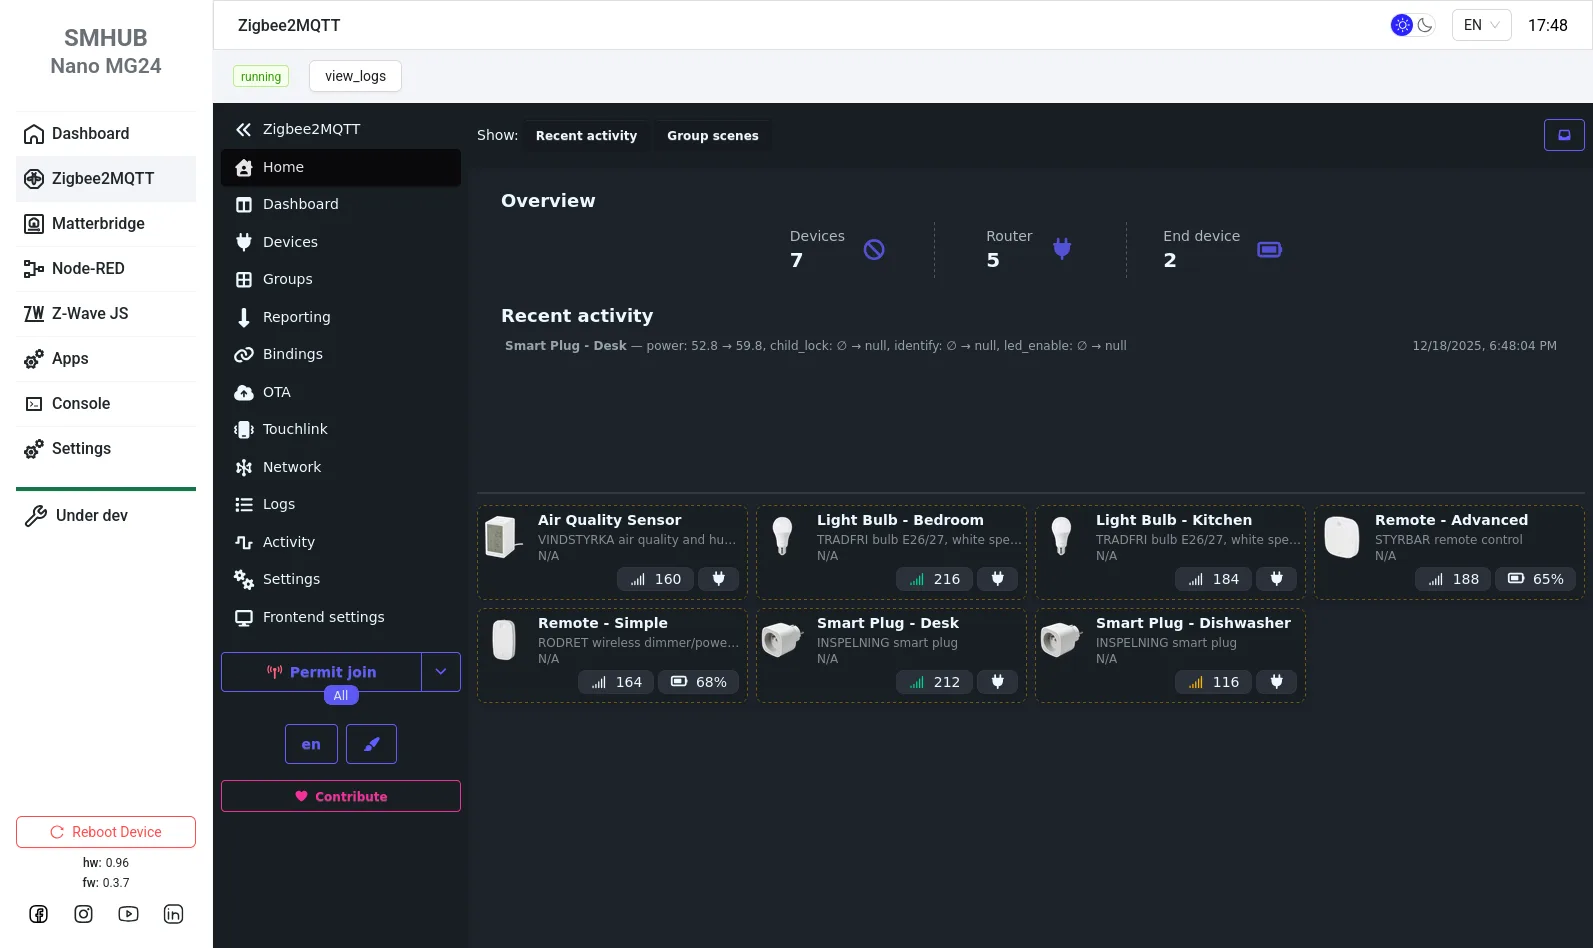
If all went well, Zigbee2MQTT on your SMHUB should now be attached to your Home Assistant instance! Navigate to Zigbee2MQTT in the web UI to see your shiny new instance. If something doesn't work, click on the View Logs button to see what went wrong.
To add devices to your network, click Permit Join and follow your device's specific instructions. The Z2M database is a great resource to find instructions for your device. After adding a new device, you probably want to modify its name.
And that's it! By now you should have a fully functional, fully portable Zigbee coordinator that can be deployed anywhere in the world. Simply connect it to the internet and it will automatically connect back to your home server.
Results
I've been running the above configuration for several days now with ~7 Zigbee devices, and it's been rock solid so far. It may not be the biggest network you've ever seen, but with how smooth it all works now, I do have a lot of confidence for stability in the future.
One thing that really stood out to me was how low the latency is. Toggling devices on and off while I'm at my place feels practically instant. This despite the fact that the command makes an entire round trip: from here to the Home Assistant server at my parent's place, then back across two MQTT brokers and Zigbee2MQTT. My previous setup with a Raspberry Pi was practically the same, and even though the Pi is a lot more powerful than the SMHUB, the lack of compute power does not appear to significantly impact network performance in any way.
I'll continue to monitor the stability of this setup and will update this blog post if the above ever changes.
Conclusion
By now I've been able to spend quite some time with this device and have been able to pinpoint quite well what I like about it and what could (in my opinion) use some improvement. I'll explain in more detail below.
The Good
- Very nice / responsive web UI
- Surprisingly stable
- Flexible power and mounting options
- Easy to set up
- Full device access
Something that happens very often in tech is companies providing a product for only one of two types of typical users. On one hand you have people who want a good out-of-the-box experience, while on the other hand you have power users who don't mind getting their hands dirty. Sometimes you see people from the latter group 'hack' devices meant for the former group, but this often takes a lot of effort due to artificial restrictions put up by the manufacturer.
SMHUB seems to break with this tradition - I could recommend the SMHUB Nano to both types of users. The out-of-the box experience is great: setup is easy, pretty much everything you need is configurable through the web UI and overall it just works really well. But at the same time, the device was also designed with power users in mind. You get full root access to the device if you so wish, and don't even have to touch the web UI if you don't want to. And since the web UI populates most of its config values from the actual state of the device, changes that are made through the console are reflected in the web UI and vice versa. They really struck a remarkably good balance between ease of use and flexibility, and I appreciate that a lot.
The Ehhhhhh
- Performance is barely enough
- Not technically open source
- Some features are currently missing
That said, there are also a few minor downsides. While the compute resources of the device are good enough to run built-in apps, SMLIGHT is really pushing it a lot. Updating apps can take a while, and it takes a few minutes for the device to fully boot. Downloading files over HTTPS is capped at ~20 Mbps due to the slow CPU. And you can see the CPU spike at 100% while signing in because… it's generating a JWT with HS256. Yeah, the algorithm that only needs to hash a string. That one. Despite this though, once your apps are up and running the device is surprisingly smooth. Just… don't expect too much of it in terms of performance.
Another disappointment-but-also-not-a-huge-deal: the SMHUB's firmware is not technically open source. SMLIGHT boasts about "Linux inside" while comparing it to "often closed" alternatives, and while this is true, it doesn't say anything about the firmware itself. That said, it is super easy to get root access to the device, and if you look around on the file system a bit, you will find their smhub_backend Python library which is completely unobfuscated. So although the device is technically not open source, it's transparent enough to easily modify, audit and verify that it isn't doing weird things, which is what is most important to me.
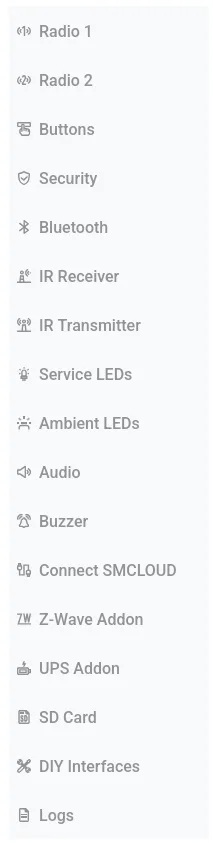
Finally, it's a little disappointing that some features are missing in the current firmware version. Tailscale is one of them, but there are also a bunch of other features that are currently 'Under Dev':
In a way, I like that SMLIGHT has already shared this device with us so that people can provide feedback. And even in its current state, almost all of the important features are supported already. But if you're intending on buying the device based on currently unsupported features that are already listed on the website, maybe wait a bit until it is clear when these will be supported.
The Bad
- Not emergency-flashable from Linux or MacOS
- Difficult to lock down externally
While the points I made before are relatively minor, there are also a few things that I genuinely dislike. One of them concerns the 'emergency' flashing process: if your device is bricked for any reason and is unable to boot up, SMLIGHT provides two ways to reset your device. One of them involves inserting an SD card, which I have no clue how to do, since as far as I can tell there is no SD card port on this thing. It's probably only supported on the full-size SMHUB version. The other method is to connect the device to your computer and run a flashing script, however this script is currently only supported on Windows. Linux and MacOS users are therefore out of luck, which is a real shame.
Secondly, I really would not recommend deploying this device in an untrusted network. By default, the MQTT server is reachable externally. Zigbee2MQTT, the backend API server and probably other apps as well are all listening on a dedicated, external port. The SSH server has root login enabled by default, so you should change the default password for both the smlight and root user (or preferably, disable password auth altogether). No firewall is installed (including iptables) so you couldn't configure it even if you wanted to.
All of the above issues are easily fixable; it's just Linux after all. Maybe SMLIGHT will address it in the future. They're also not that big of a deal if your device is running in a trusted network. But if you're deploying it professionally, definitely put it on a separate LAN segment away from other devices (which you should be doing anyway).
Final Words
So, am I happy with the final result? Yes! Very much so, in fact. It's a pretty good successor to my previous setup. I generally enjoy running software with different purposes on separate hardware, and this aligns quite well with that methodology. It's really nice to have a simple device that manages my Zigbee network and simply exposes an MQTT broker, while simultaneously tying in with my Tailscale network.
Would I recommend it to others? Depending on your use case: yes, absolutely. As I mentioned before, this device targets a pretty wide range of people. To me, the advantages of this device are much greater than the downsides, and I suspect this to be the case for most people.
Of course, if plugging a dongle into your already existing Home Assistant host is all you need, this device is probably not for you. But if you need coverage in a different location, or even on the other side of your house, this device will work great. For ~€45 you get everything you need in a single device that's also very easy to set up. That's a pretty good deal if you ask me.