🧰 Manual for Testers: Z-Wave Integration Installation (Home Assistant)
1. Open Integrations Menu
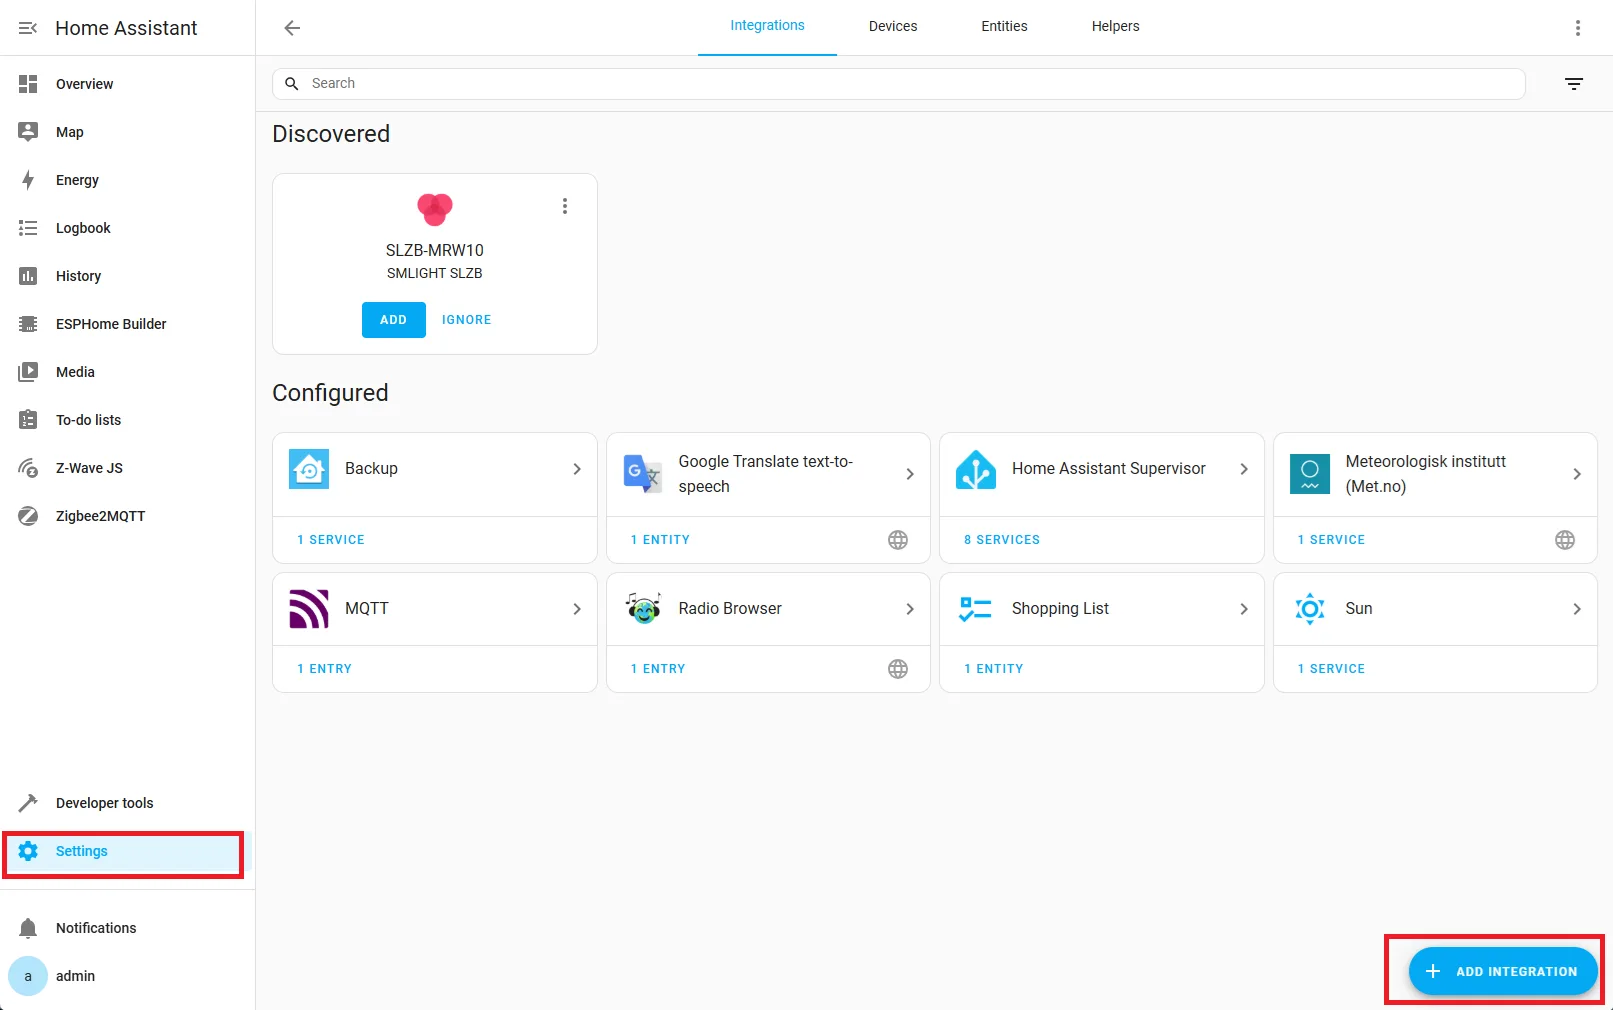
Go to Settings → Devices & Services, then click Add Integration at the bottom right.
2. Search for Z-Wave Integration
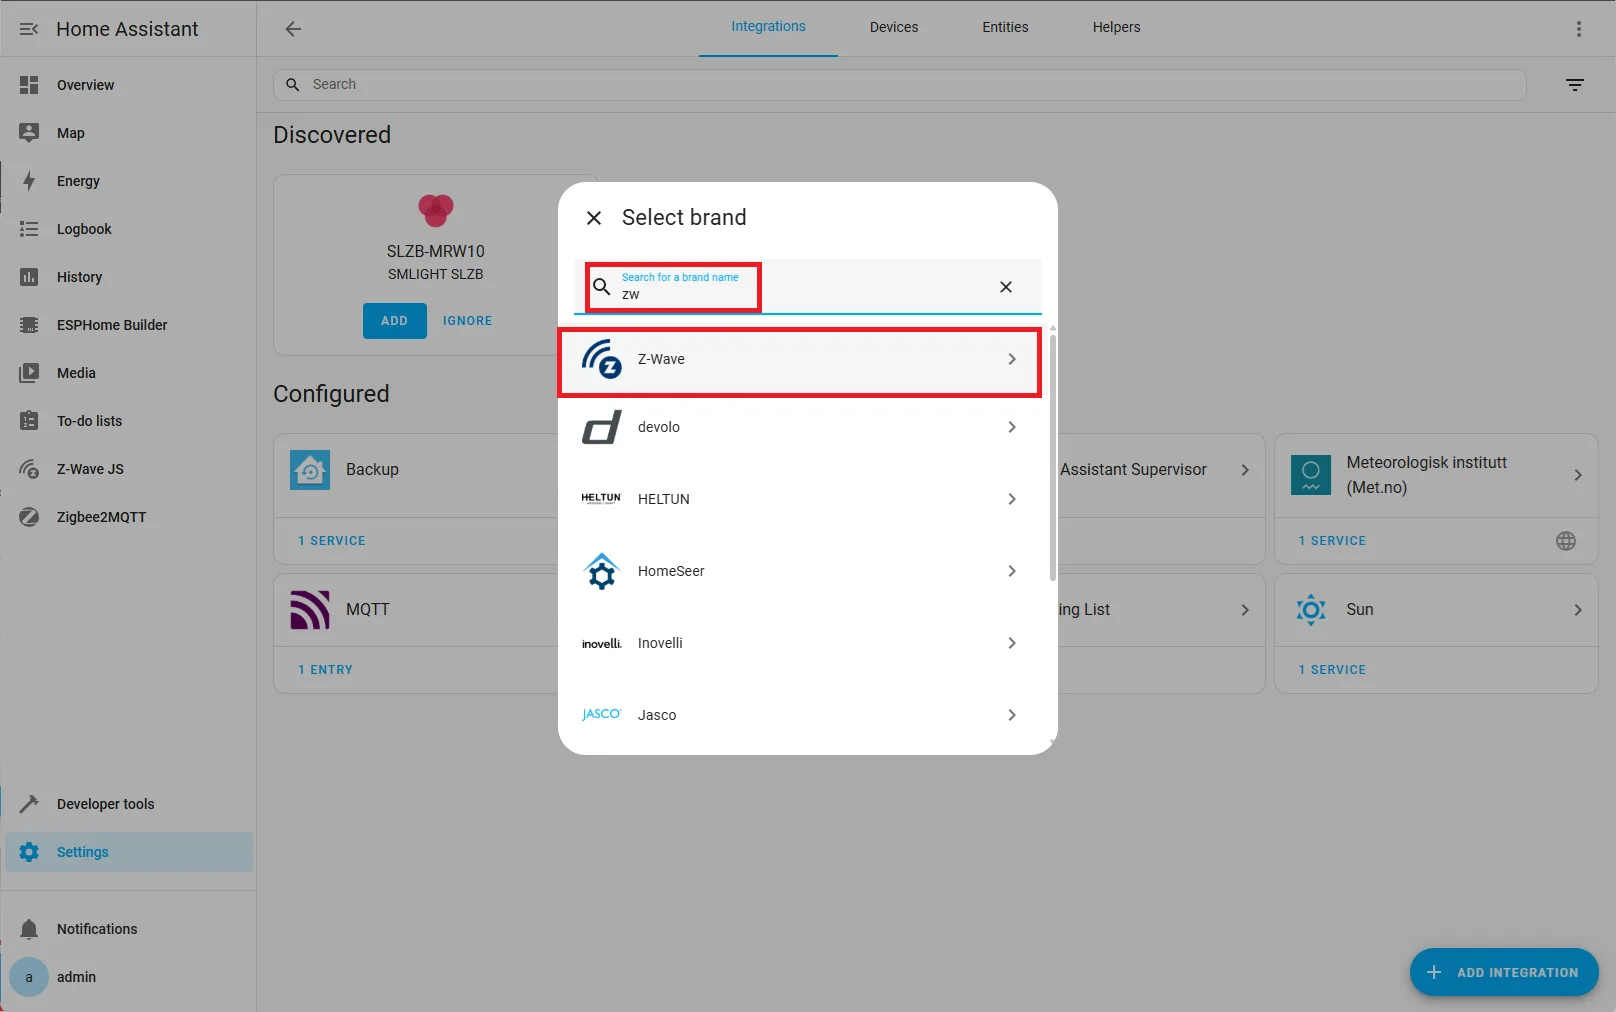
Type Z-Wave into the search bar and click on the integration when it appears.
3. Select Custom Installation
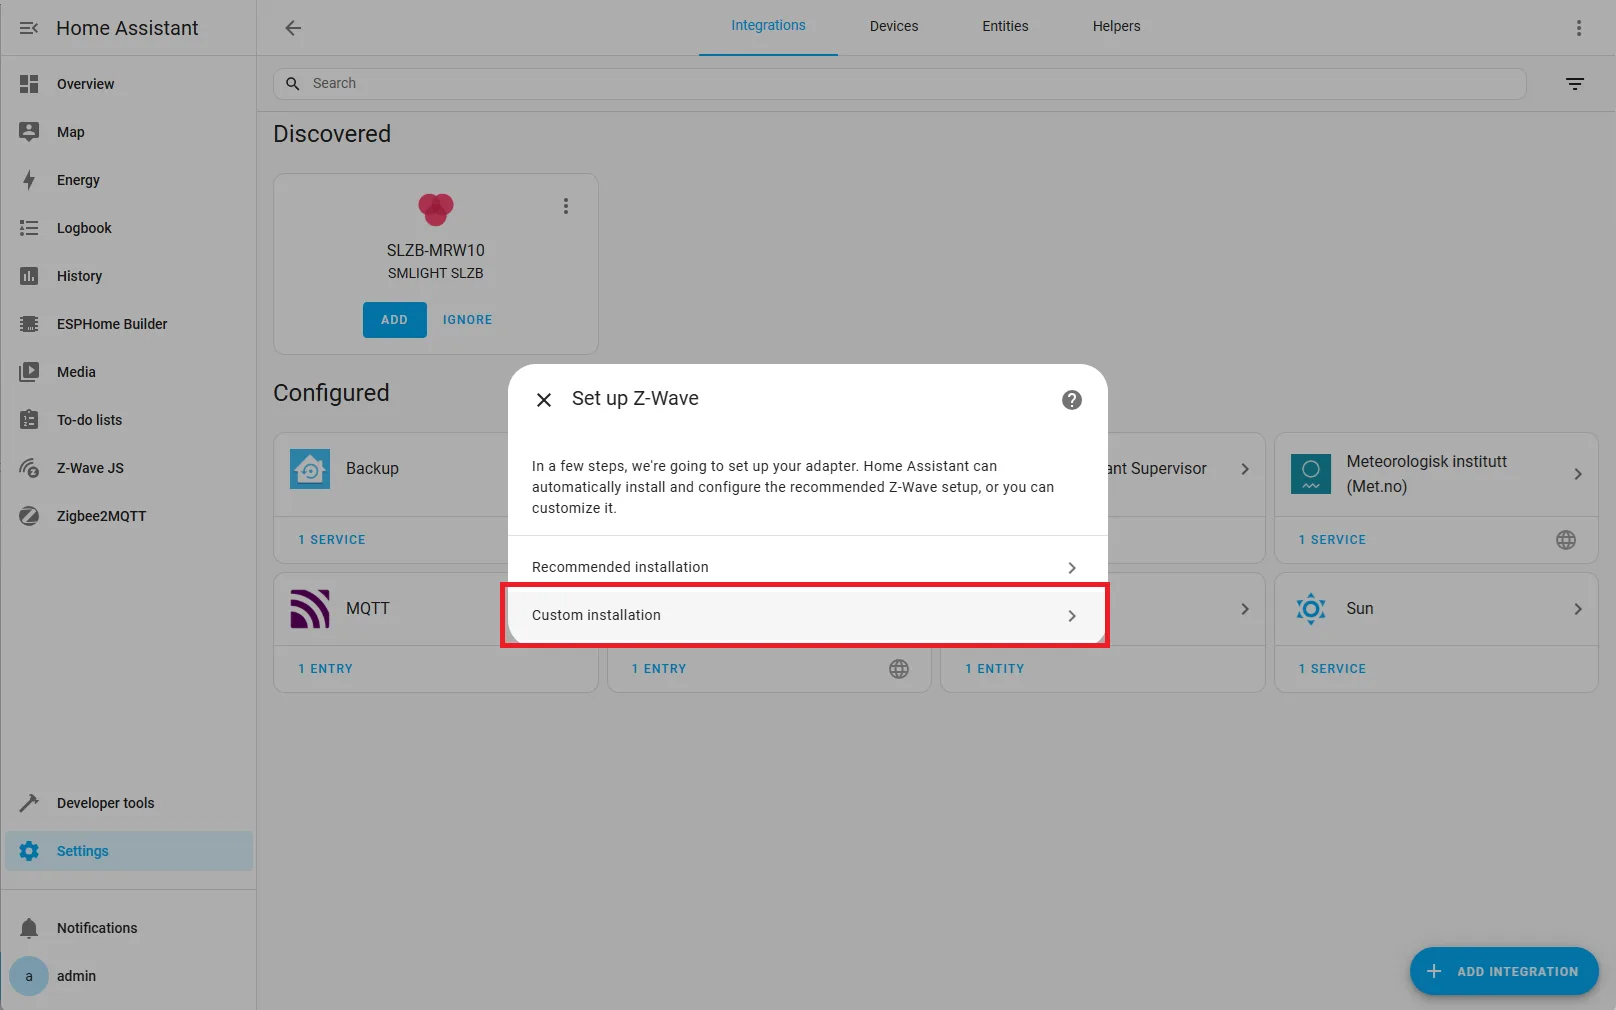
Choose the Custom Installation option.
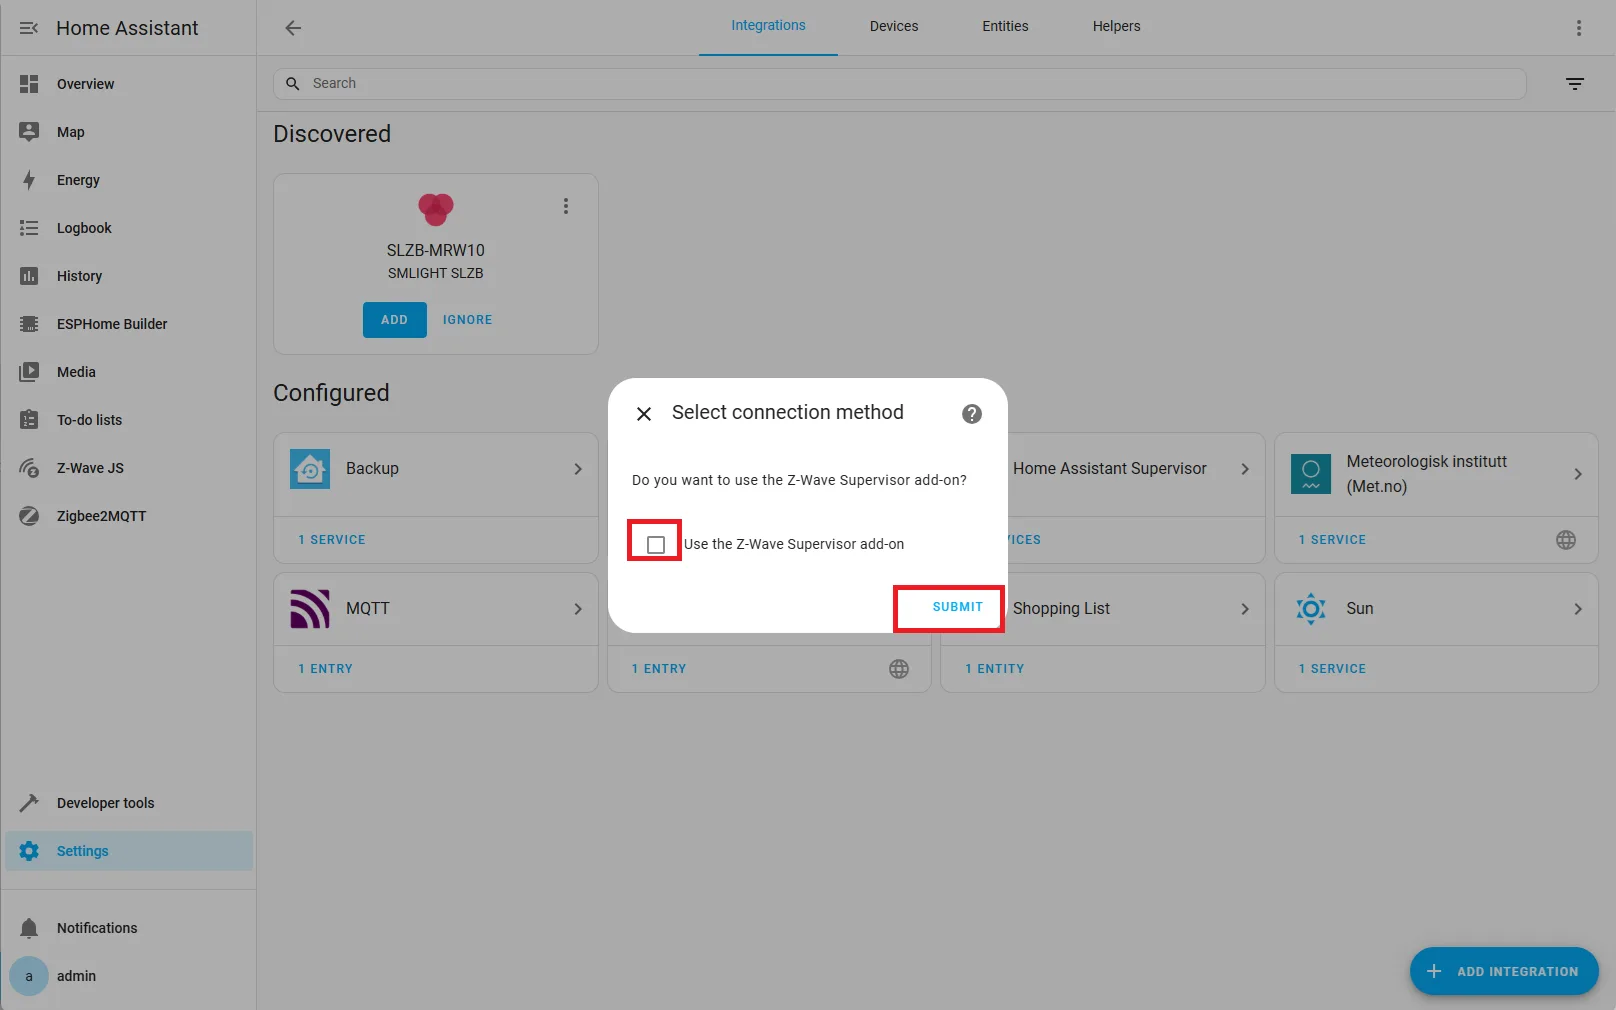
4. Disable Supervisor Add-on
Uncheck Use the Z-Wave Supervisor Add-on and click Submit.
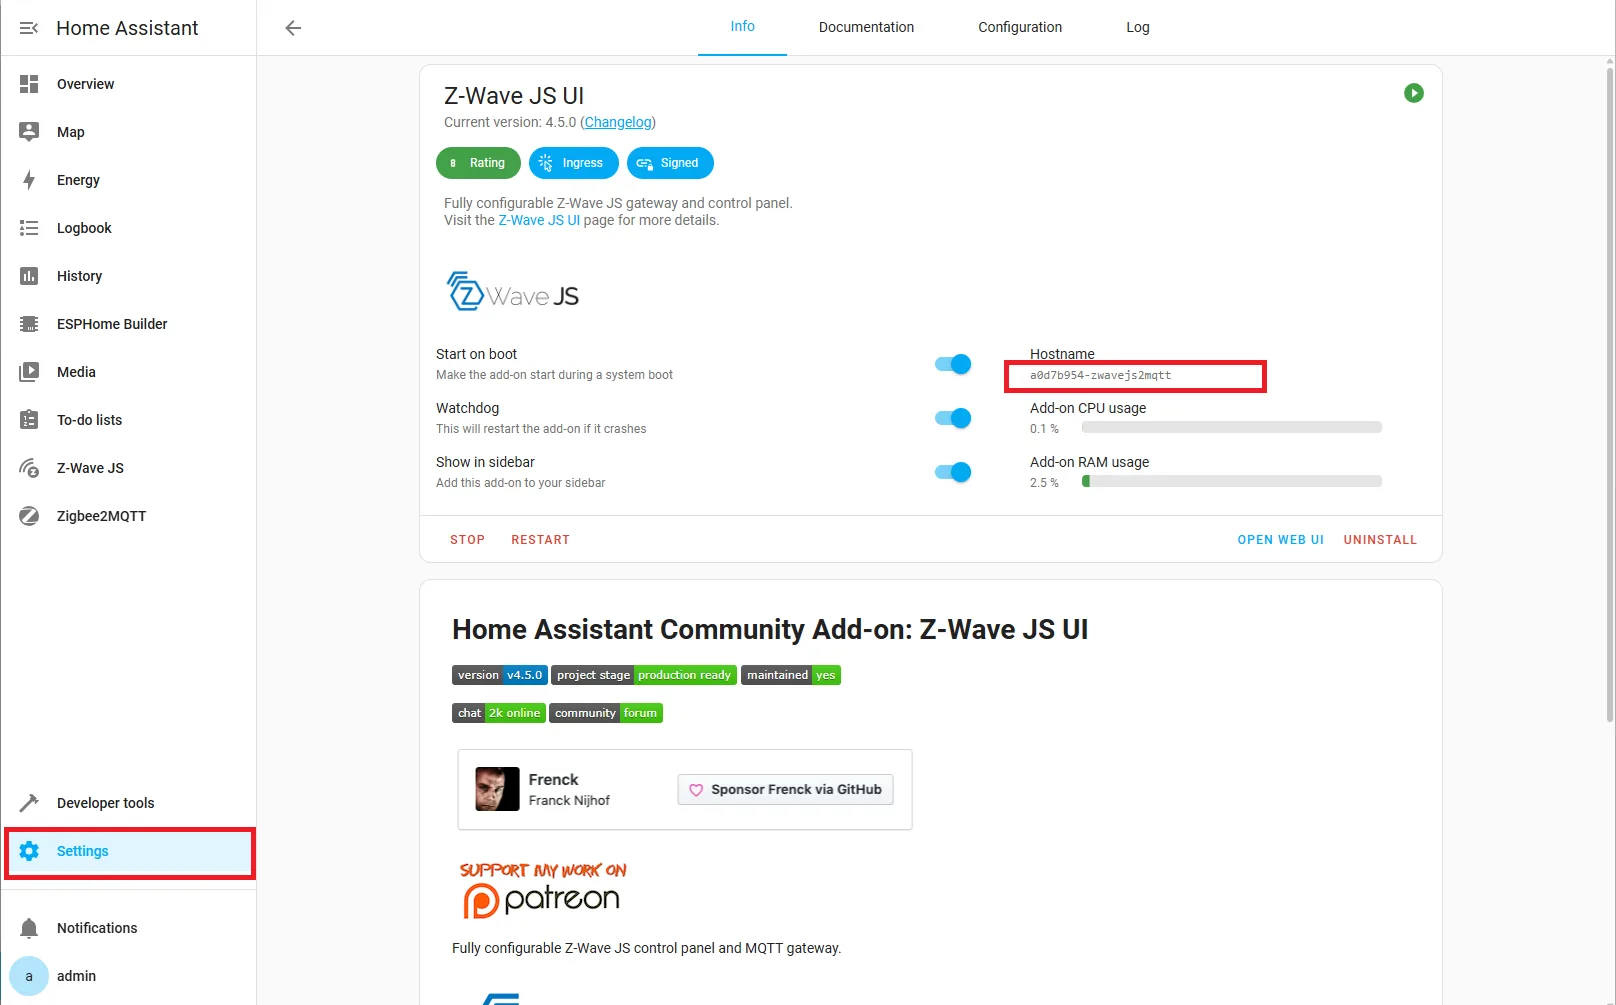
5. Get the Add-on Hostname
In a new window, go to Settings → Add-ons → Z-Wave JS UI, and copy the hostname of the add-on.
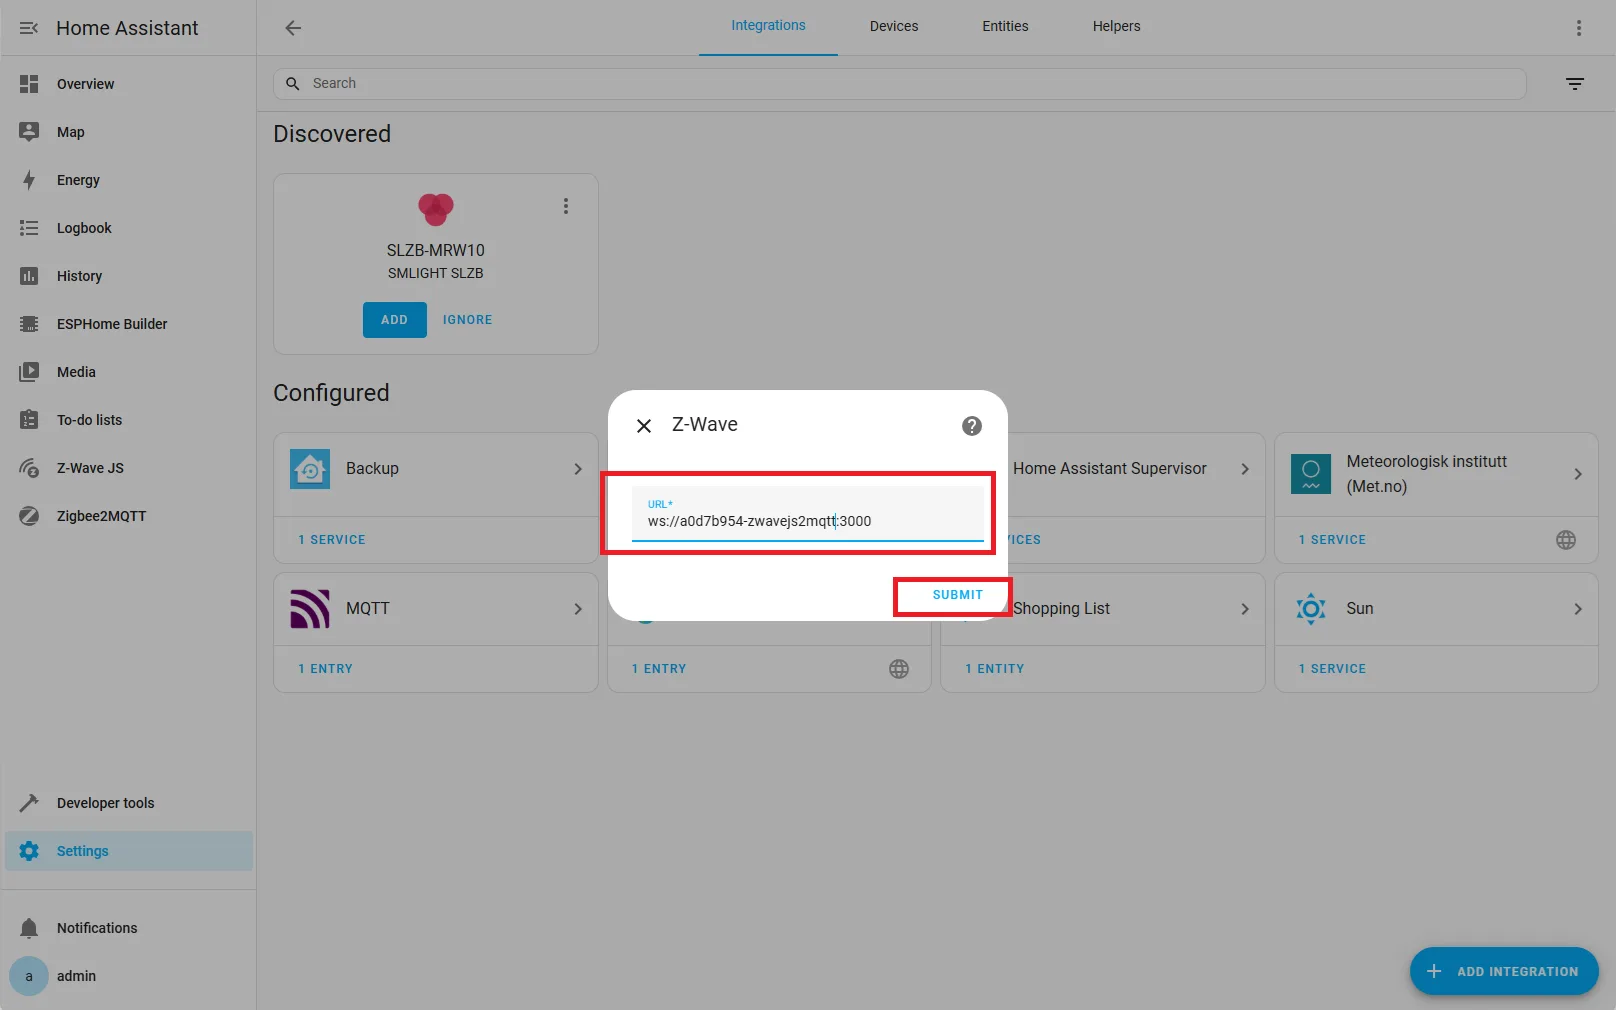
6. Enter WebSocket URL
Return to the Z-Wave integration setup screen and enter the WebSocket URL in the format:
ws://HOSTNAME:3000Replace HOSTNAME with the copied hostname.
7. Finalize Integration
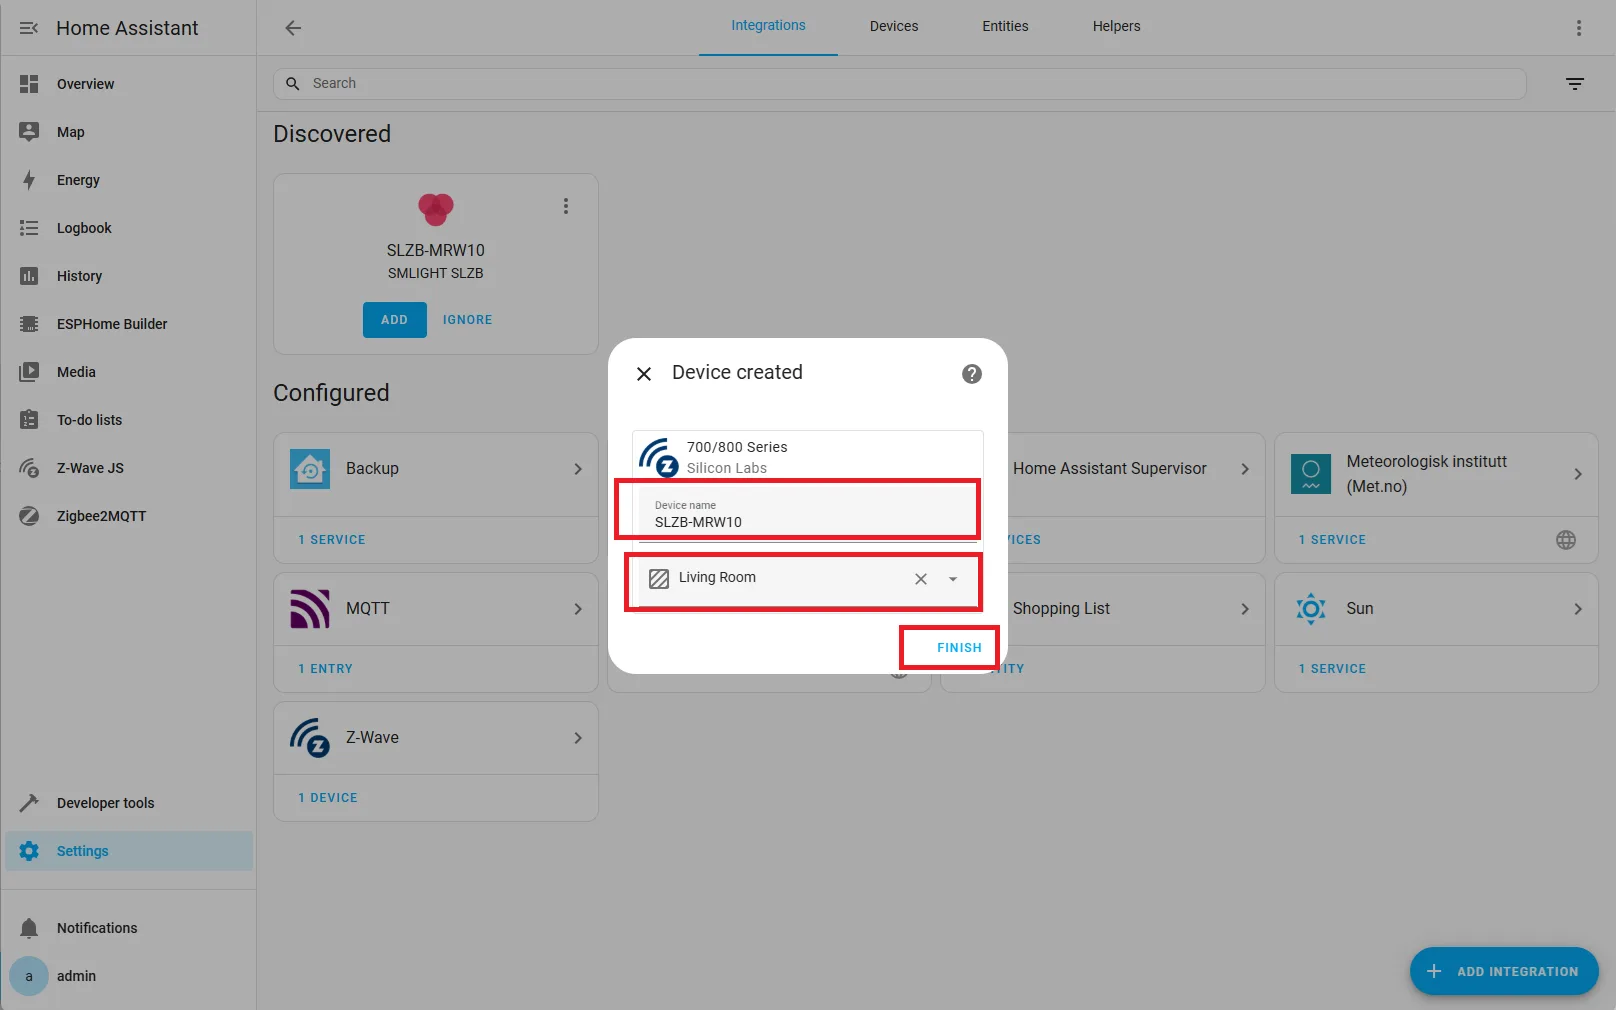
Optionally set a device name (e.g., SLZB-MRW10) and select a location. Click Finish.